Build a Web App for your Machine Learning model
Your Machine Learning model is ready. What should you do next? You can save the model and use it in Python. You can create an API. You can add the model to an existing application. There are many ways to make predictions with a Machine Learning model.
In this tutorial, I will show you a beginner-friendly option: we will build a Web App for a Machine Learning model.
The best part? You don't need to write HTML, CSS, or JavaScript. Only Python.
We will train a Machine Learning model with MLJAR AutoML, automatically generate a Web App with app(), and then publish the app online with MLJAR Platform. The generated application is created with Mercury, a framework for building web apps from Python notebooks.
In the final result, we will have two web apps:
- An app for single prediction, where the user fills the form and gets one prediction.
- An app for batch prediction, where the user uploads a CSV file and gets predictions for many rows.
You can find the full code and results in my GitHub repository:
https://github.com/pplonski/web-app-from-machine-learning-model
What will we build?
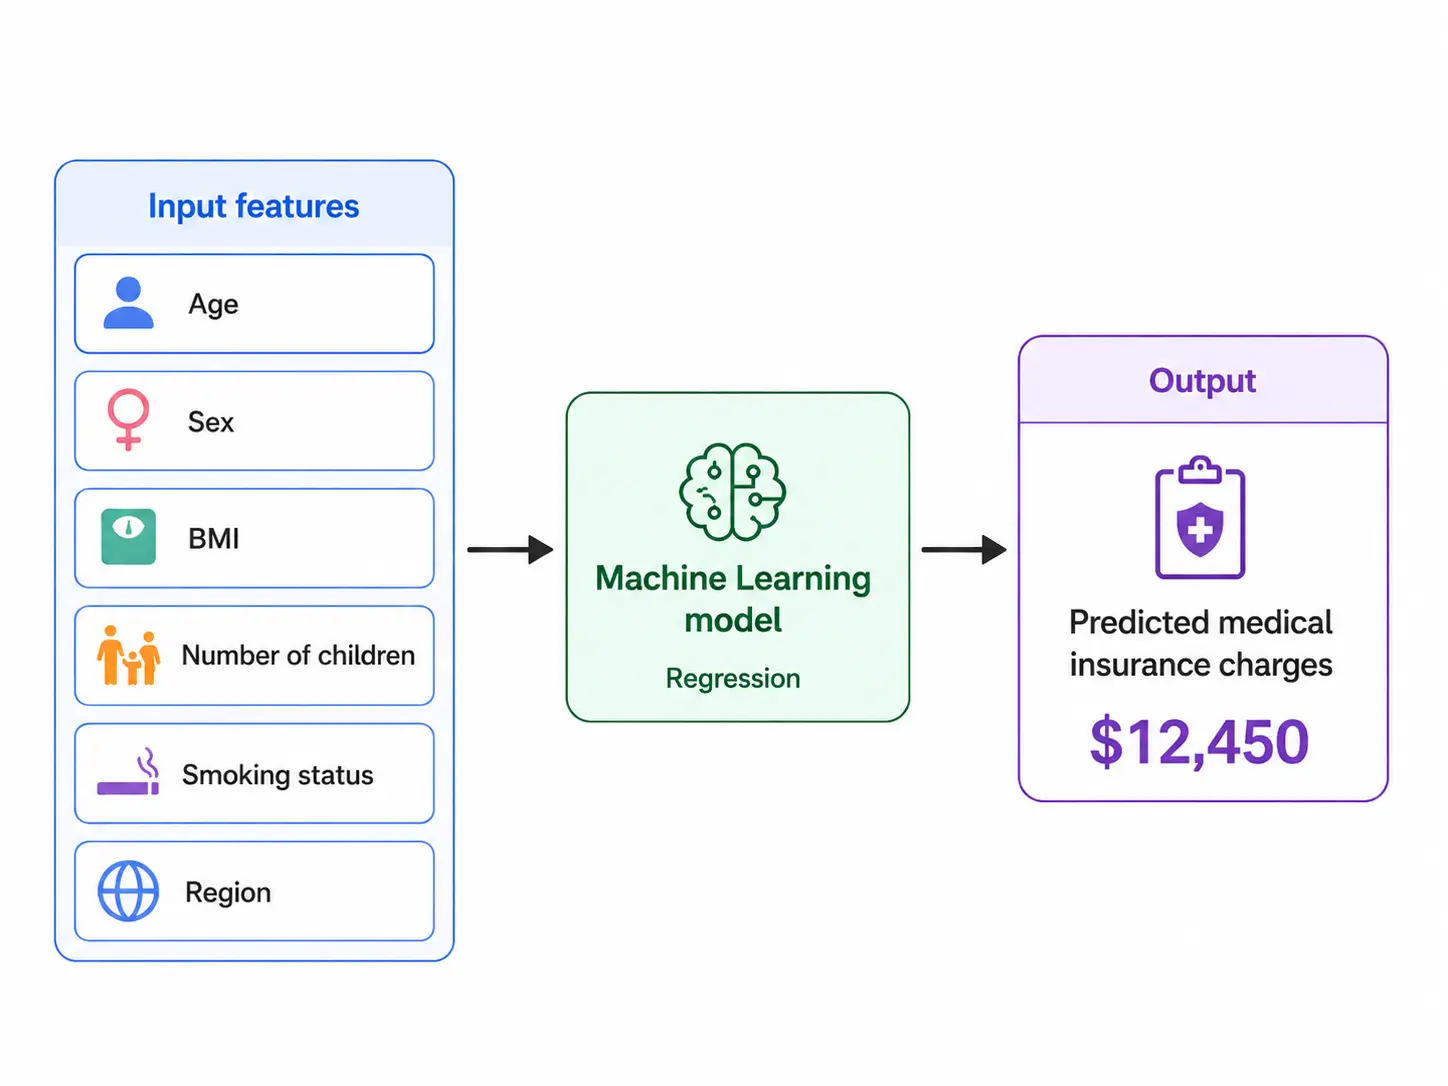
In this tutorial, we will build an application for predicting medical insurance charges. The model will use patient demographic and health related factors, such as:
- age,
- sex,
- BMI,
- number of children,
- smoking status,
- region.
The target value is charges, which means medical insurance charges. This is a regression problem because we predict a number.
We will use MLJAR AutoML to train the model. AutoML will automatically check different Machine Learning algorithms, compare their performance, and select the best model. After training, we will generate a Web App from the trained model.
This is useful because many people don't want to work directly with Python code. They prefer a simple web interface. For example, your boss, client, doctor, researcher, or business teammate can open a link, enter values, and get the prediction.
Why create a Web App for a Machine Learning model?
Training a Machine Learning model is only one part of the project. The second part is making the model useful. If your model is hidden in a Python script or notebook, only technical users can use it. It is hard to share it with people who don't know Python.
A Web App solves this problem. You can give users a nice interface where they can:
- enter input values,
- run prediction,
- upload CSV files,
- download results,
- use the model without touching code.
This is a very practical way to share Machine Learning models. In many projects, this can be enough to show a prototype, test an idea, or collect feedback from users.
Install packages
We need two Python packages:
pip install mljar-supervised mercury
The mljar-supervised package is used to train the Machine Learning model. The mercury package is used to run the generated Web App.
The requirements.txt file in the repository has only these two packages:
mljar-supervised
mercury
Project structure
The project repository contains the following files and directories:
web-app-from-machine-learning-model/
├── AutoML_App/
├── AutoML_Results/
├── data/
├── media/
├── requirements.txt
└── train_automl.py
The most important file is:
train_automl.py
It trains the model and generates the Web App. The data directory contains the training and test data. The AutoML_Results directory contains the results from MLJAR AutoML training. The AutoML_App directory contains the generated Web App.
You don't need to manually write the web application. MLJAR AutoML generates it for you.
Load data
Let's start with loading the data.
import pandas as pd

df = pd.read_csv("data/train.csv")
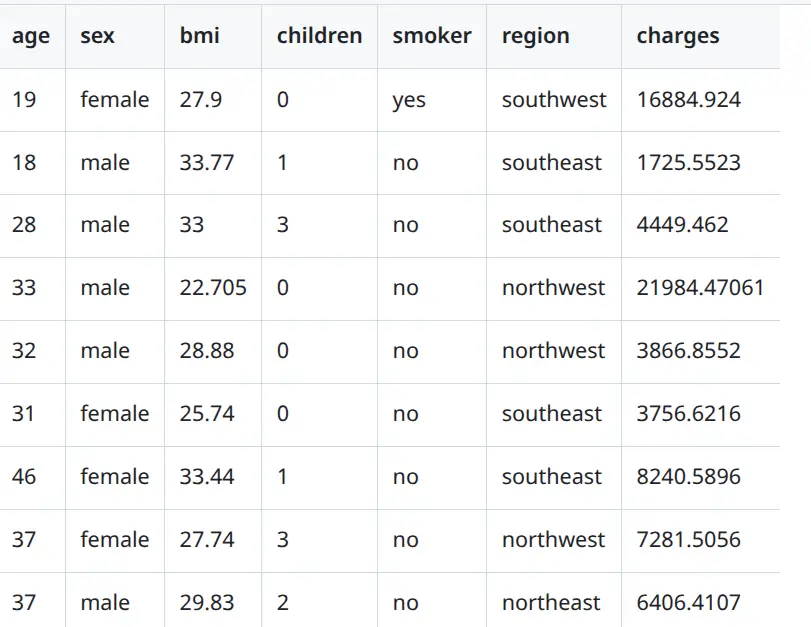
The dataset contains patient information and medical insurance charges. The target column is charges. This is the value that we want to predict.
We split the data into input features and target:
X_train = df.drop(columns=["charges"])
y_train = df["charges"]
The X_train variable contains all input columns. The y_train variable contains the target column.
Train Machine Learning model with MLJAR AutoML
Now we can train the model.
from supervised import AutoML

automl = AutoML(
    results_path="AutoML_Results",
)

automl.fit(X_train, y_train)
That's all. MLJAR AutoML will automatically detect that this is a regression task. It will train several models and compare their results.
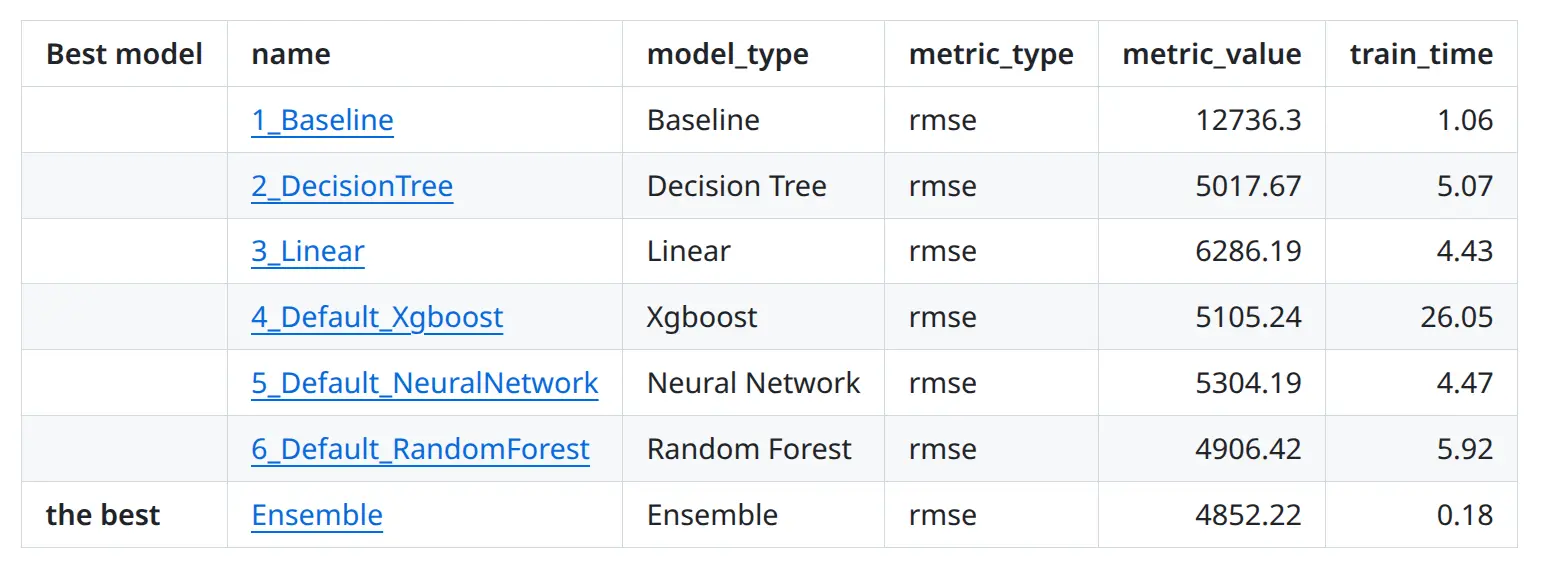
In this example, AutoML checks models like:
- Baseline,
- Linear model,
- Decision Tree,
- Random Forest,
- Xgboost,
- Neural Network,
- Ensemble.
The training output from this project shows that the best model is an Ensemble model.
You don't need to manually test all these algorithms. AutoML does it for you and saves the full report in the AutoML_Results directory. This is very helpful for beginners because you can focus on the problem and the data, not on writing a lot of training code.
Generate Web App automatically
Now comes the most interesting part.
We will generate a Web App from the trained AutoML model.
automl.app(
    path="AutoML_App",
    title="Insurance Charges Predictor",
)
This command creates a ready-to-use Web App. The app is generated in the AutoML_App directory.
You don't need to write frontend code. You don't need to create forms manually. You don't need to design the layout. MLJAR AutoML creates the app based on your trained model and input data. The generated app is created with Mercury. Mercury can serve Python notebooks as web applications, so the final app is still based on Python.
What files are generated?
After running automl.app(), the AutoML_App directory contains files like:
AutoML_App/
├── app_support.py
├── automl.zip
├── config.toml
├── mljar_app.json
├── predict_batch.ipynb
├── predict_single.ipynb
├── requirements.txt
└── runtime.txt
The most important notebooks are:
predict_single.ipynb
predict_batch.ipynb
The predict_single.ipynb notebook is used for single prediction. The predict_batch.ipynb notebook is used for batch prediction from a CSV file. The automl.zip file contains the model runtime files needed to make predictions. The requirements.txt file contains Python packages needed to run the app.
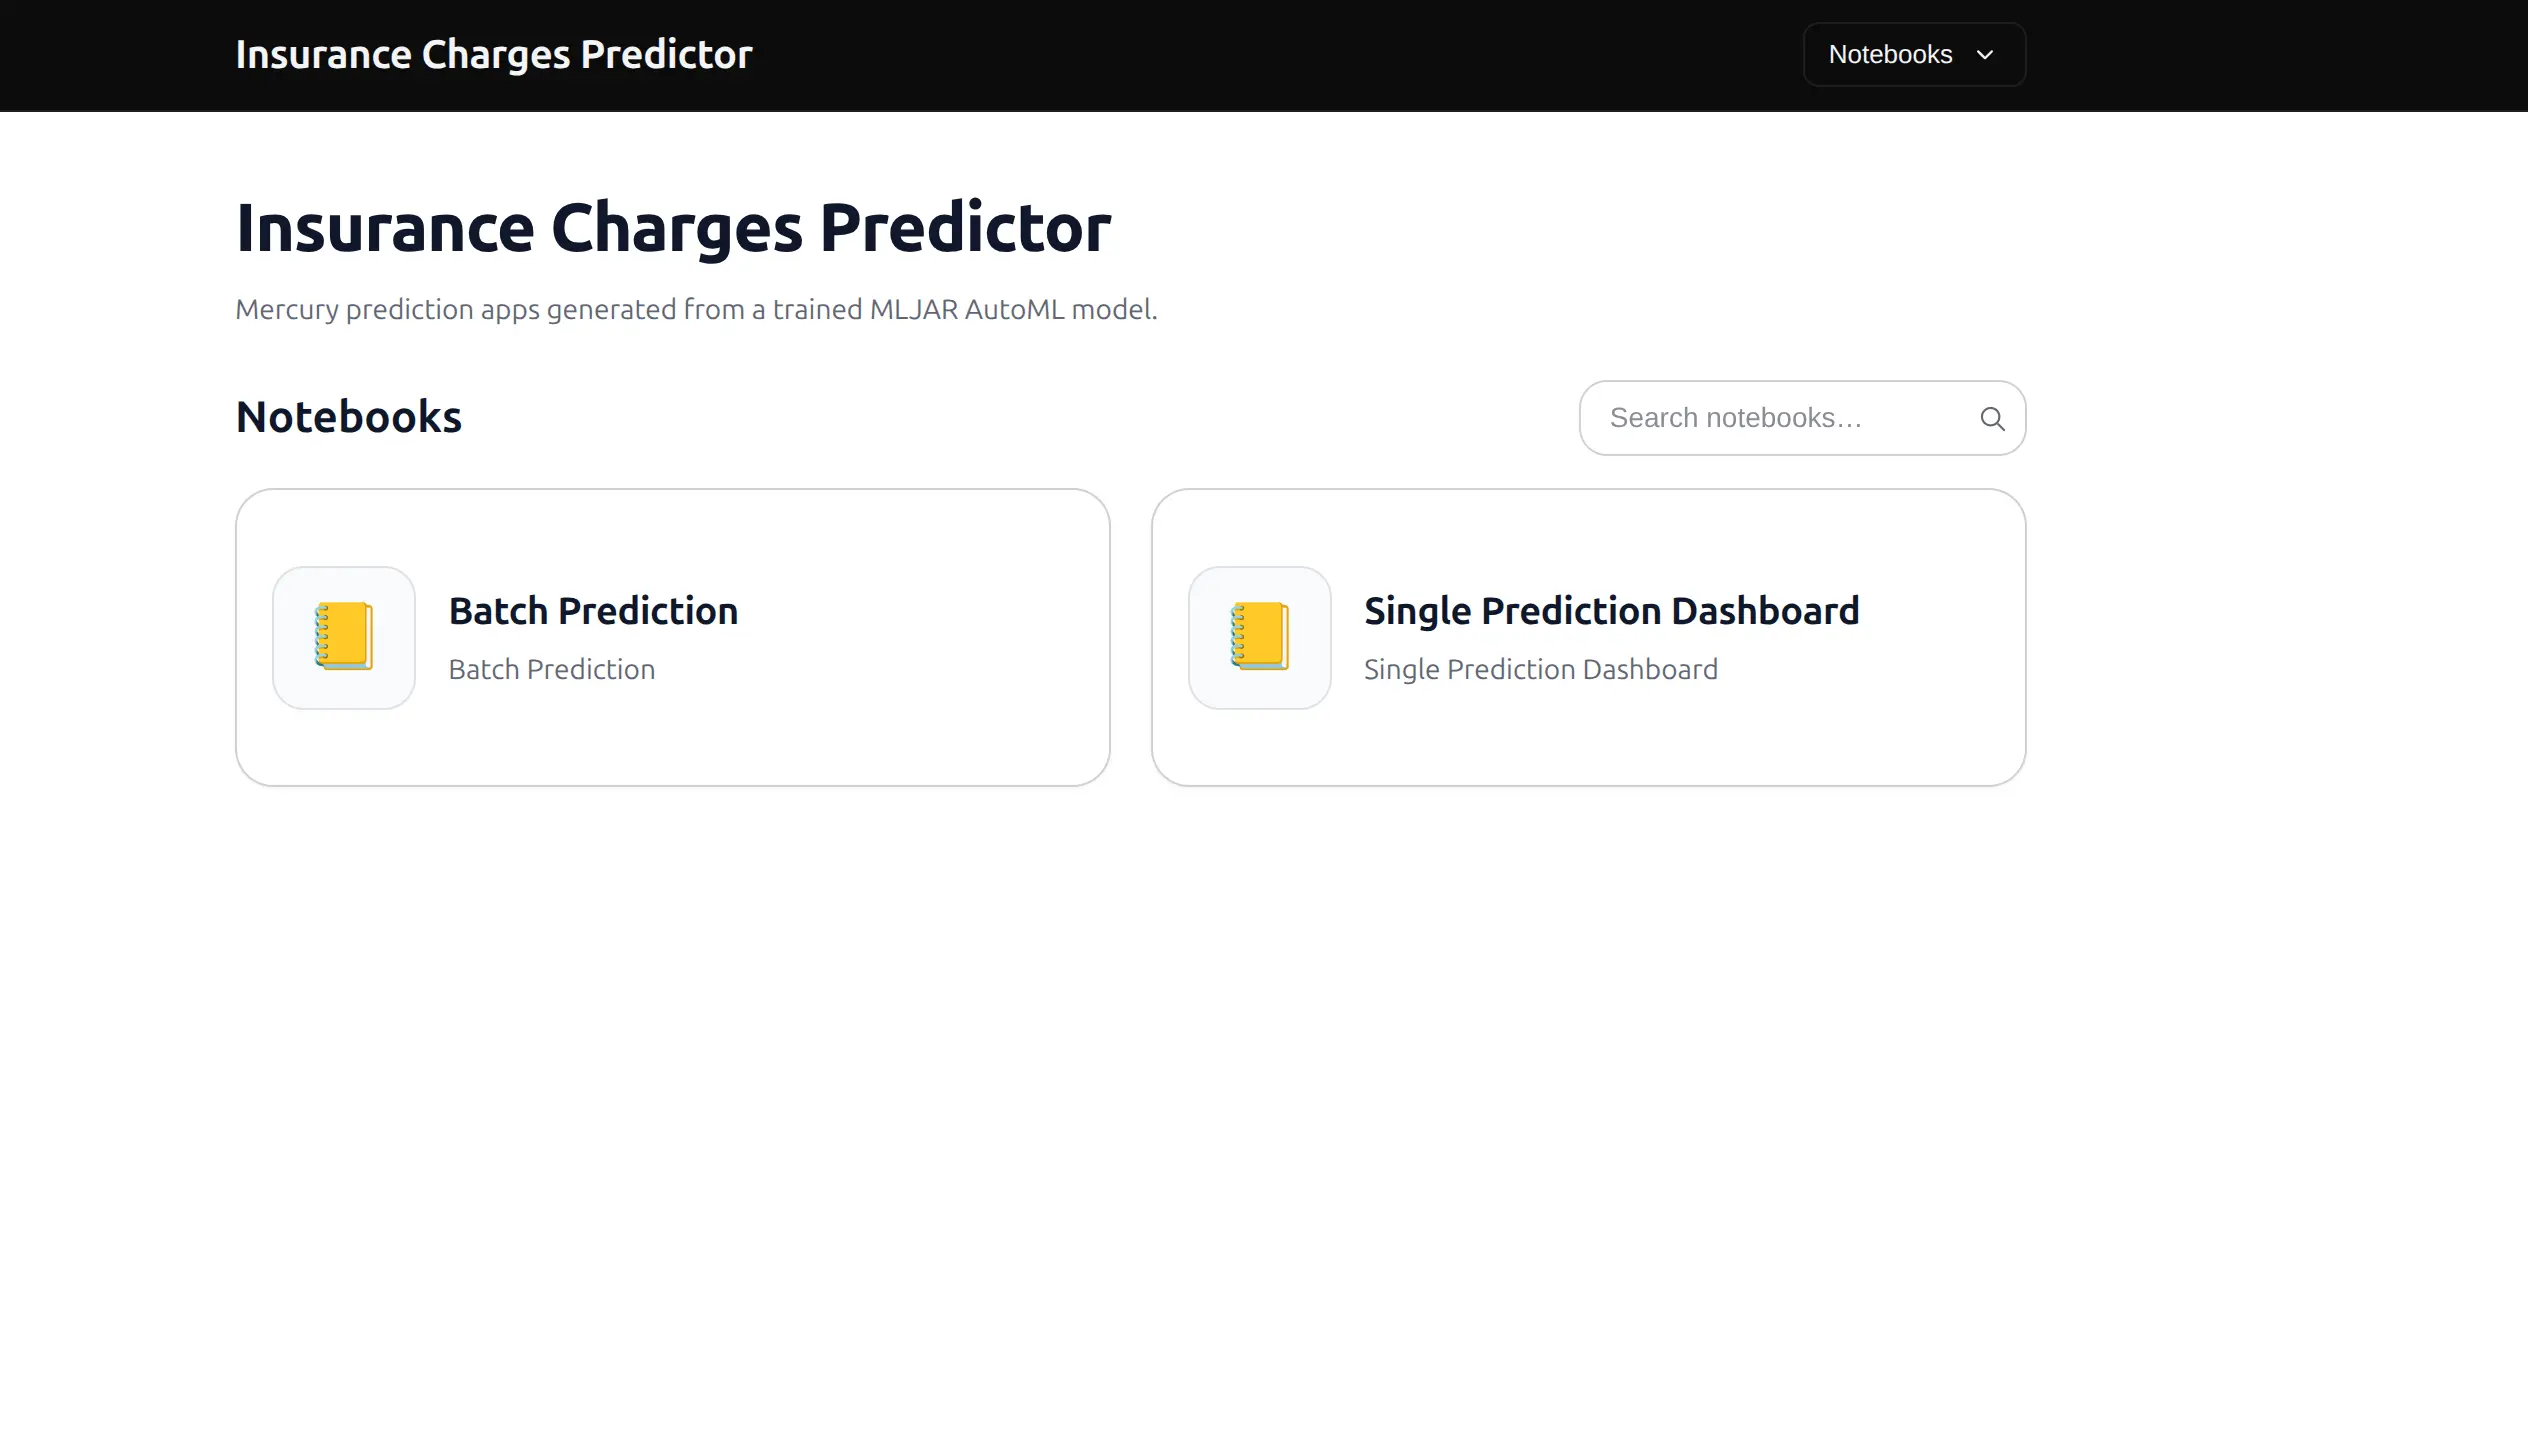
Mercury page view with both applications:
Single prediction app
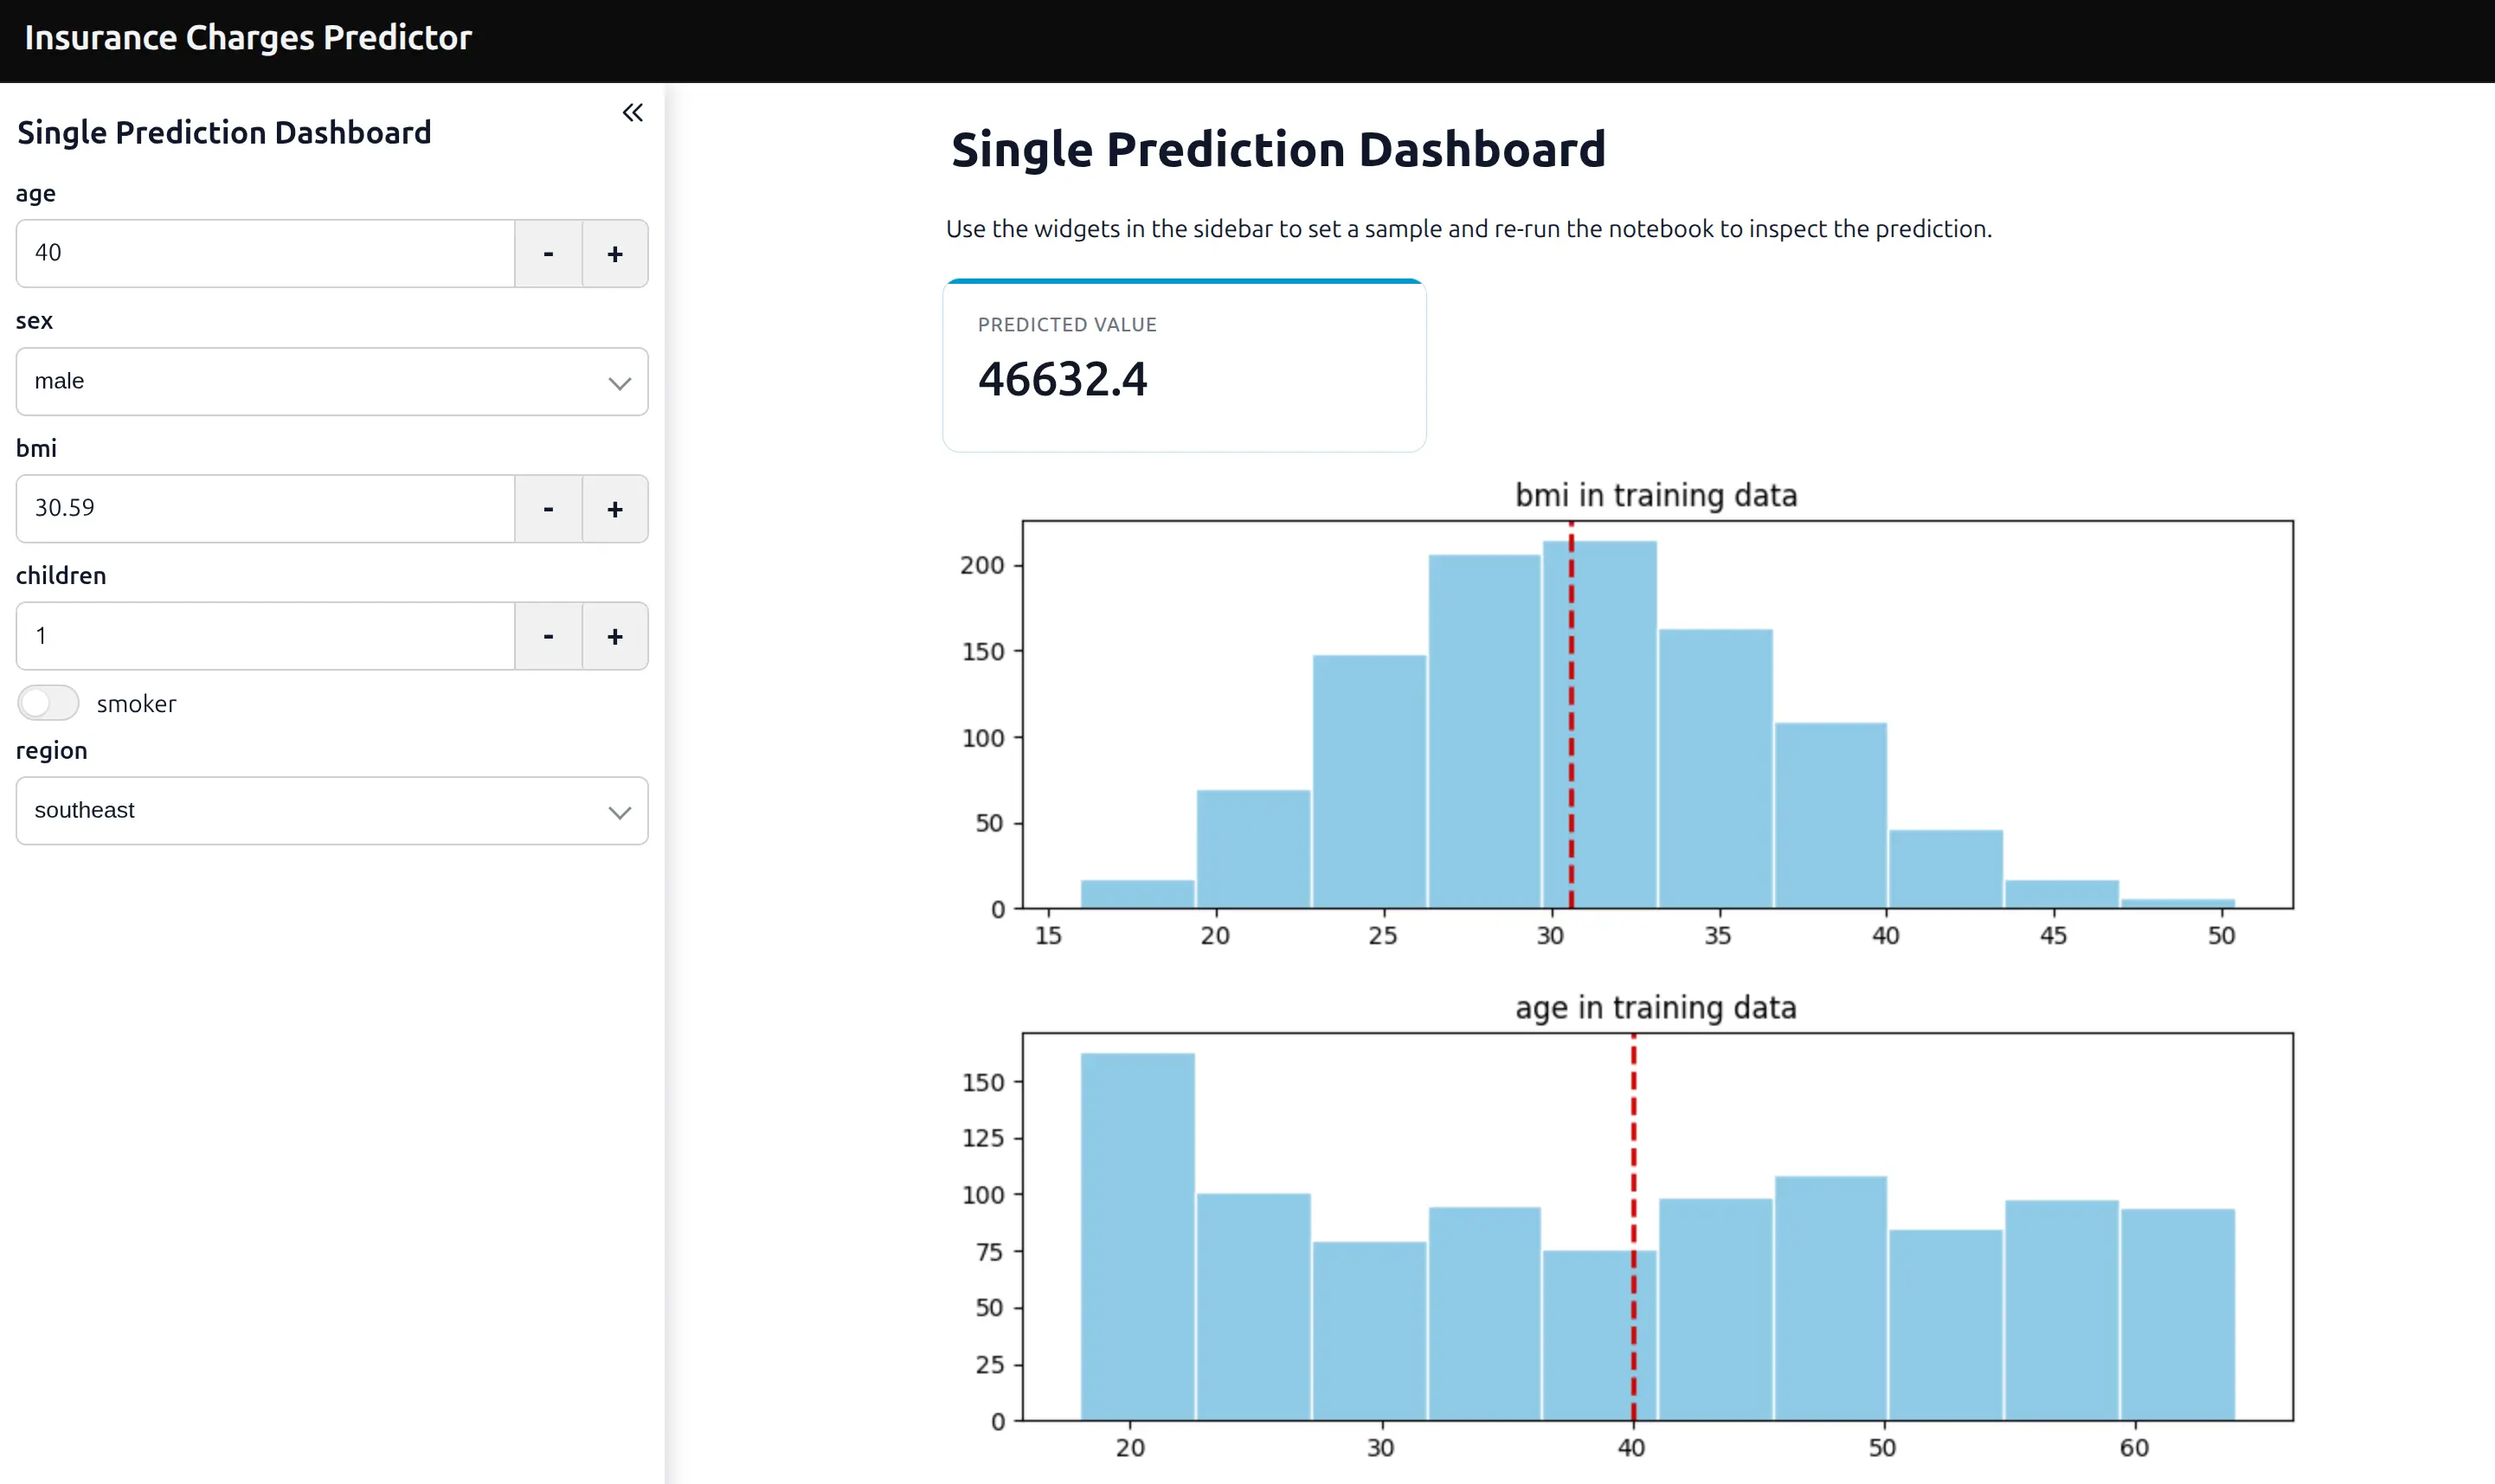
The first generated app is for single prediction. In this app, the user can enter values in a form, for example:
- age,
- sex,
- BMI,
- number of children,
- smoking status,
- region.
After the user changes any value in the form, the prediction is updated automatically. This makes the app very interactive. You can change the input values and immediately see how they affect the predicted medical insurance charges.
This type of app is great when someone wants to check one case at a time. For example, a non-technical user can open the app in the browser, fill in the form, and get the prediction without writing any Python code.
The app also shows more information about the prediction. For each input value, we display how it compares with the training data distribution. This helps the user understand whether the selected value is typical or unusual compared to the data used to train the model.
Additionally, the app displays a feature importance plot. This plot shows which features had the biggest impact on the model predictions. It is useful because the user can better understand what the model is using to make its decision.
So the single prediction app is not only a simple prediction form. It also gives extra context and helps explain the model behavior.
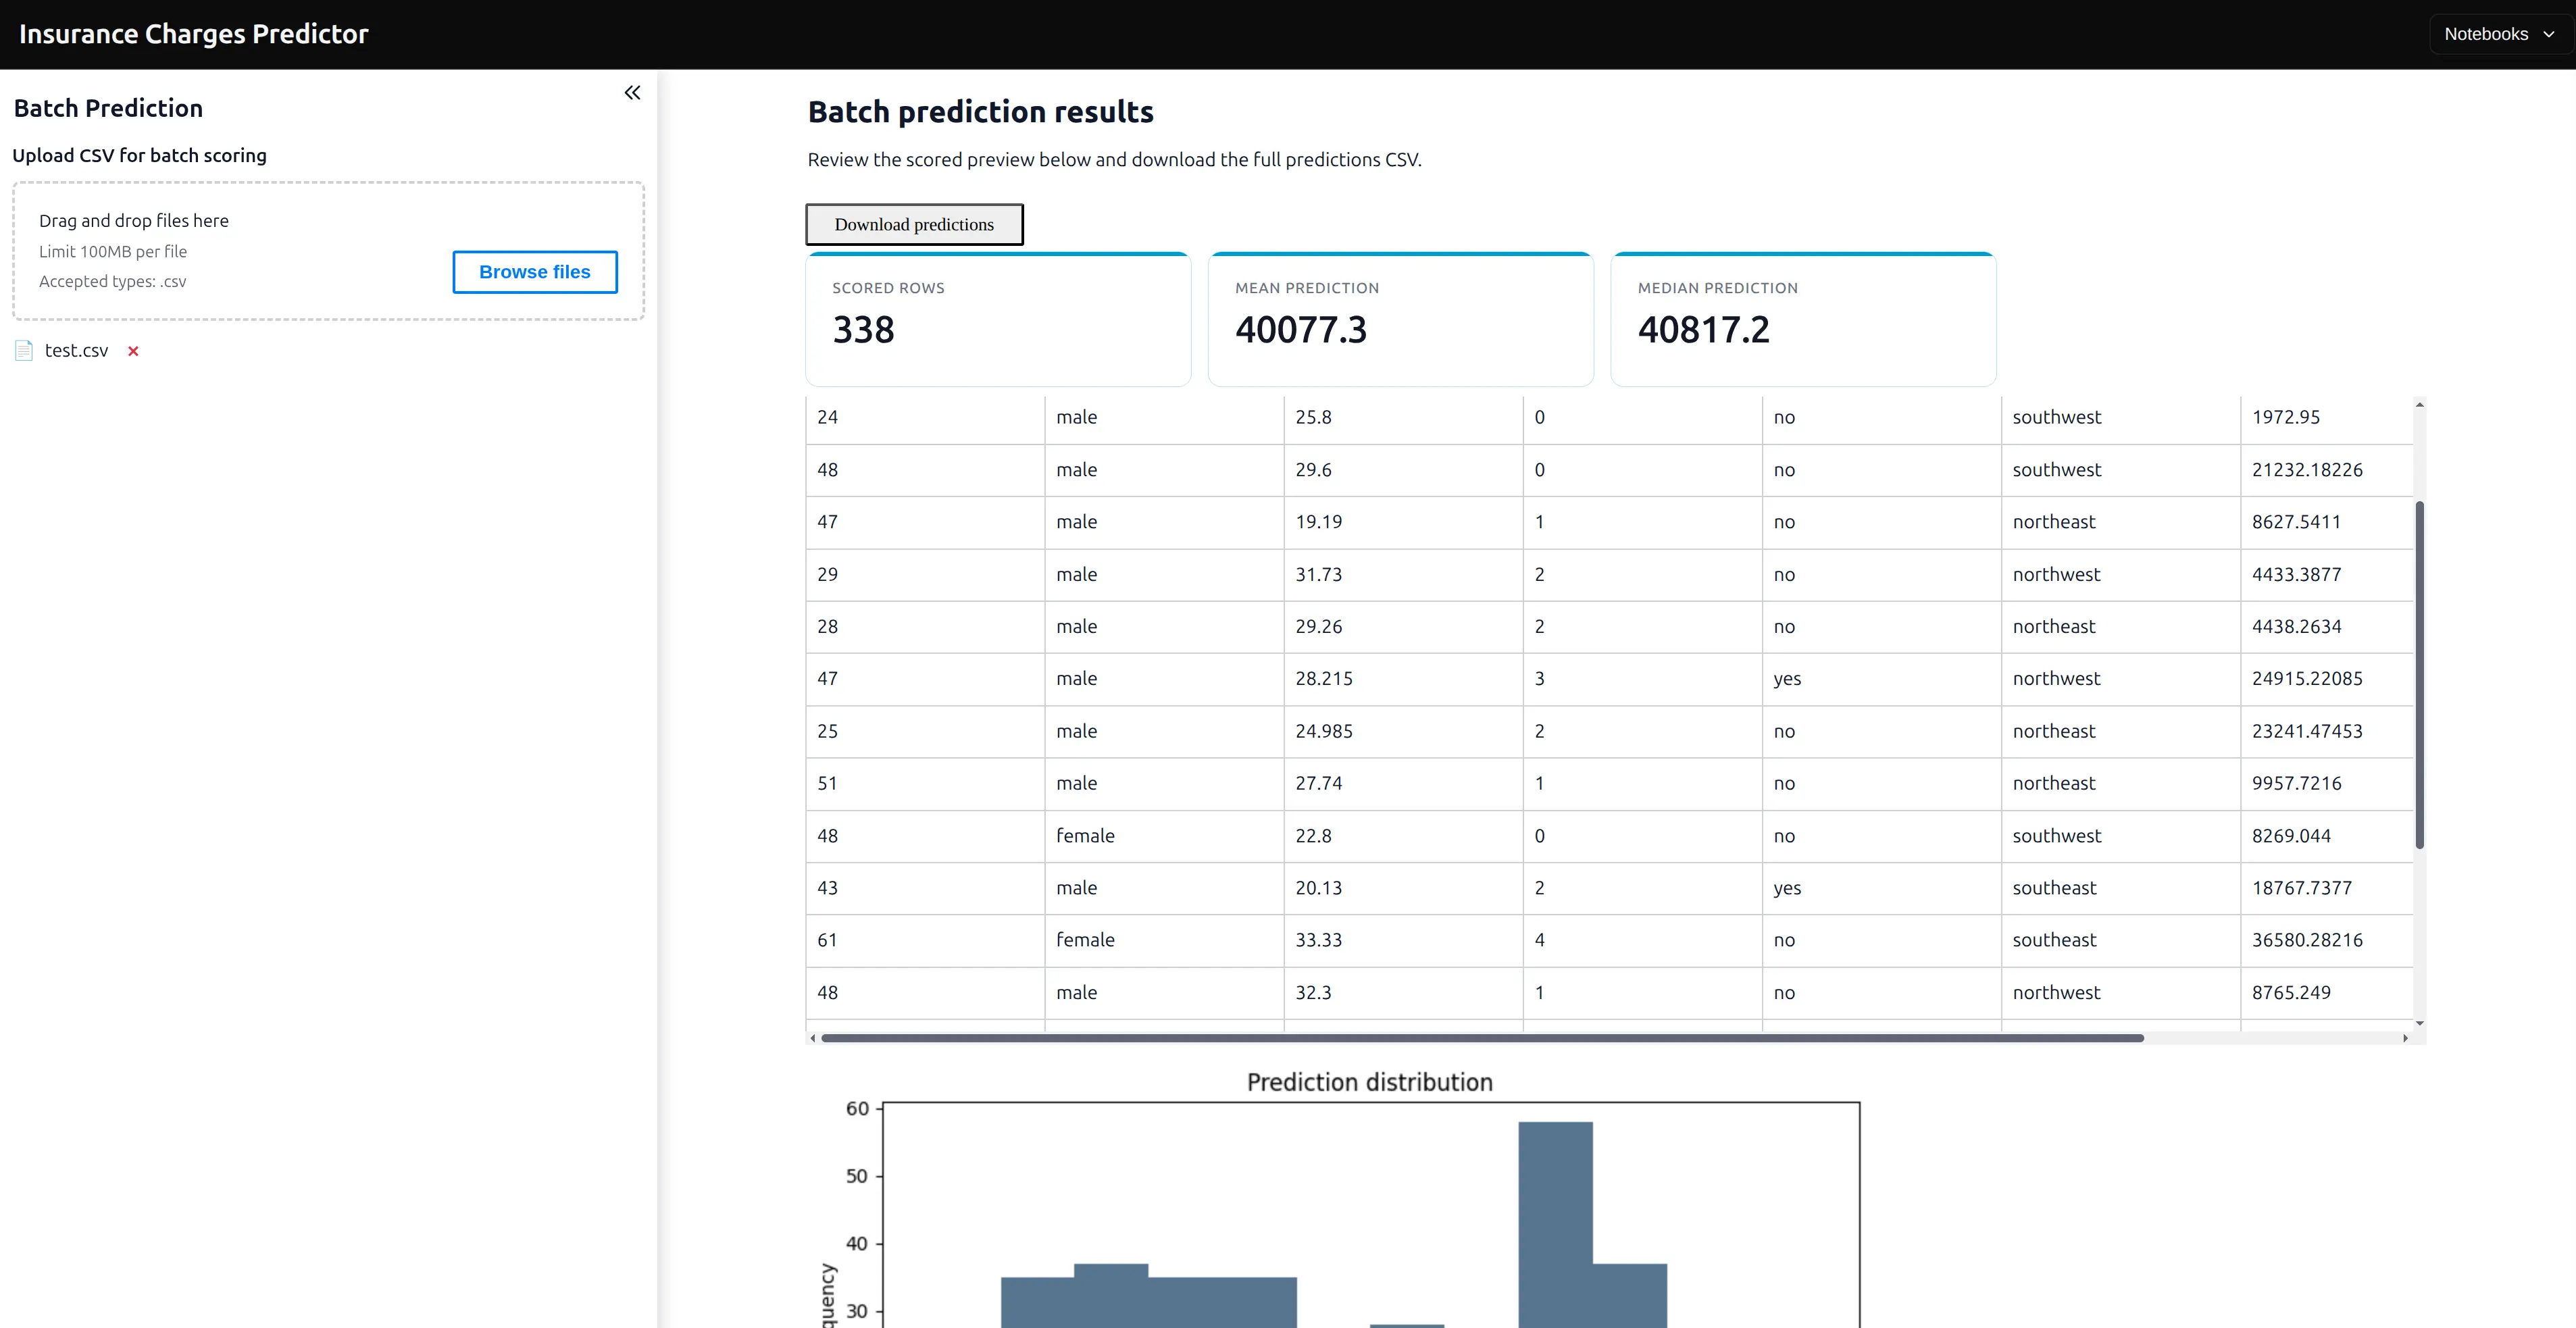
Batch prediction app
The second generated app is for batch prediction. In this app, the user uploads a CSV file with many rows. The app computes predictions for all rows and returns a file with results. This is very useful when users already have data in a spreadsheet or CSV file. For example, they can prepare a file like this:
age,sex,bmi,children,smoker,region
19,female,27.9,0,yes,southwest
35,male,30.5,1,no,northwest
52,female,31.2,2,no,southeast
The app will add predictions for each row. User can download computed predictions with Download predictions button.
Run the Web App locally
You can run the generated app locally with Mercury. Go to the generated app directory:
cd AutoML_App/app
Install dependencies:
pip install -r requirements.txt
Start Mercury:
mercury
Mercury will start a local server. You can open the app in your browser and test it on your computer. This is a good step before publishing the app online. You can check if the form works, if the predictions are correct, and if the batch CSV upload works as expected.
There is also a helper function in MLJAR AutoML:
automl.local_app()
It can generate and start the local app directly from Python code.
Publish the Web App online
Running locally is nice, but sharing a local app with other people is not easy. The easiest way to publish the app online is to use MLJAR Platform. You can publish the app with one Python command:
automl.publish_app()
In the repository, this line is commented:
# automl.publish_app()
To publish the app, remove the # and run the script. The expected output from publish is:
Start app publish
Creating app workspace
Signing in to MLJAR platform
Creating app URL
Created app URL: https://model-forge-5fbd.ismvp.org
Uploading file: predict_single.ipynb
Uploading file: predict_batch.ipynb
Uploading file: app_support.py
Uploading file: mljar_app.json
Uploading file: config.toml
Uploading file: requirements.txt
Uploading file: runtime.txt
Uploading file: automl.zip
Finished. You can access your app at: https://model-forge-5fbd.ismvp.org
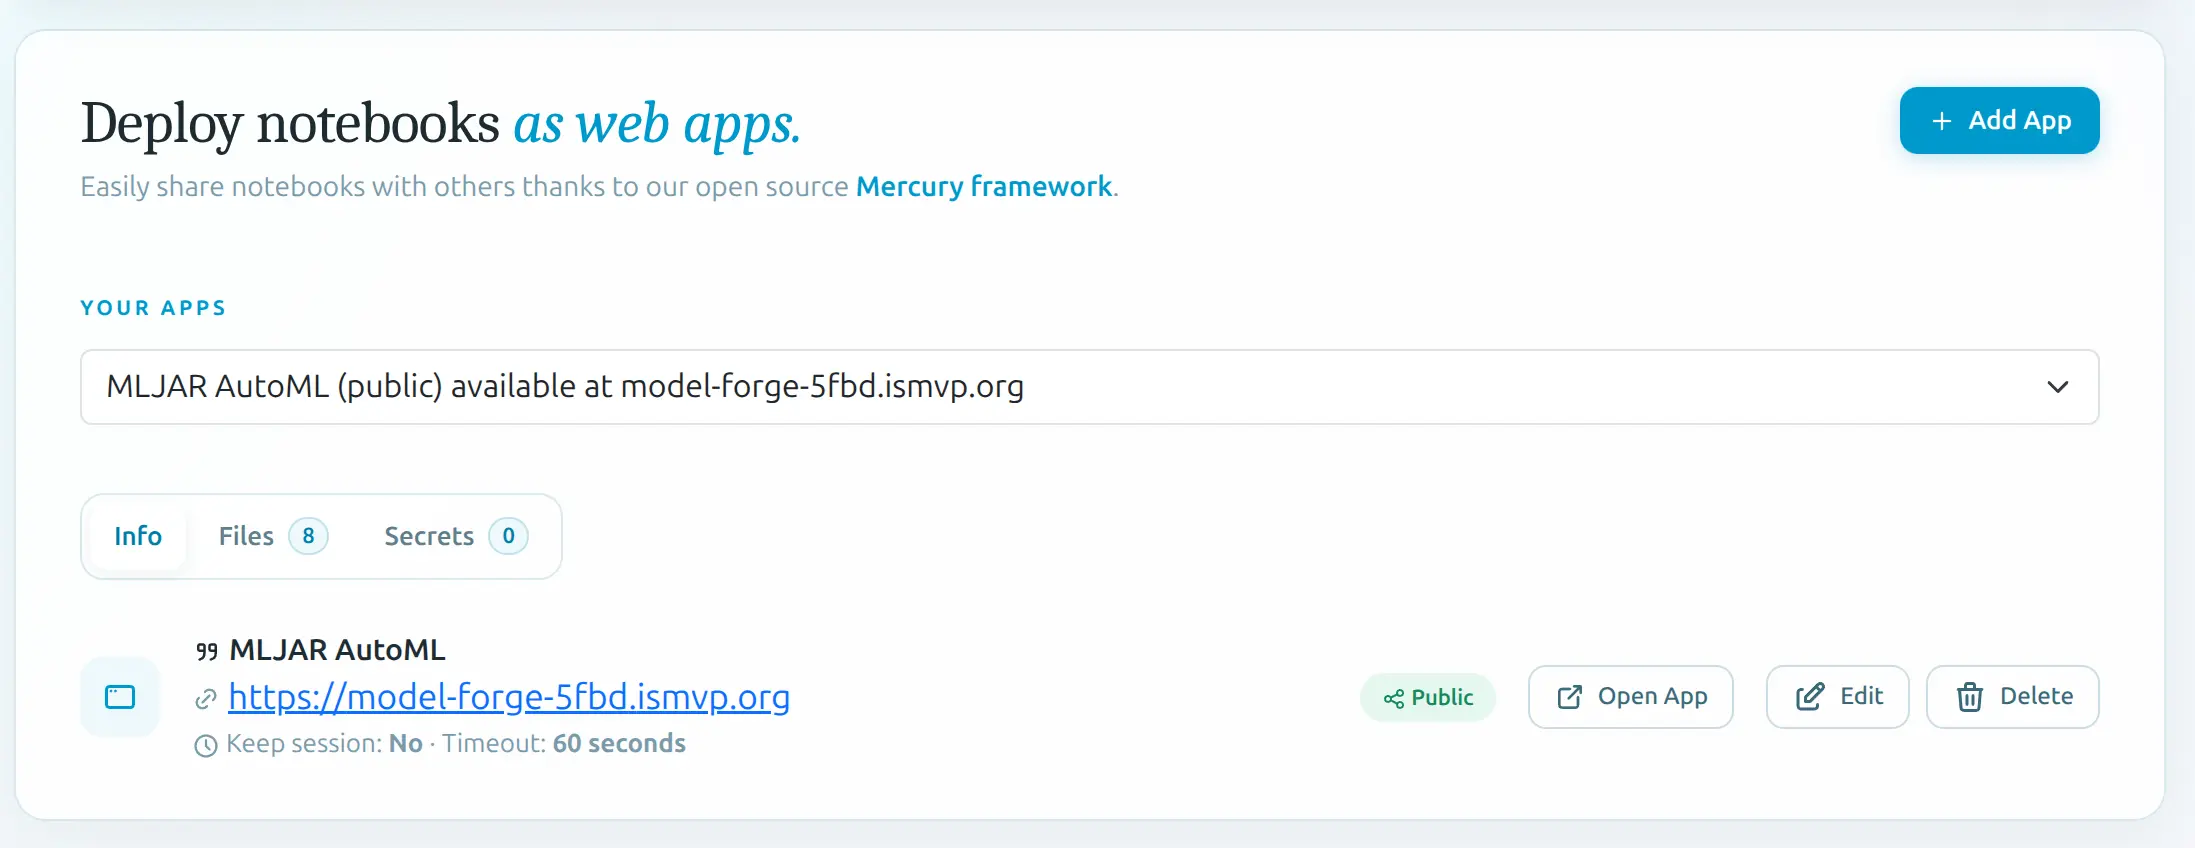
MLJAR AutoML will upload the generated application files to MLJAR Platform and create a URL for your app. You can open MLJAR Platform and inspect your web app:
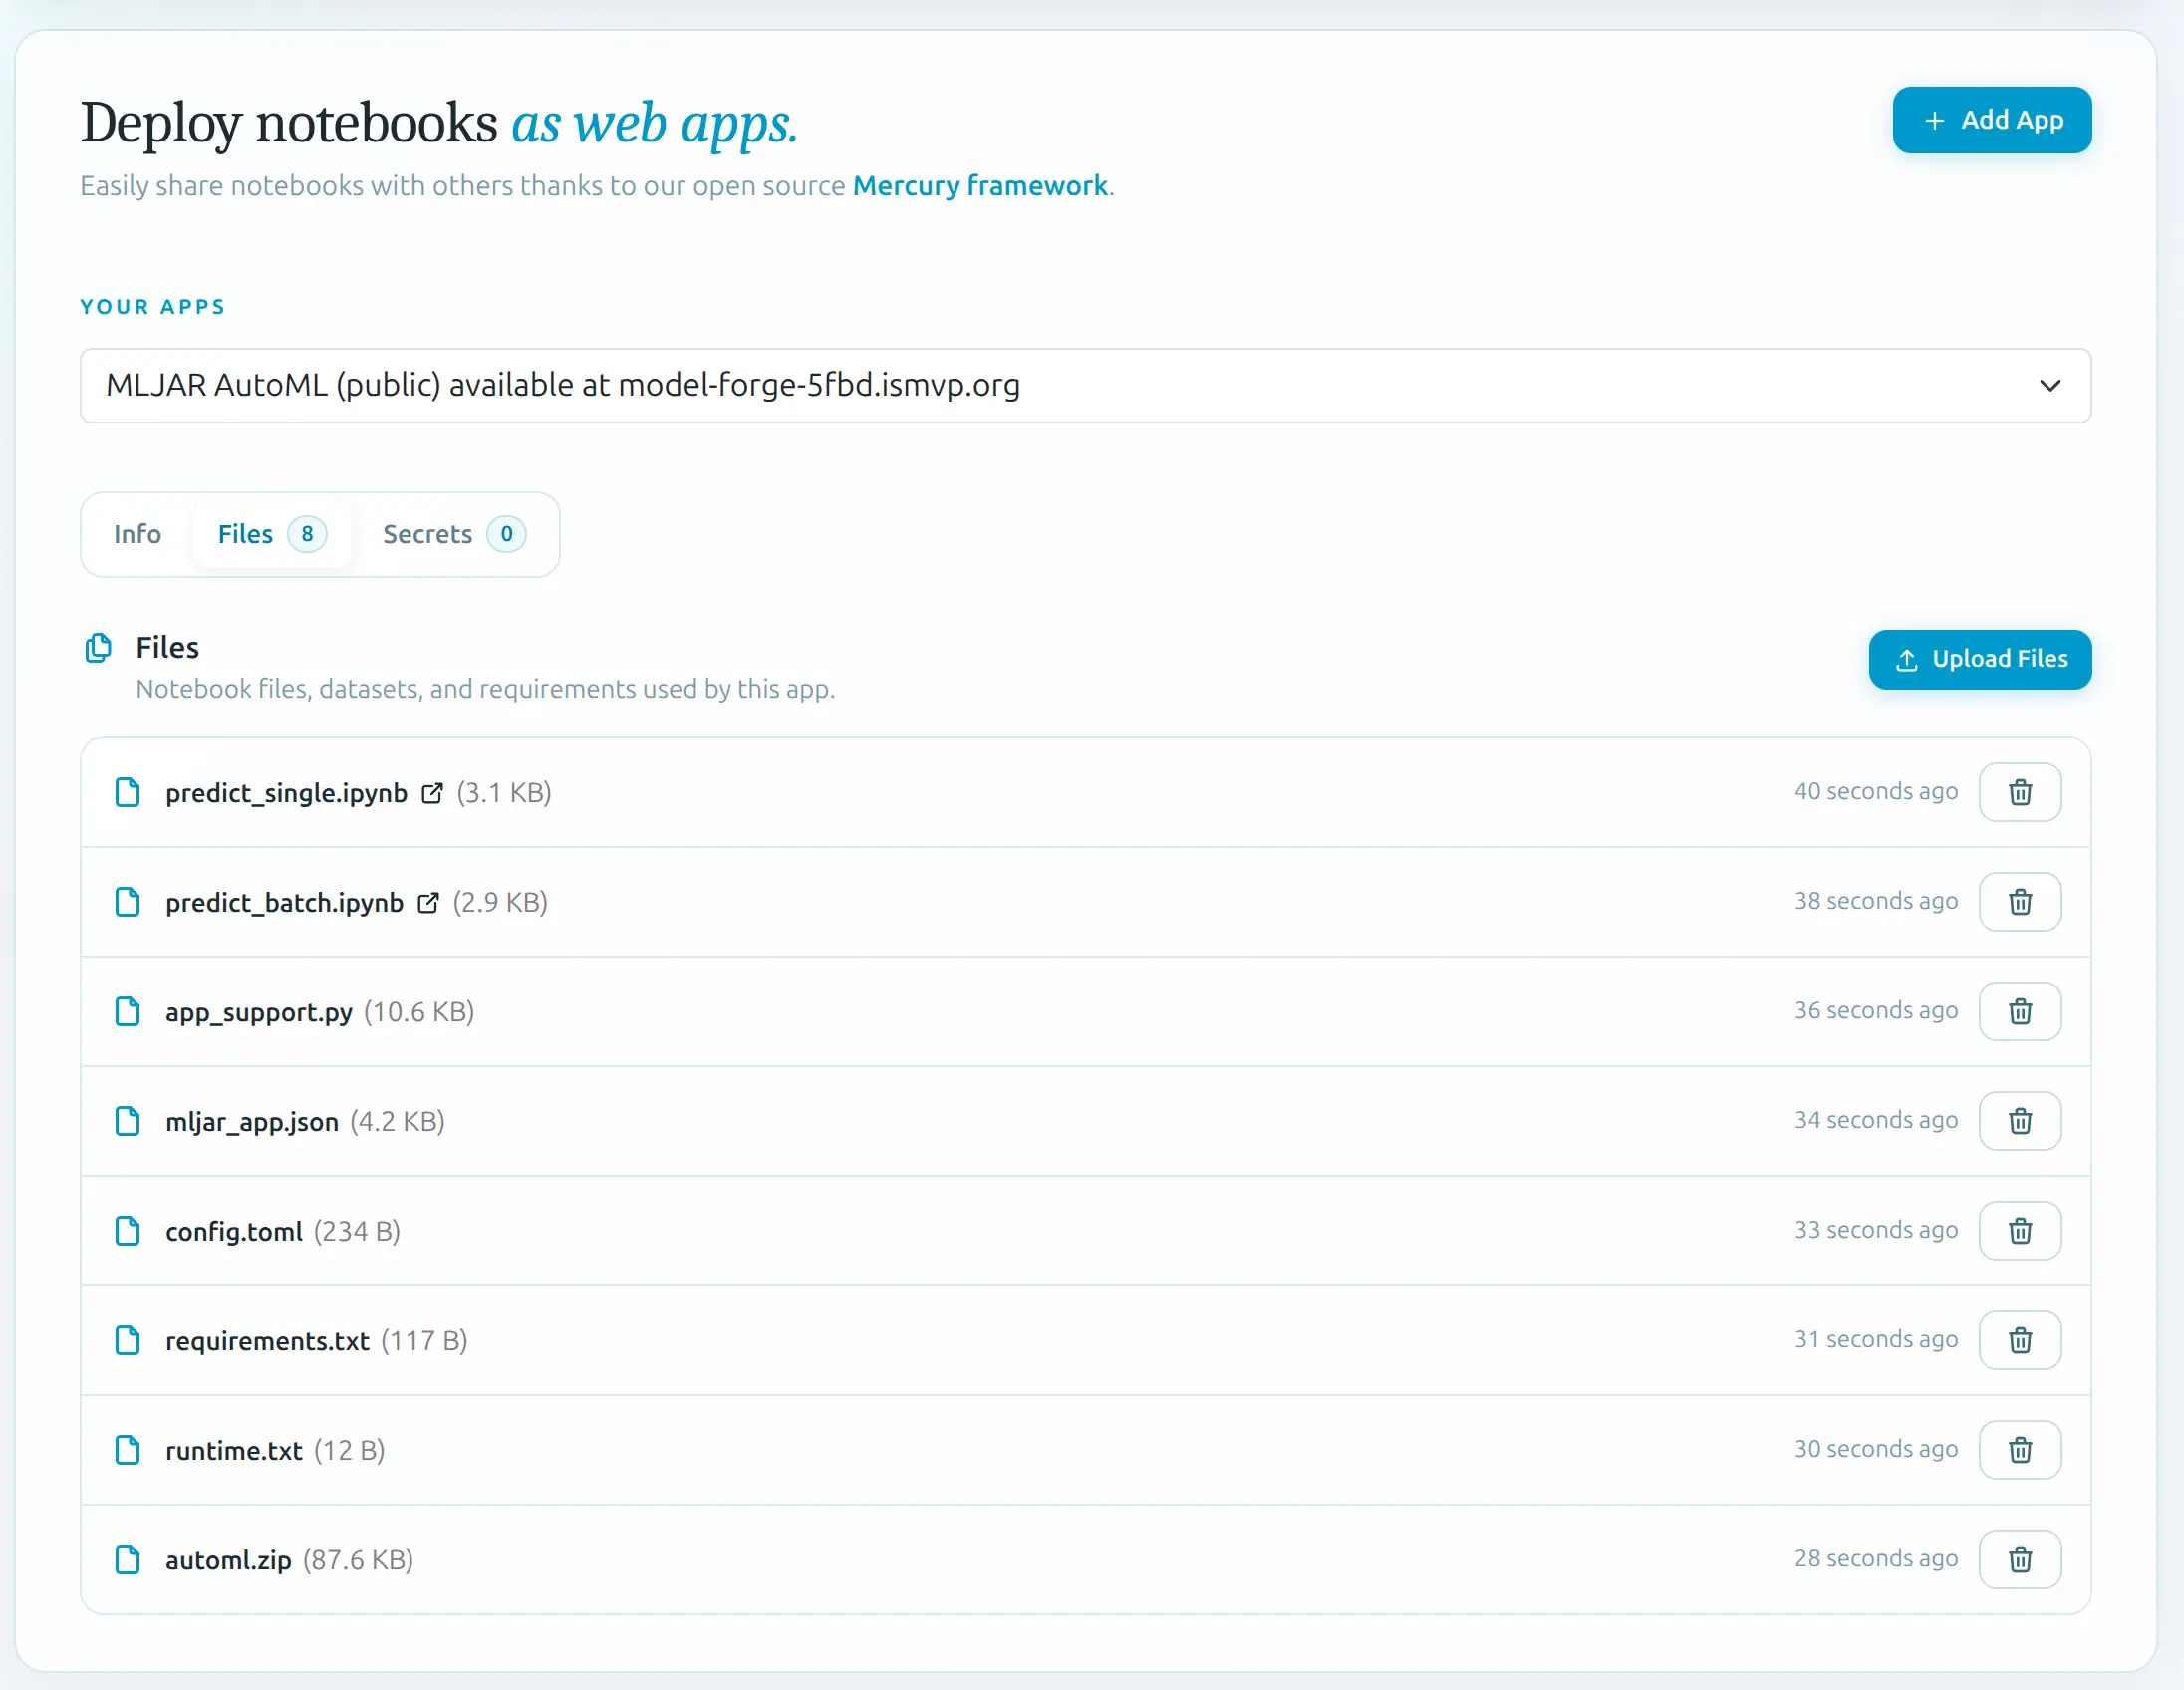
You can list all uploaded files:
After publishing, you can share the link with other people. They can open the app in the browser and use your Machine Learning model without installing Python. This is very convenient when you want to share your model with: clients, teammates, business users, researchers, students, friends.
Full training script
Here is the full script used in this tutorial:
import pandas as pd

from supervised import AutoML

# Read data
df = pd.read_csv("data/train.csv")

X_train = df.drop(columns=["charges"])
y_train = df["charges"]

# Train AutoML
automl = AutoML(
    results_path="AutoML_Results",
)

automl.fit(X_train, y_train)

# Create App
automl.app(
    path="AutoML_App",
    title="Insurance Charges Predictor",
)

# Start App locally
# automl.local_app()

# Deploy App on platform.mljar.com
# automl.publish_app()
It is a short script, but it does a lot:
- Loads the data.
- Splits features and target.
- Trains Machine Learning models.
- Saves AutoML results.
- Generates a Web App.
- Optionally starts the app locally.
- Optionally publishes the app online.
This is why I like this workflow. It keeps the project simple.
Important note about generated apps
The Web App is generated automatically. This means that you don't need to manually write the app code. You can focus on the Machine Learning part. Of course, advanced users can later open the generated files and customize them. But for beginners, the default generated app is already very useful. It gives you a working interface for single and batch predictions. For many projects, this is enough to show your model to other people and collect feedback.
When should you use this approach?
This approach is good when you want to quickly share a Machine Learning model.
You can use it for:
- model demos,
- proof of concept projects,
- internal tools,
- educational projects,
- client presentations,
- small business applications,
- research prototypes.
It is especially useful when the users of the model are not Python developers. Instead of sending them a notebook or Python script, you can send them a link to a Web App.
Summary
In this tutorial, we trained a Machine Learning model and created a Web App for predictions. We used MLJAR AutoML to train the model. The model predicts medical insurance charges based on patient information.
Then we used automl.app() to automatically generate a Web App.
The generated app contains two useful prediction interfaces:
- Single prediction app for one sample.
- Batch prediction app for CSV files.
We also saw how to run the app locally with Mercury and how to publish it online with: automl.publish_app()
The full code is available on GitHub:
https://github.com/pplonski/web-app-from-machine-learning-model
This workflow is beginner-friendly because you don't need to write frontend code. No HTML. No CSS. No JavaScript. Only Python. Happy predicting!
AI Data Analyst on Your Computer
Use MLJAR Studio to explore data, find insights, and create reports with AI. Everything runs locally, so your data stays with you.
About the Author