Installation guide
Install MLJAR Studio
Installing MLJAR Studio is simple. Download the installer for your operating system, install the application, and complete the first launch setup. MLJAR Studio will help you sign in to your account or activate your license and automatically install Python, so you can start working with data right away.
Step 1
Download
Download the installer for your operating system.
Step 2
Install
Run the installer and add MLJAR Studio to your computer.
Step 3
Setup
On first launch, sign in to your account or activate your license and install Python.
Download MLJAR Studio
Open the downloads page: downloads page.
Choose the installer for your operating system on the downloads page. If you use a Mac with Apple Silicon, such as M1, M2, or M3, choose the Apple Silicon version.
Click Download and wait for the installer to finish downloading.
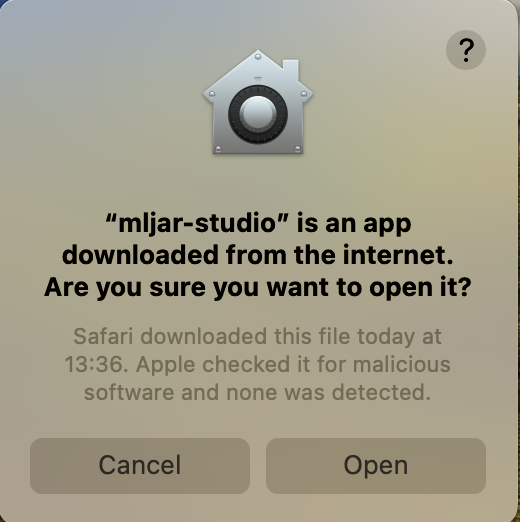
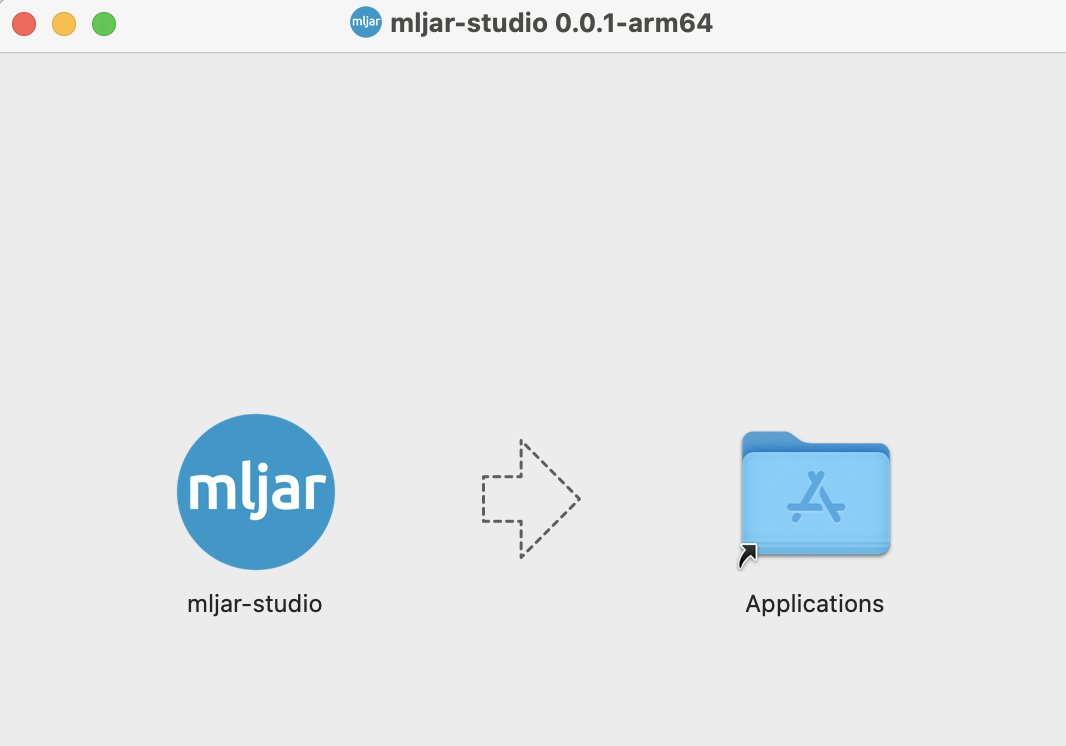
Install macOS
Open the downloaded installer. macOS may show a warning the first time you open the app. If that happens, click Open to continue.
Drag the MLJAR Studio icon to the Applications folder.
Open Launchpad, search for MLJAR Studio, and start the application.
After opening the app, continue to First Launch Setup (All Systems) to sign in to your account or activate your license and install Python.
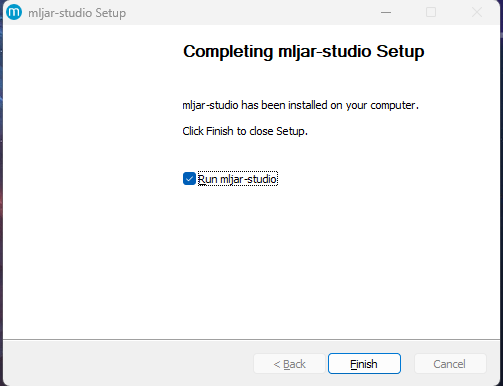
Install Windows
Open the downloaded installer to start the installation.
When the installer window appears, click I Agree to accept the license agreement and continue.

When installation is finished, click Finish.
Open the Start menu, search for MLJAR Studio, and run the application.
After opening the app, continue to First Launch Setup (All Systems) to sign in to your account or activate your license and install Python.
Install Linux
On Ubuntu, install MLJAR Studio with the following command:
sudo dpkg -i mljar-studio-your-version.debAfter installation, open MLJAR Studio and continue to First Launch Setup (All Systems).
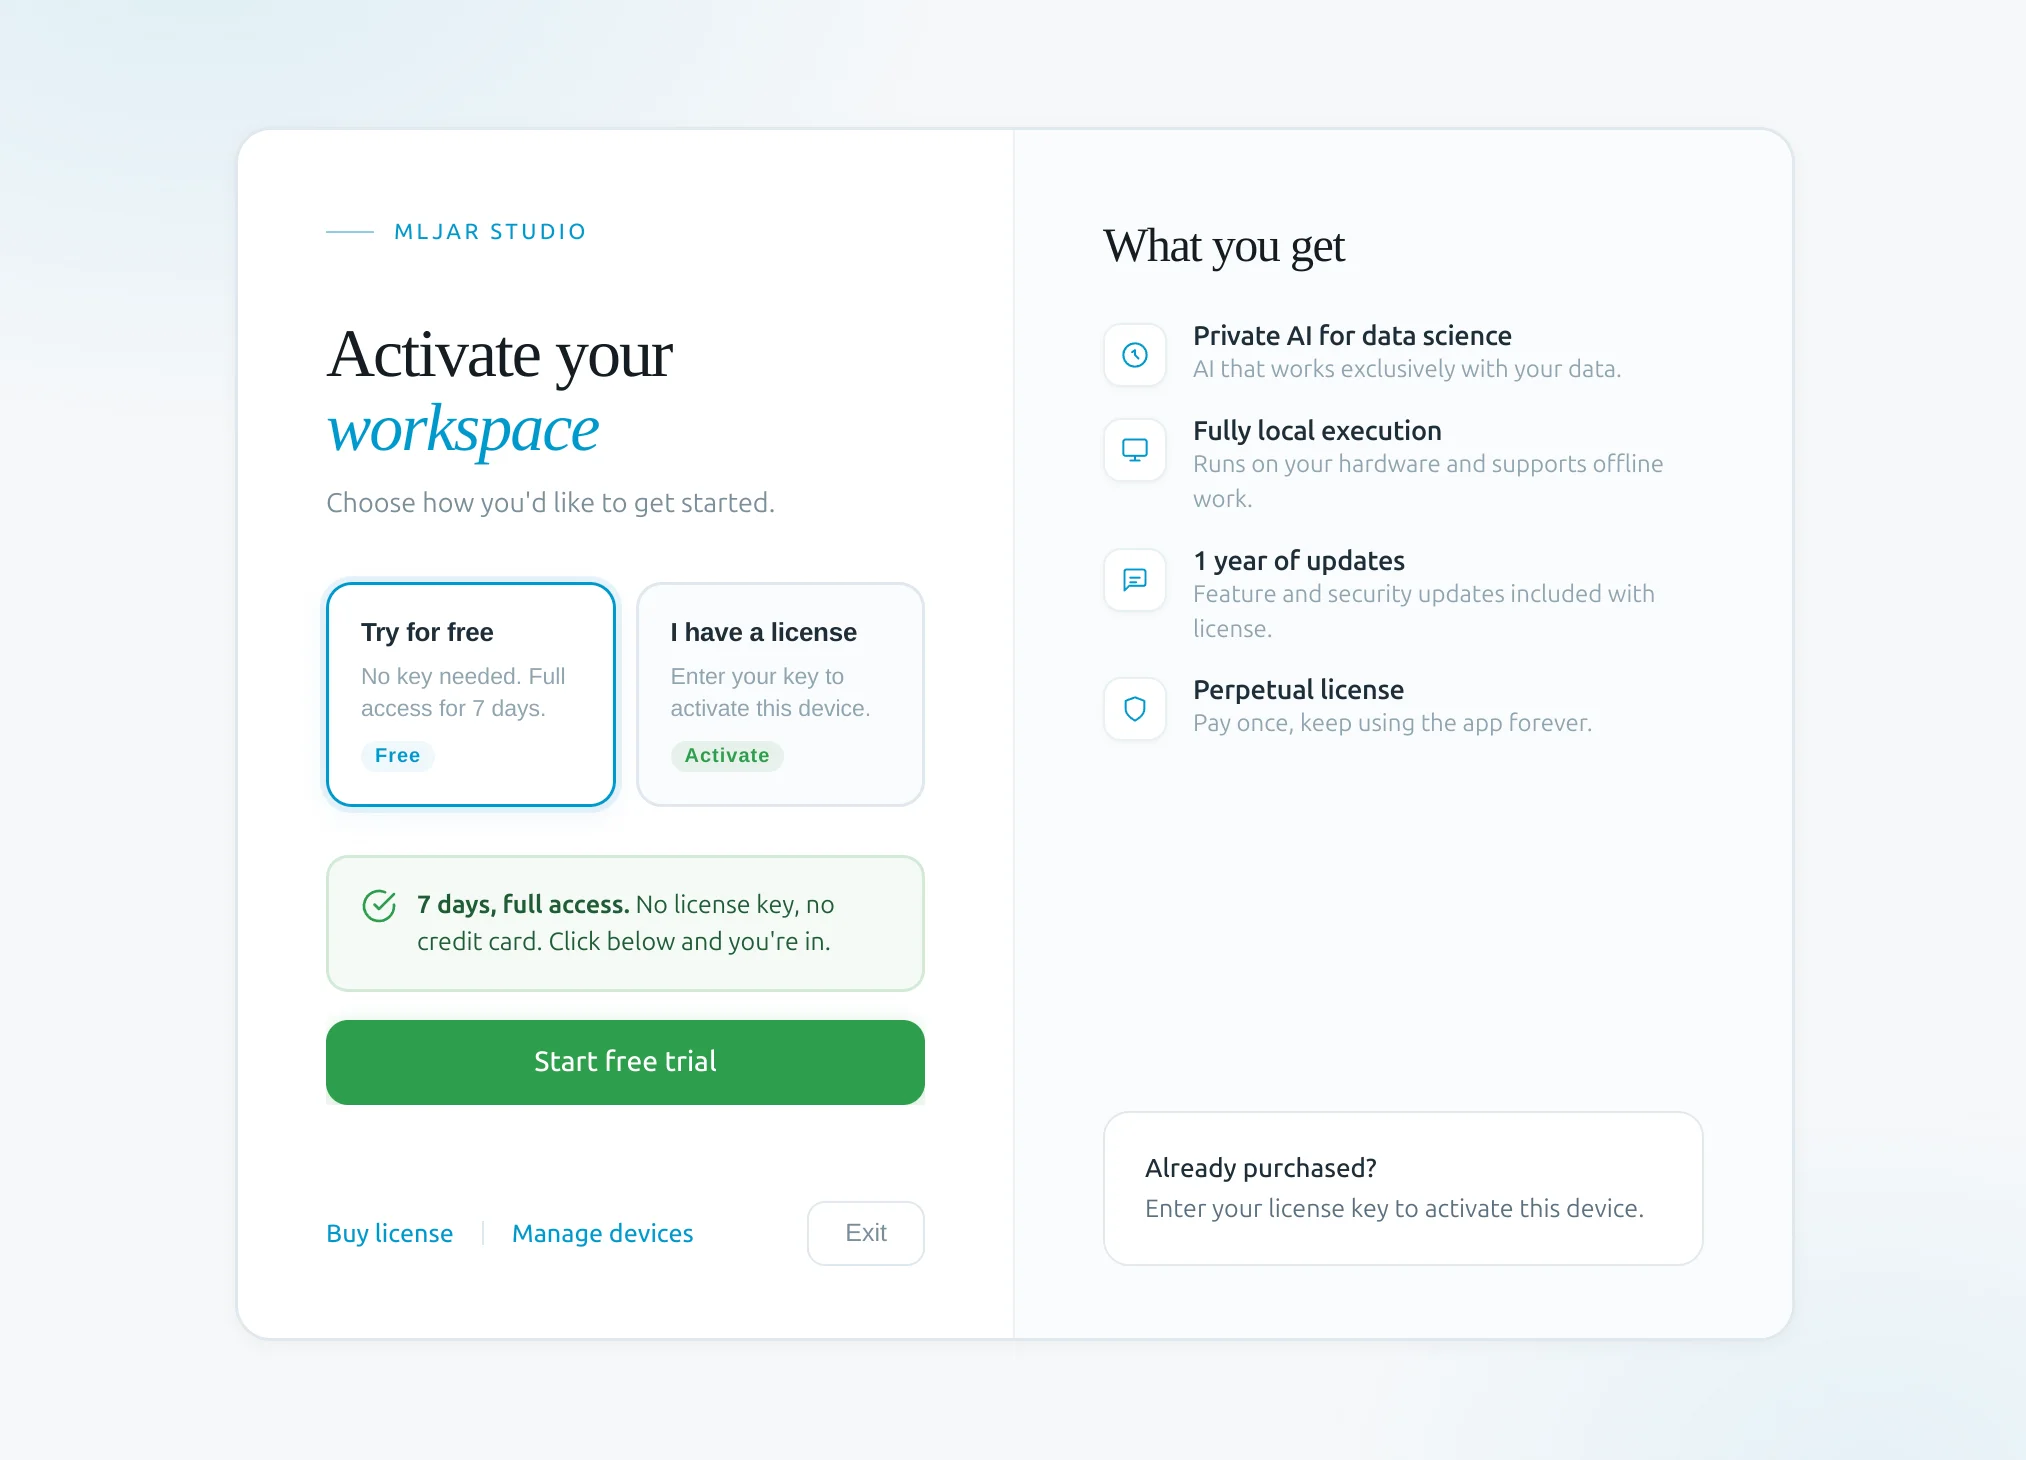
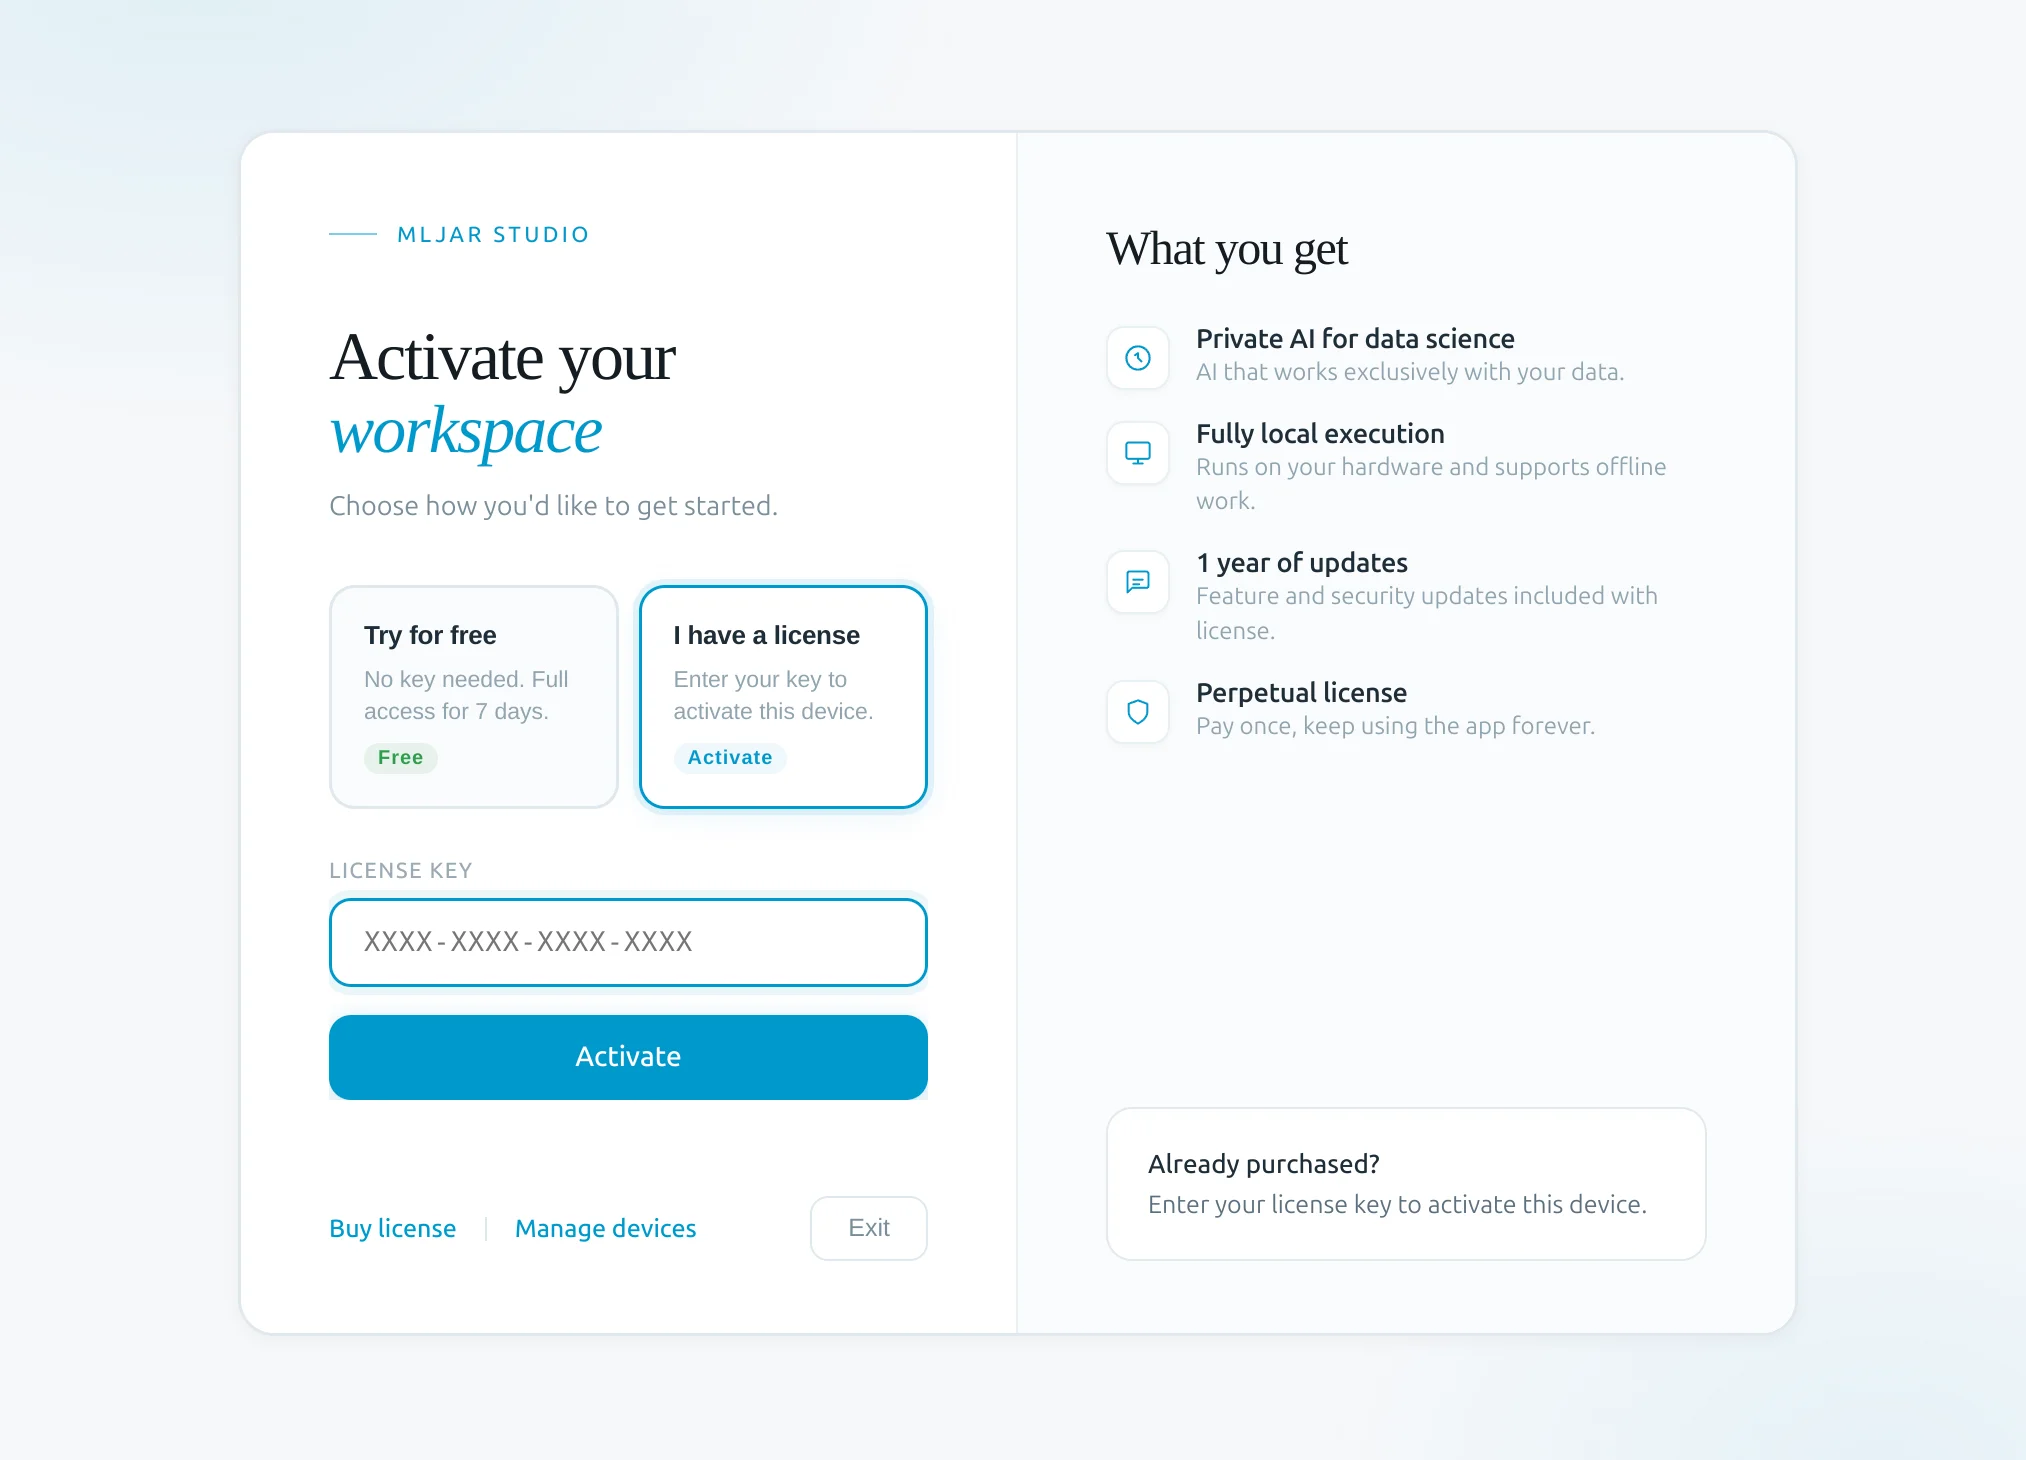
First Launch Setup (All Systems)
When you open MLJAR Studio for the first time, you will complete a short setup shared across macOS, Windows, and Linux. You can sign in to your account or activate your license, install Python automatically, and start your first analysis in just a few steps.
First, sign in to your free account or enter your license key.
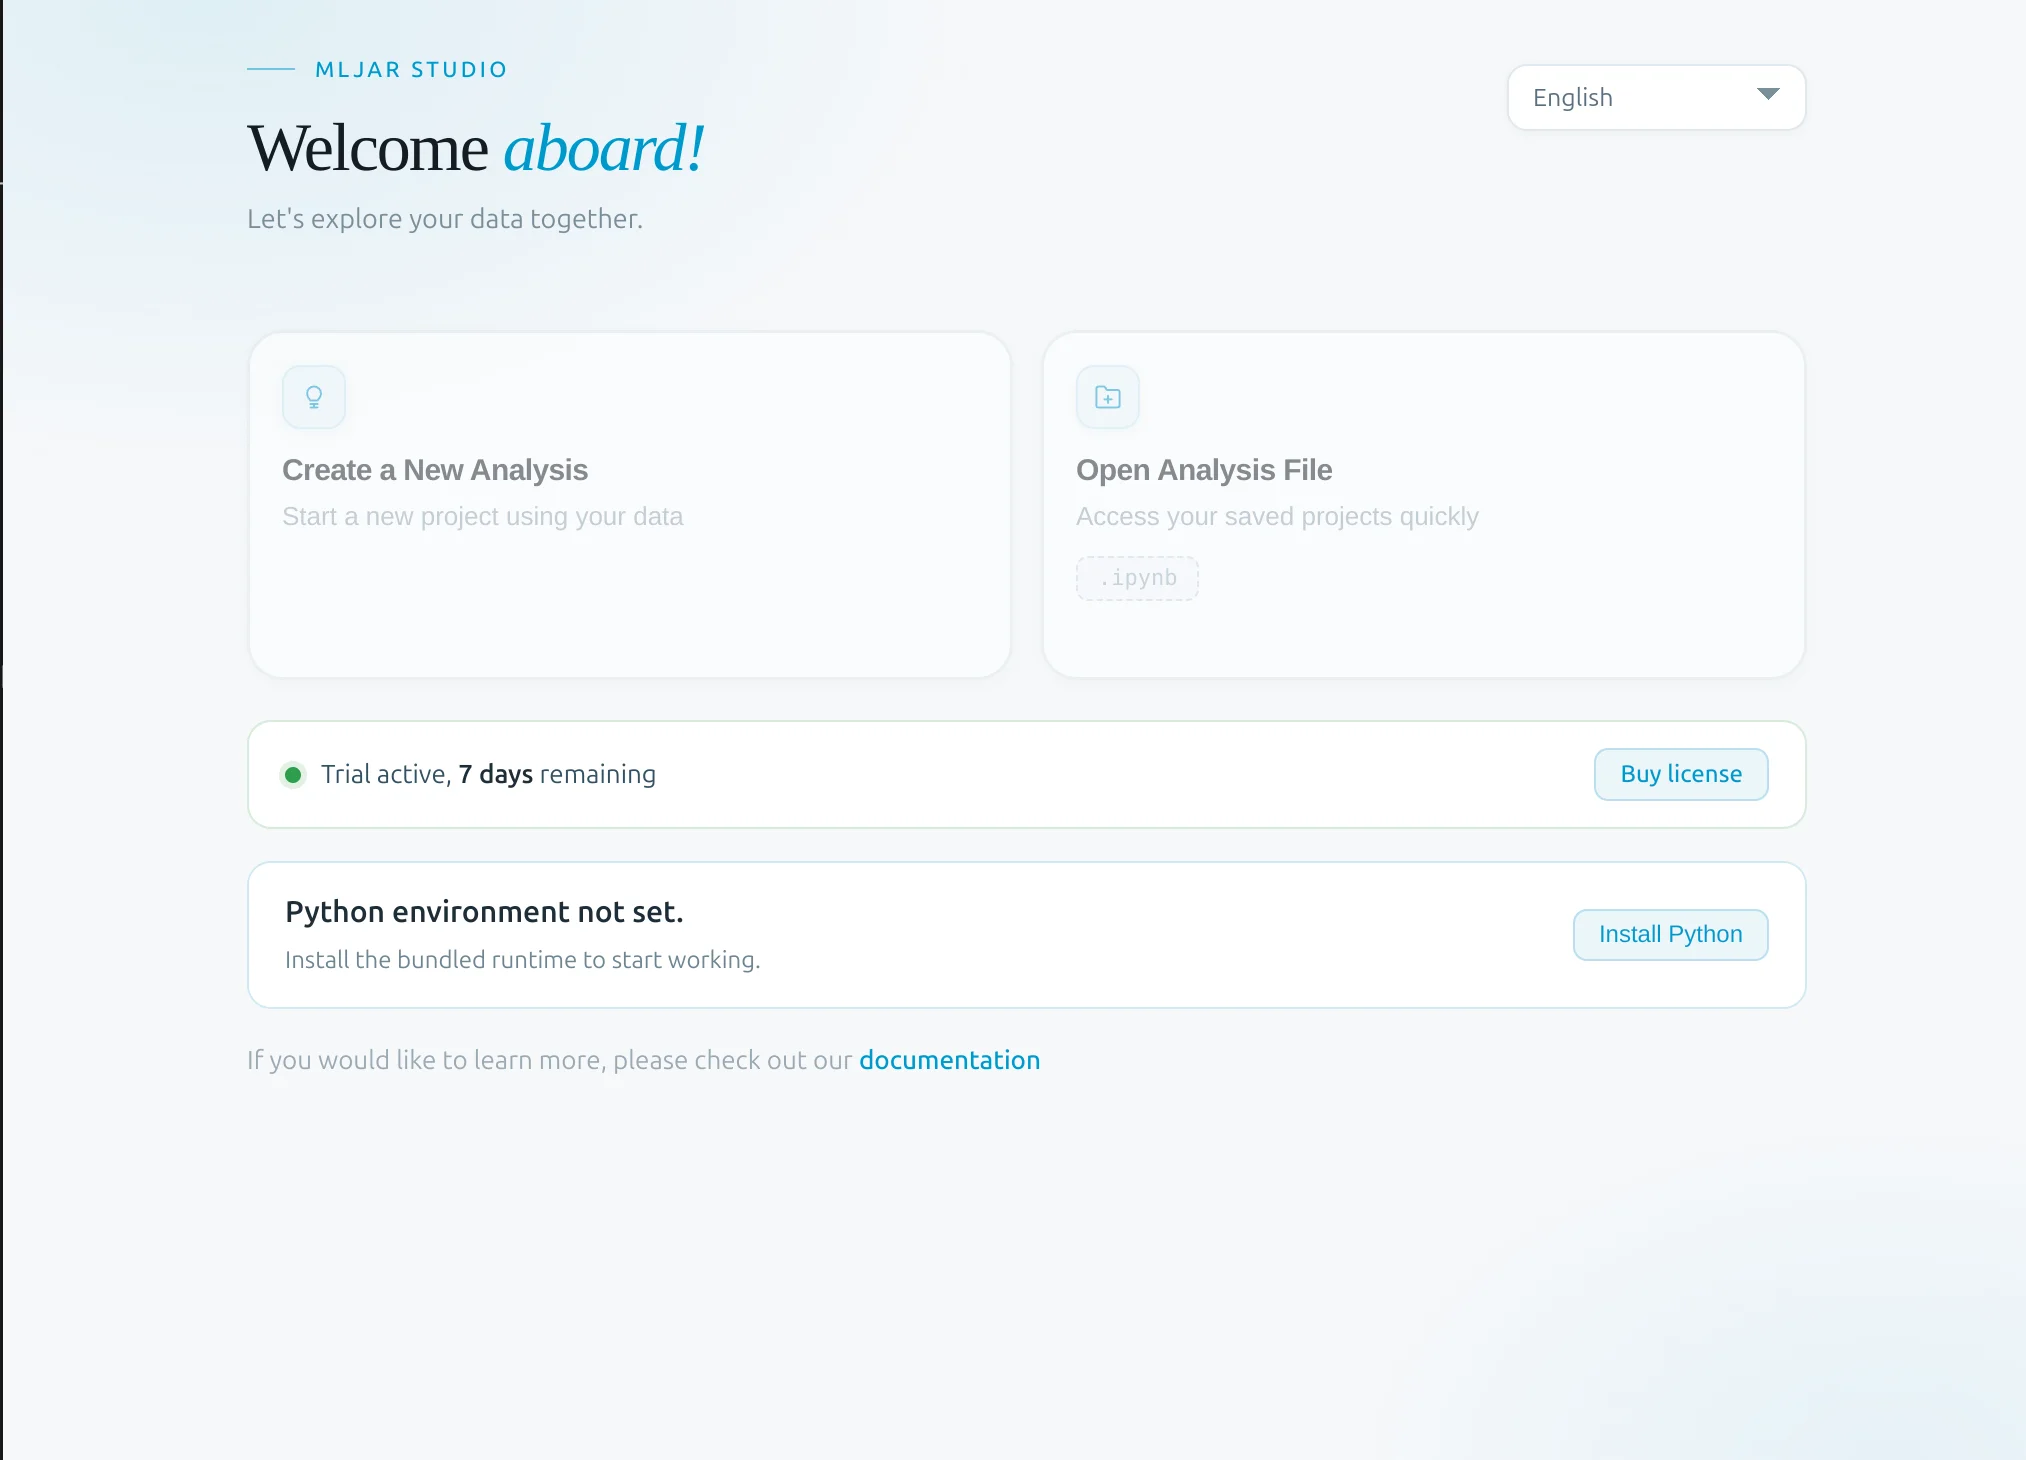
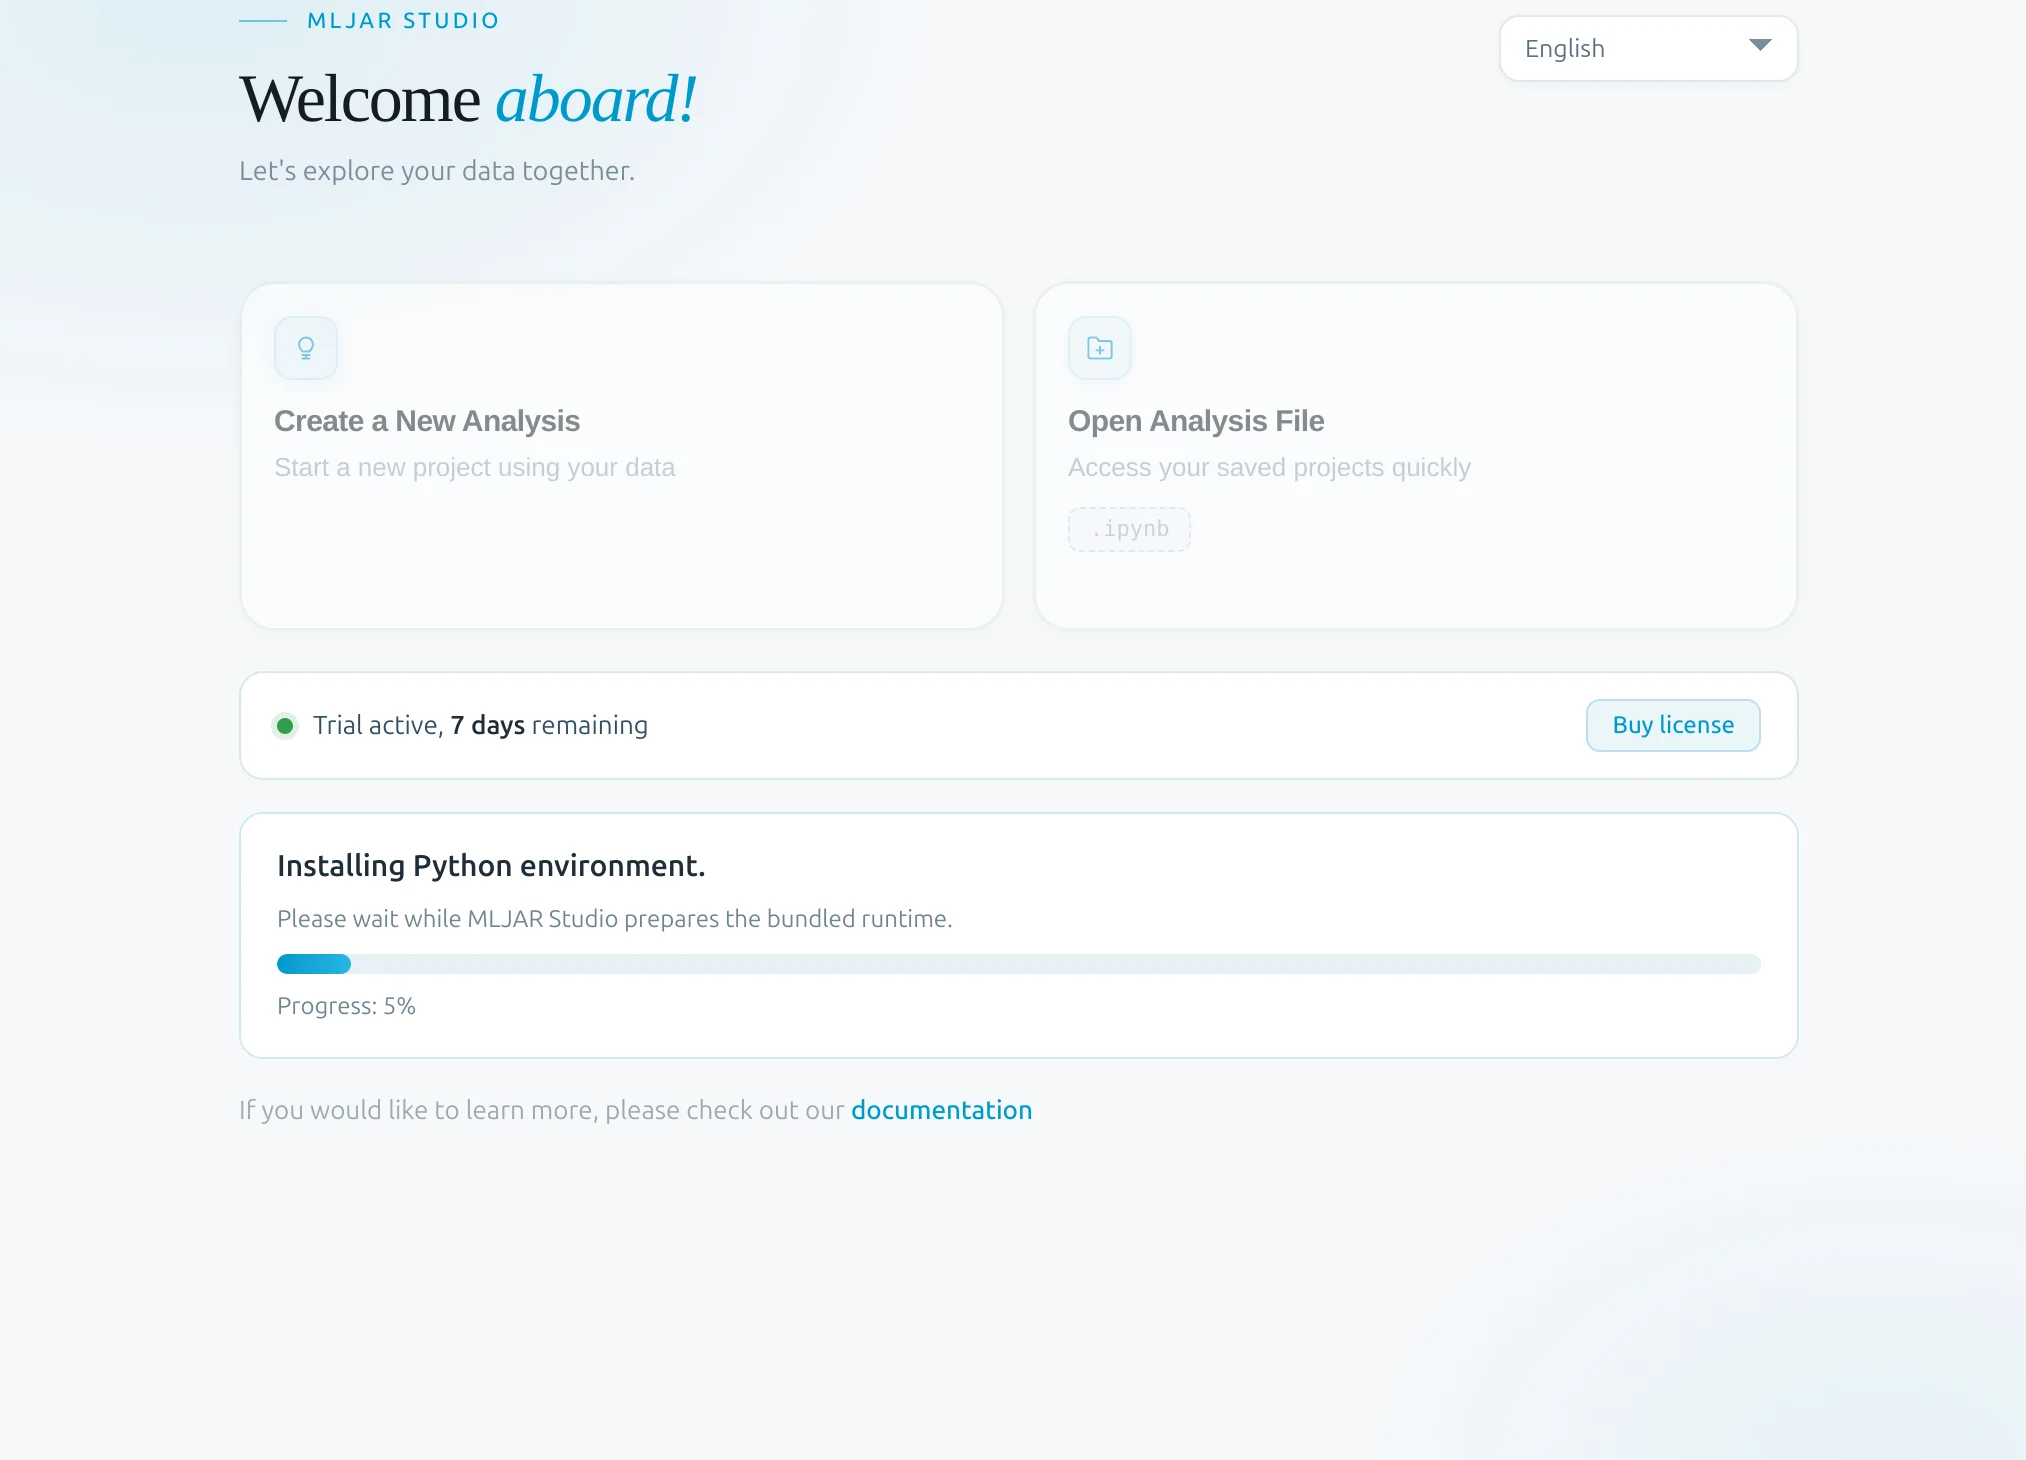
Next, install Python by clicking Install Python. MLJAR Studio will prepare the Python environment for you automatically, so you do not need to configure anything manually.
Please wait while Python is being installed.
When setup is finished, you will see the welcome screen. Click Create a New Analysis to begin.
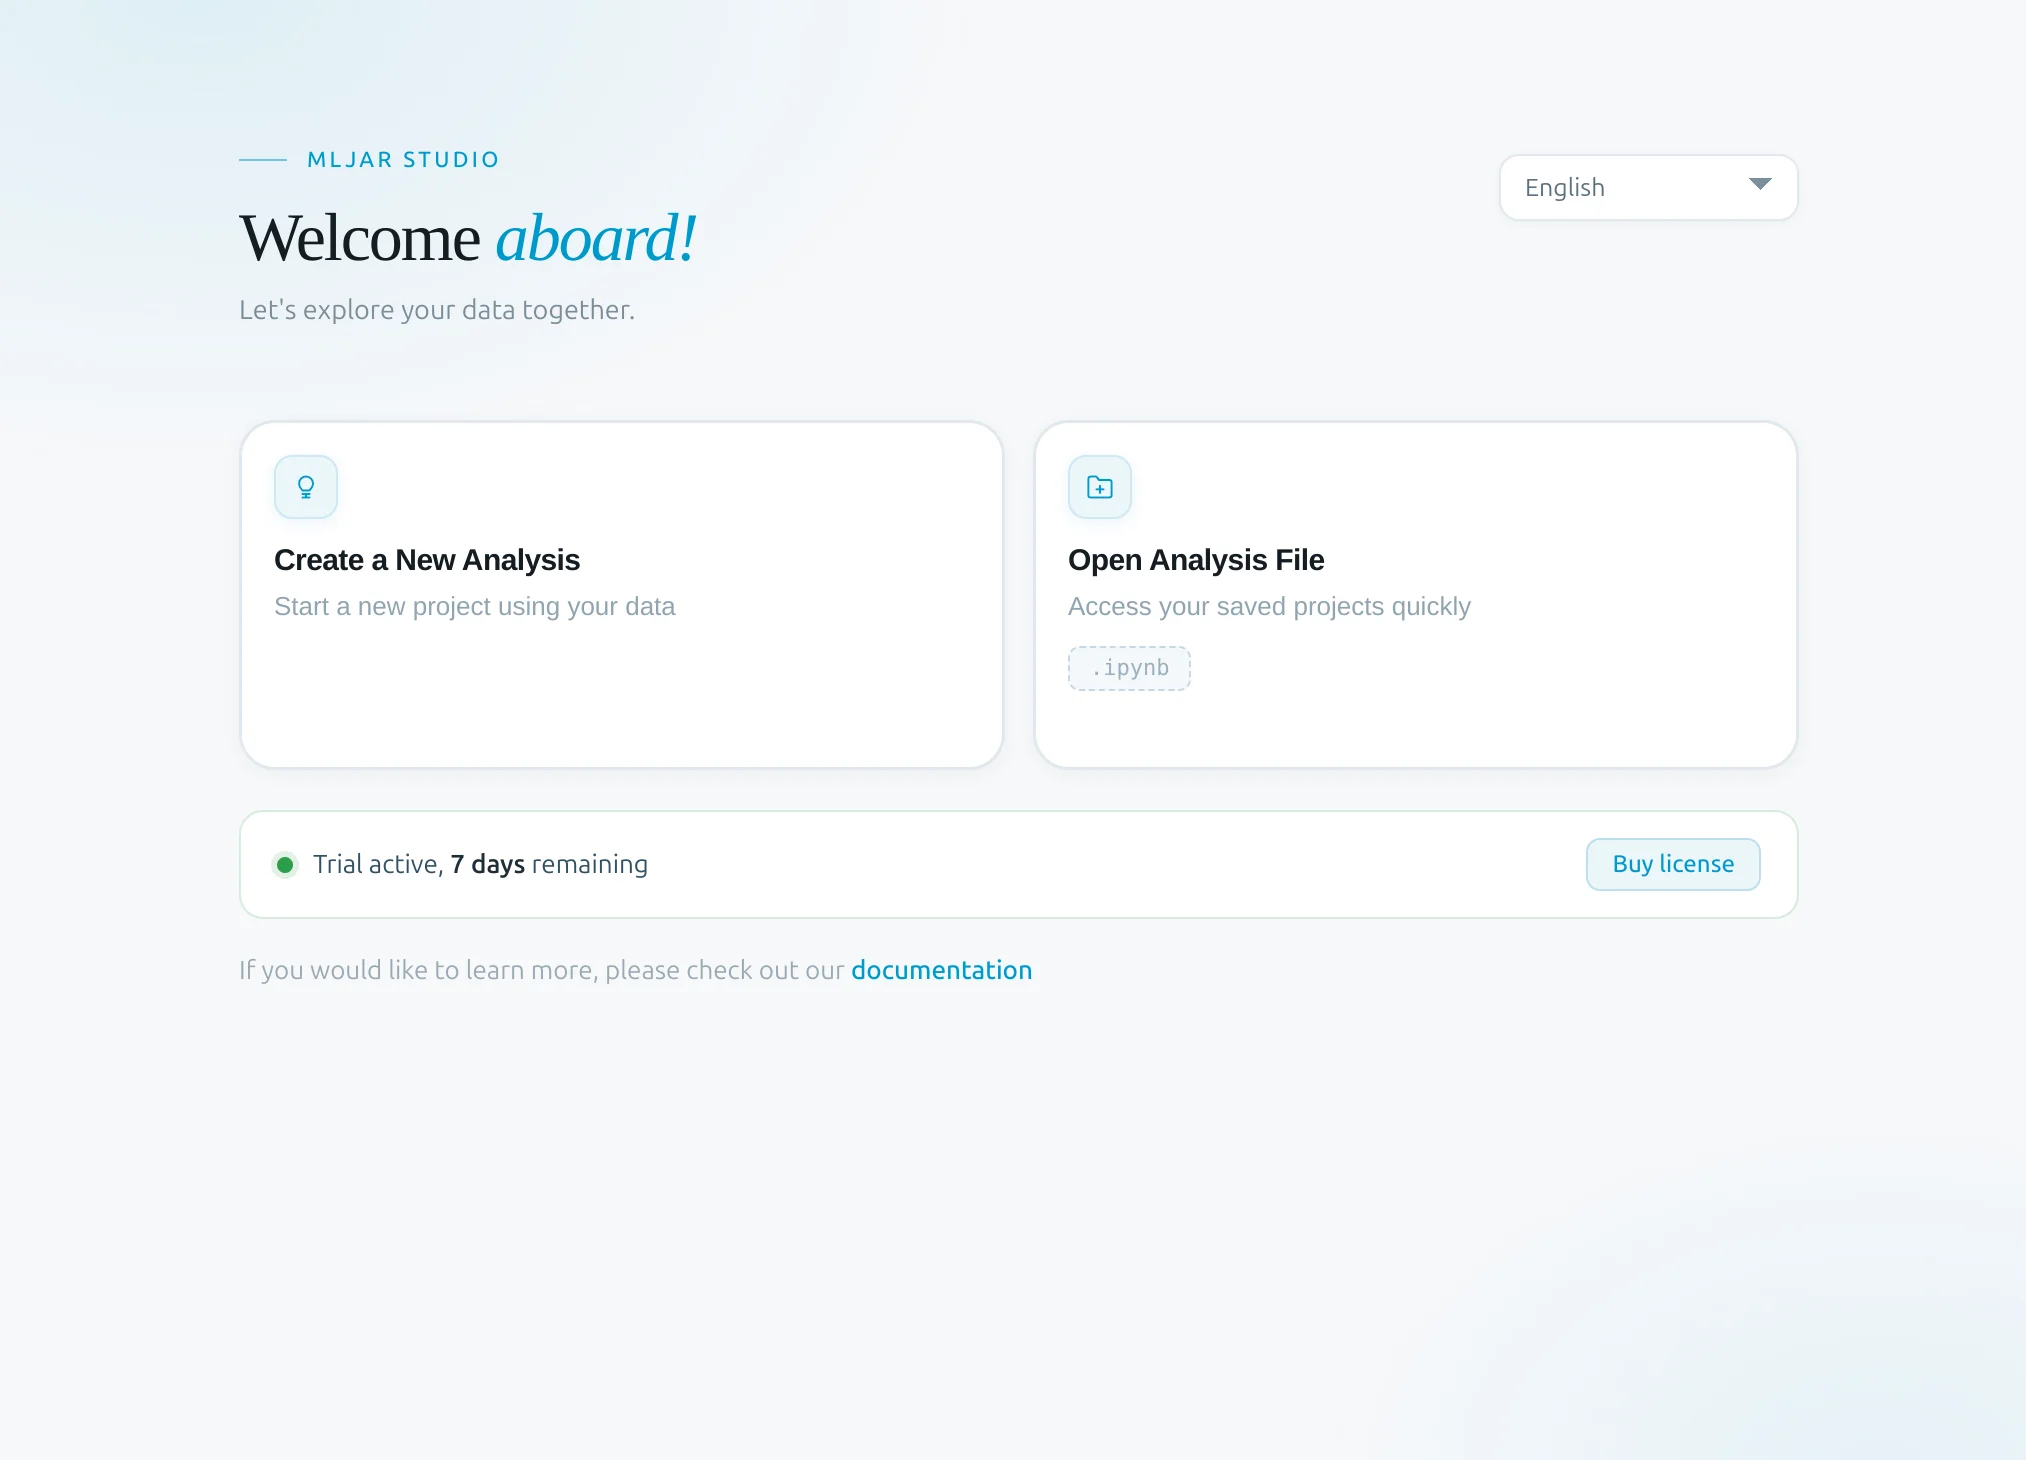
You are now ready to use MLJAR Studio. The app will open the getting-started screen, where you can create your first notebook and begin working with data.
