The 8 surprising ways how to use Jupyter Notebook
The Jupyter Notebook is a great tool for experimentation with code. It provides the REPL (read-eval-print loop) with a visual interface for plots, tables and many more. You can mix Markdown and selected programming language (usually Python). It is a default choice of development and experimentation environment for data scientists and machine learning practitioners. Have you heard about other ways to use the Jupyter Notebook? Let's explore 8 alternative ways of how to use Jupyter Notebook that might surprise you!
1. Package development
Surprise, surprise! The Jupyter Notebook can be used for python package development. There is a package nbdev for this. It can greatly speed-up package development with:
- automatic documentation generation and publishing on GitHub pages,
- write tests in notebook (wow!) and setup Continous Integration (CI) with GitHub Actions,
- automatic publishing on PyPi and conda,
- two-way synchronize between notebook and source code - yes, you can use traditional IDE for code edits and then see it in Jupyter!

The package is developed by Fast.ai (the company behind courses about Machine Learning for developers). Below is the video of Jeremy Howard (Fast.ai founder) about why notebooks are great for software development:
2. Web app
There are two ways to convert Jupyter Notebook to web apps with use of open-source tools. You can use:
voilawithipywidgets,Mercuryframework.
The voila turns Jupyter Notebook into a standalone web application. The interactive widgets are added with ipywidgets package. The voila starts a Tornado application with Jupyter kernel for each user.
The Mercury is an alternative to voila. It adds interactive widgets to the notebook without changes in the code. The YAML header is used to define online presence of the notebook. It makes the process of converting notebook to web application very easy - there is no need to write additional code for User Interface. Additional features of Mercury are:
- built-in app gallery, you can serve multiple notebooks as web app,
- download executed notebook as HTML or PDF,
- add authentication to notebook - only logged users can see the notebook (super easy to add with one line of YAML!),
- produce files with notebook and make them available for download.
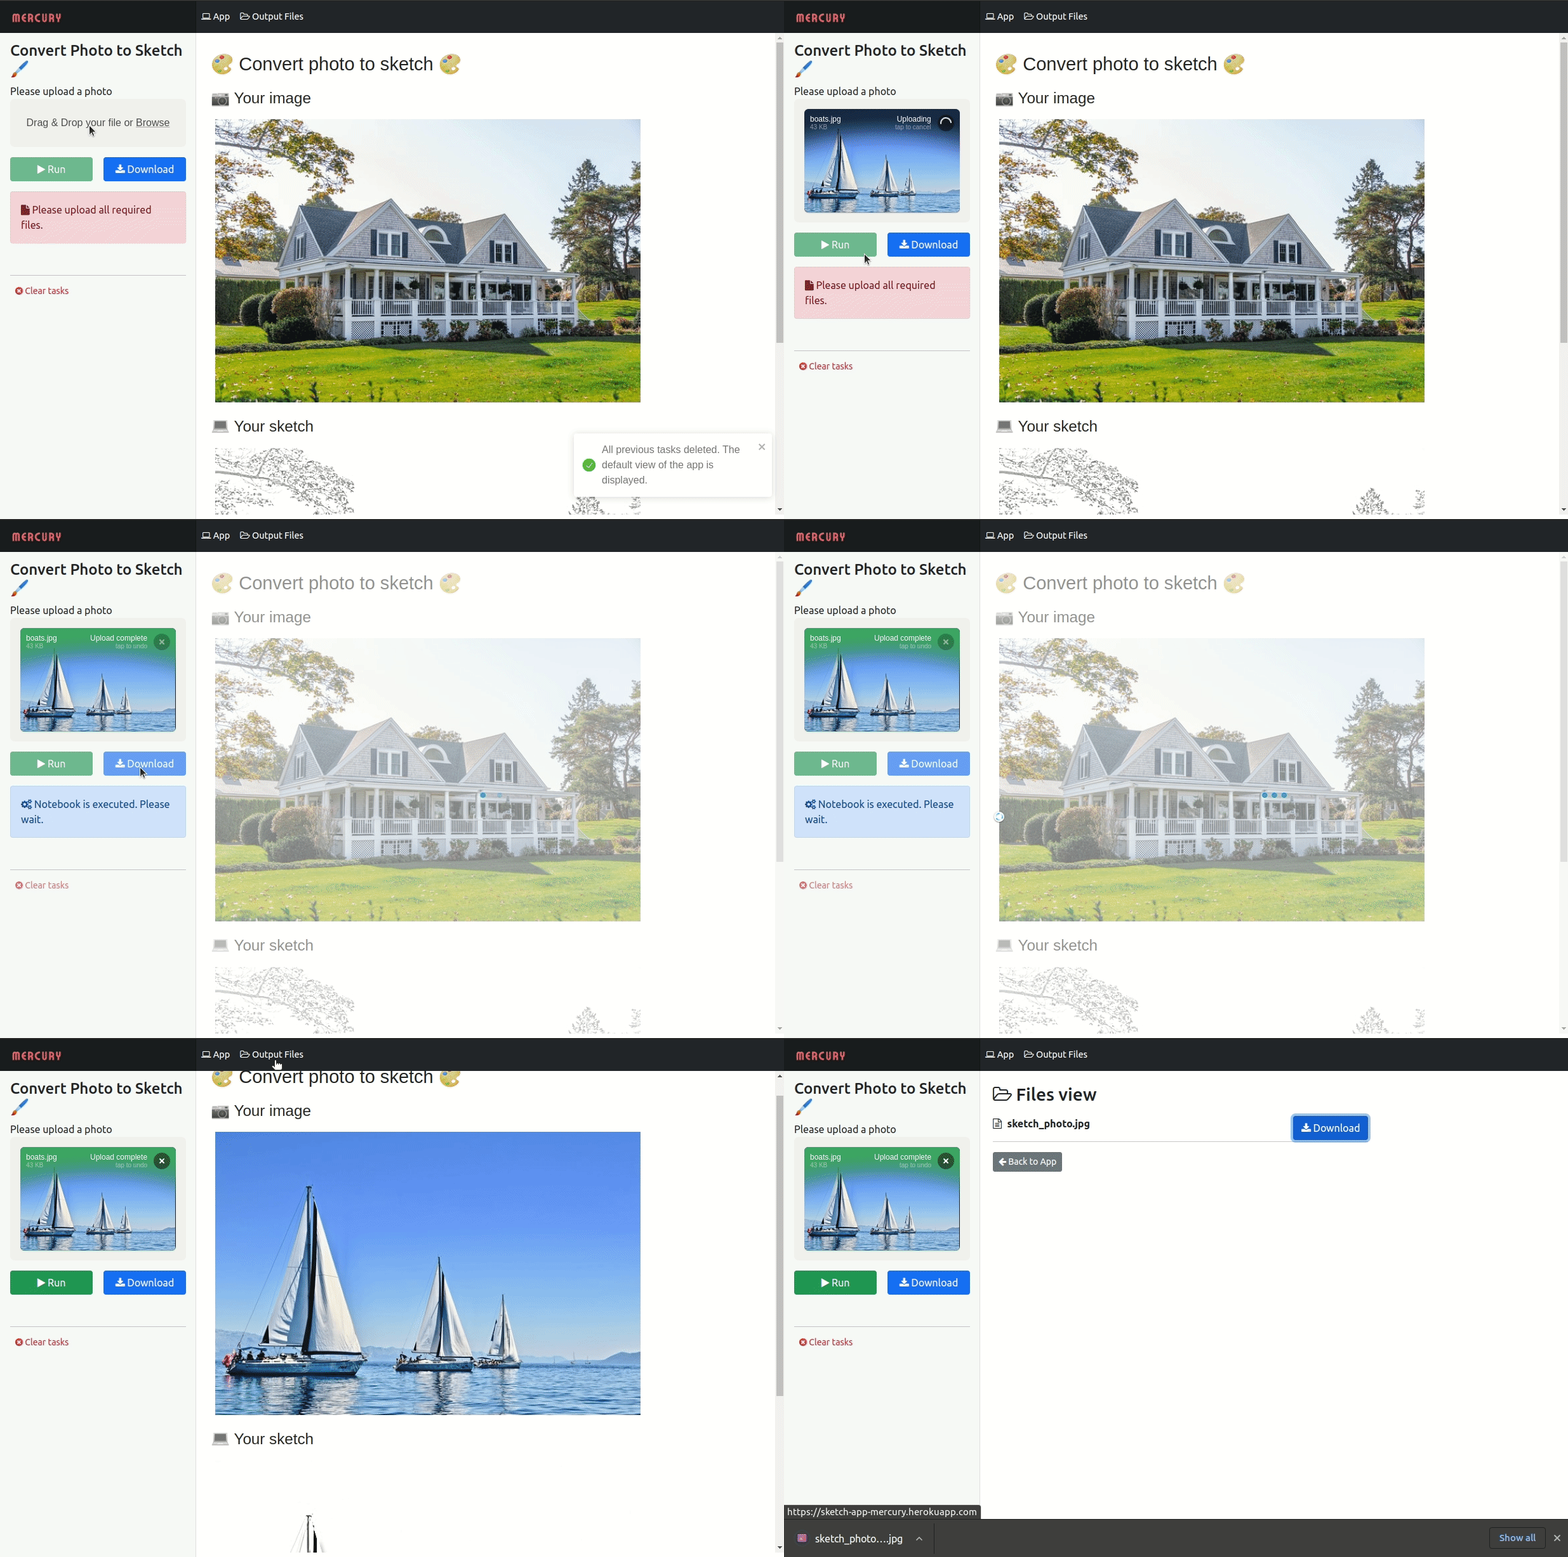
Example application created with Mercury for converting images into sketches:

Tutorials with example applications built with Mercury:
- Computer Vision web app from Jupyter Notebook for converting images to sketches,
- NLP web app from Jupyter Notebook to compute text sentiment.
3. Slides
You can create slides with Jupyter Notebook. This might be a life saver if your presentation has a lot of plots that need to be often updated. You don't need to do this manually, you can simply execute notebook with slides as output. The presentation created with Jupyter Notebook is using reveal.js package. Notebook can be converted to slides with nbconvert or Mercury. The nbconvert tool needs to be called in the terminal. The conversion command is below:
jupyter nbconvert --to slides <your-notebook>
If you decide to use Mercury tool, then you will need to add YAML configuration in the notebook. You can simply run:
mercury run
in the directory with your notebook and the Mercury will generate slides for you. The important difference between nbconvert and Mercury is that latter allows to add widgets to the presentation and recompute slides even during the presentation. What is more, Mercury makes it super easy to deploy presentations to the cloud (it can be done with one command on Heroku!). Below is a YouTube video with the presentation that was made in Jupyter Notebook. The code for presentation is on the GitHub, it is also hosted on Heroku (free dyno) at budapest-ml-forum-2022.herokuapp.com.
When building slides with Jupyter Notebook you might find the RISE extension very helpfull. It allows you to preview to slides during writing.
4. Book
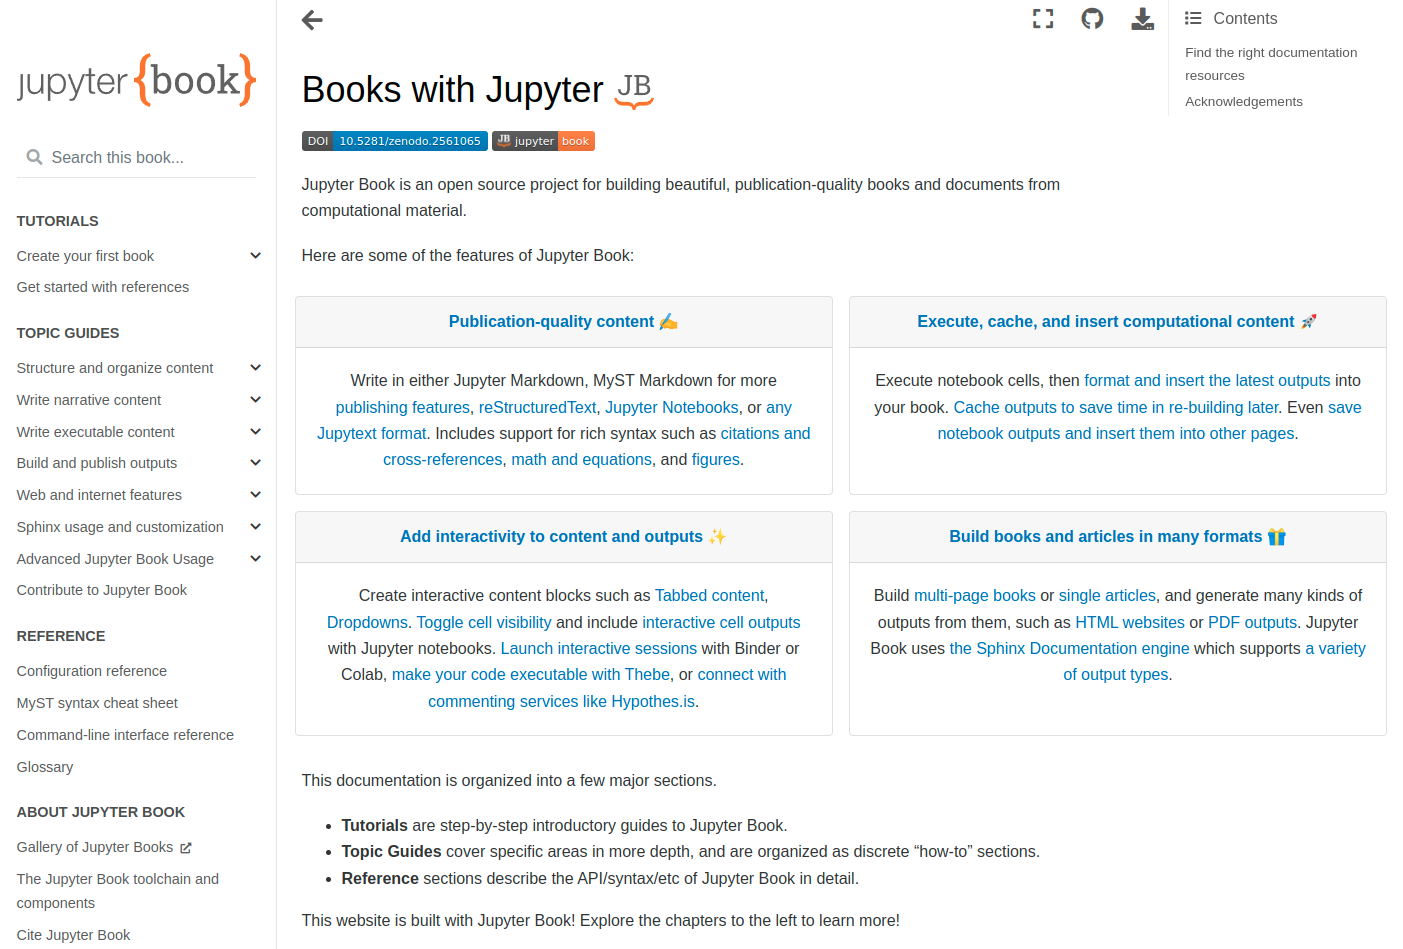
You can create books with Jupyter Notebooks! There is a project called jupyter-book. It is an open-source tool for building publication-quality books and online documents. The book can be published as online website or can be exported to PDF file. It is a perfect for publishing computational materials. You can write code and include output of cells in the content.
The documentation of the tool is also created with jupyter-book. It is available at jupyterbook.org.

5. Blog
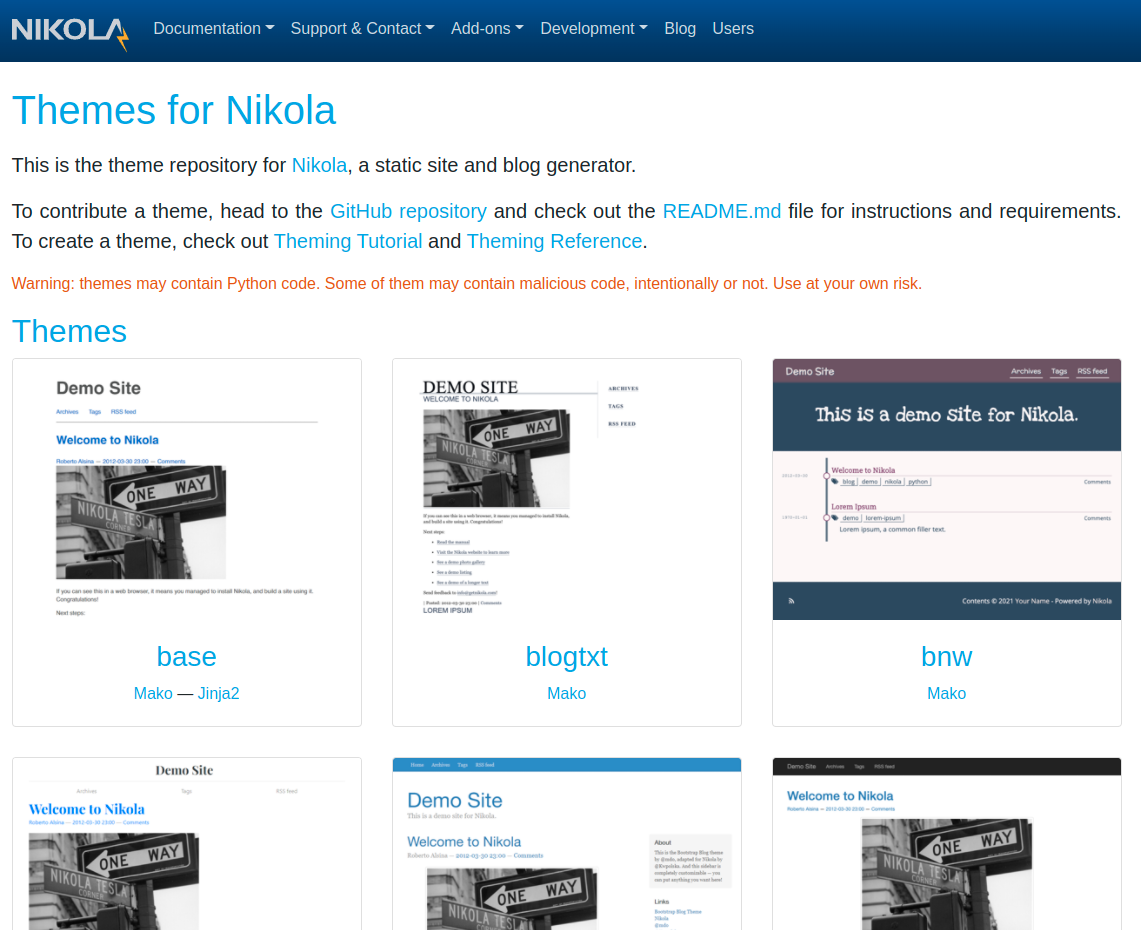
You can create a blog with Jupyter Notebook. Of course, you can do it manually, for example export every notebook to HTML file (with nbconvert) and then just publish all files as static website. But you can do much better with Nikola framework. It reads your Jupyter Notebooks and produce the static website. The tool is open-source with MIT License (Nikola GitHub repo). It comes with many themes, tags, feeds, archives, comments and can be easily extended.

6. Report
You can automate report generation with Jupyter Notebook (and Python of course!). This can be achieved in many ways:
- you can convert your notebook into PDF with
nbconvert. It is important to know thatnbconvertnot only converts Jupyter Notebooks into different formats, like HTML, Markdown, PDF, Latex, but also can execute the notebook. - you can use
papermillto execute parametrized notebooks. It can be very usefull if you would like to create several versions of the report. - you can use
Mercuryfor sharing notebooks as parametrized reports. What is more, you can schedule report generation and export final reports as HTML or PDF files.
7. Dashboard
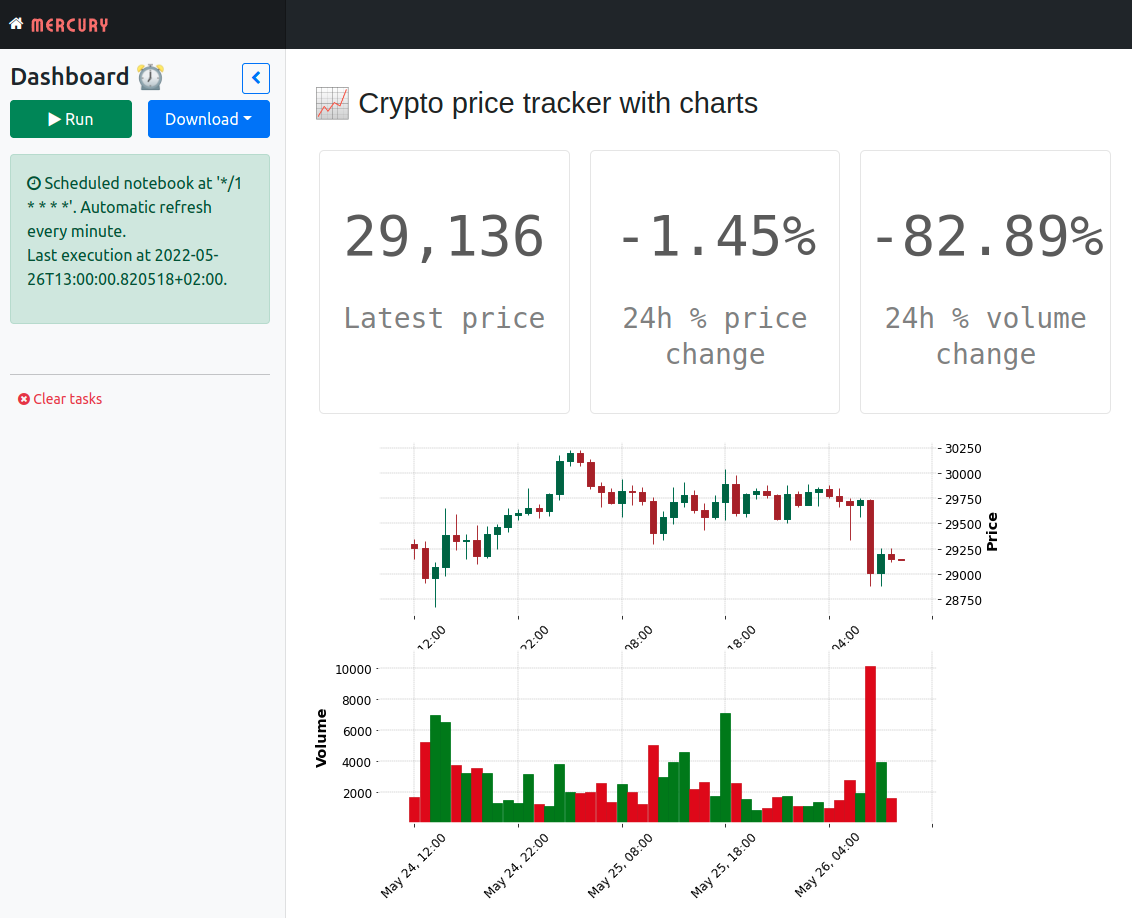
The interactive dashboards can be easily created with Python in Jupyter Notebook. The Mercury tool can be used to convert it to web-based application that can be shared over the internet. What is more, there is a schedule option available in Mercury that allows the notebook (dashboard) execution in predefined time intervals. It accepts the crontab-like string with interval definition.
Example YAML for notebook scheduling:
---
title: Dashboard ⏰
description: Schedule execution every minute!
schedule: '*/1 * * * *'
---

8. REST API
You can build REST API endpoints with Jupyter Notebooks. There are two packages for doing this:
- Jupyter Kernel Gateway,
- Mercury framework.
The Jupyter Kernel Gateway can be used to define many endpoints in the single notebook. For example:
# GET /hello/world
print("hello world")
# POST /contacts
# decode the request
req = json.loads(REQUEST)
# pull out the body
body = req['body']
# generate a new contact ID
new_contact_id = str(uuid.uuid4())
# put what we can about the contact in the dictionary
contacts[new_contact_id] = {field: body.get(field) for field in fields}
print(json.dumps({'contact_id': new_contact_id}))
The above code will create the GET endpoint at /hello/world address and POST endpoint at /contacts.
The Mercury can be alternative to Jupyter Kernel Gateway. It has different approach - one notebook is a one POST endpoint. The notebook name (to be strict, a slug) is the endpoint name. The notebook during the execution saves the response as JSON file. After notebook execution, the response is returned by the server. You can read more about this approach in the documentation.
Summary
The Jupyter Notebook is a great tool not only for experiments but also for software development. There are plenty of things that can be created with it. You can use Jupyter Notebook to create web apps, packages, blogs, dashboards, slides, REST API, books, and reports. The mix of code and Markdown with a connection of rich outputs gives endless possibilities.
About the Authors


Related Articles
- Develop NLP Web App from Python Notebook
- The 2 alternative approaches for Jupyter Notebook widgets
- The ipynb Jupyter Notebook File Extension
- How to create Mercury private fork and customize?
- PDF cheatsheets for 32 Jupyter Notebook Shortcuts
- The 7 ways to run Jupyter Notebook online
- The 5 ways how to style text in Jupyter Notebook
- How to share Jupyter Notebook with non-programmers?
- The 4 ways to export Jupyter Notebook as PDF
- How to hide code in Jupyter Notebook?