How to create Mercury private fork and customize?
The open-source framework Mercury is a perfect tool for sharing notebooks as web apps with non-programmers. The Mercury software is dual licensed. It has open-source AGPL_v3 license and commercial friendly license. With open-source license any user can freely use the Mercury to share their notebooks. The open-source users don't have to publicly share their notebooks. If they do any changes to the Mercury itself all changes need to be public. The white-labeling is prohibited. The commercial friendly license allows for private forks and white-labeling (you can use your own branding). What is more, commercial users have access to more features and dedicated support. In this post, I will show you how to create a private fork of Mercury repository.
How to create private fork of Mercury?
The Mercury consists of two repositories:
- the public, open-source repository available to everyone at https://github.com/mljar/mercury,
- the private, closed-source repository available only to commercial users at https://github.com/mljar/mercury-pro/ You need to have a commercial license to see the repository. You can buy the license at our pricing website.
In this article I will show you how to create a private fork of the open-source repository. With private fork you will be able to keep your changes private and pull updates from the upsteam repository.
There is no a strict thing as a private fork in the GitHub. I will show you how to make a repository that will behave almost as a forked one and will be private.
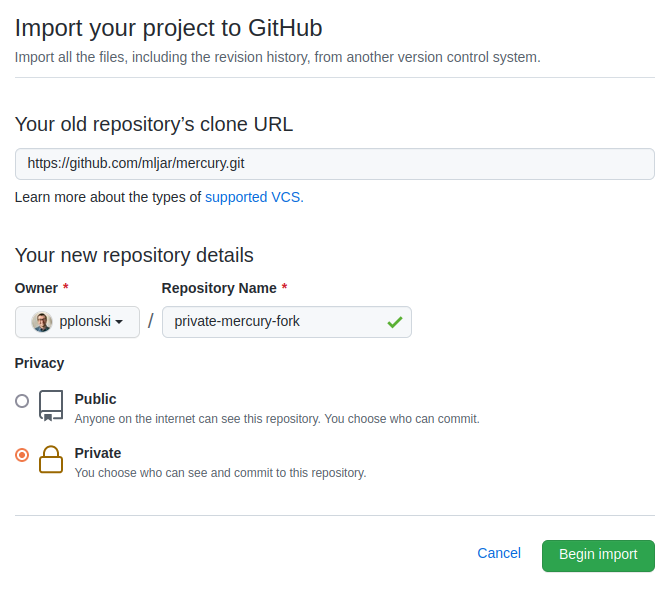
I will use the GitHub service for importing the projects. Please open the tool in your web browser by pointing to https://github.com/new/import address. Please set the URL to https://github.com/mljar/mercury.git. You can name your project as you want, I set the name private-mercury-fork and marked the project as private. Please see details in the image below:
After clicking the Begin import you should see the importing view:

After successfull import, you should be able to open your repository.
Please clone the repository to your local machine, you can get the repo address on the GitHub website:
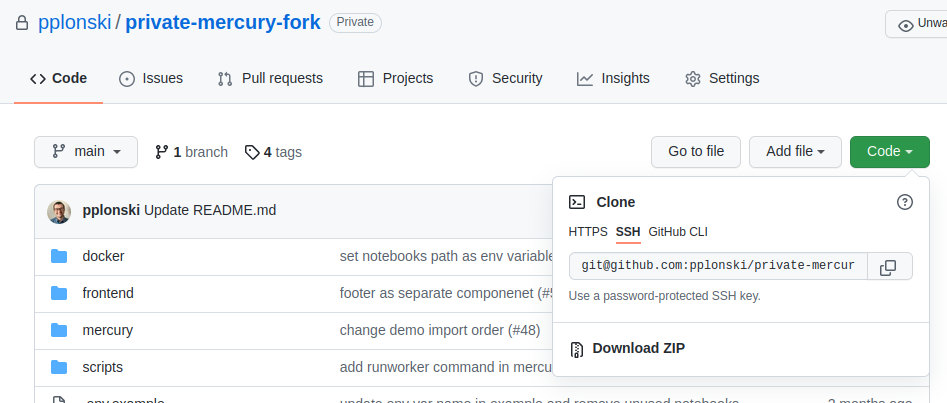
The command that I used to clone the repo:
git clone git@github.com:pplonski/private-mercury-fork.git
Please change the directory to the project repo. We will need to add upstream repository pointing to the https://github.com/mljar/mercury. We also need to disable the push for upstream repo:
# add upstream
git remote add upstream git@github.com:mljar/mercury.git

# disable push to upstream
git remote set-url --push upstream DISABLE
That's all. The private fork is ready :)
To get the latest code changes from Mercury and merge with yours:
git pull upstream main
White labeling
Below are described steps to customize the branding of Mercury app for commercial users.
Update logo and favicon
Please prepare your logo and favicon. The logo that I'm using in this post has 600x200 pixels size. It is in PNG format with transparent background.
The logo should be placed in the frontend/public directory in your private fork project. My logo file name logo is my_custom_logo.png. I've also updated the favicon.ico file with custom one. Please replace the original file with the new one in the frontend/public directory.
To update the code please search all occurences of mercury_logo.svg and reaplace with your logo file name (in my case it is my_custom_logo.png).
Update app title
Please open the frontend/public/intex/html file and change the lines:
    <meta
      name="description"
      content="Mercury: Easily share your Python notebooks"
    />
and
<title>Mercury</title>
Please set your information there.
Please open the frontend/public/manifest.json file and update the information about short_name and name.
Update the footer
The next step is to update the footer information. Please open the file frontend/src/components/Footer.tsx and change it to yours:
import React from "react";

export default function Footer() {
  return (
    <footer
      className="footer"
      style={{
        position: "absolute",
        bottom: "0",
        width: "100%",
        height: "40px",
        lineHeight: "40px",
        backgroundColor: "#f5f5f5",
        borderTop: "1px solid #e5e5e5"
      }}
    >
      <div className="container">
        <span className="text-muted">
          My company © 2022
        </span>
      </div>
    </footer>
  );
}
Let's check the new look of the application. Please naviagate to frontend directory in the console and install required packages:
yarn install
After installation please start the development server for the frontend:
yarn start
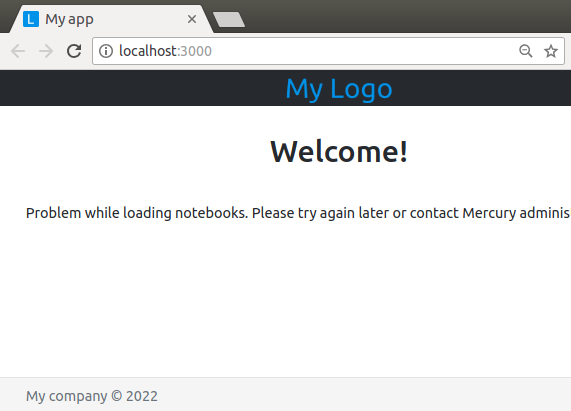
You should see the view like in the image below:
Start the backend
(This step is optional!)
To see some notebooks in the application please start the development server for backend. Please run the following commands from the mercury directory:
# set up virtual env and install packages
virtualenv menv
source menv/bin/activate
pip install -r requirements.txt
In the main project directory please execute:
./scripts/pack_mercury.sh
You can run the server and worker now with demo notebook:
# please execute in mercury directory
python mercury.py run demo
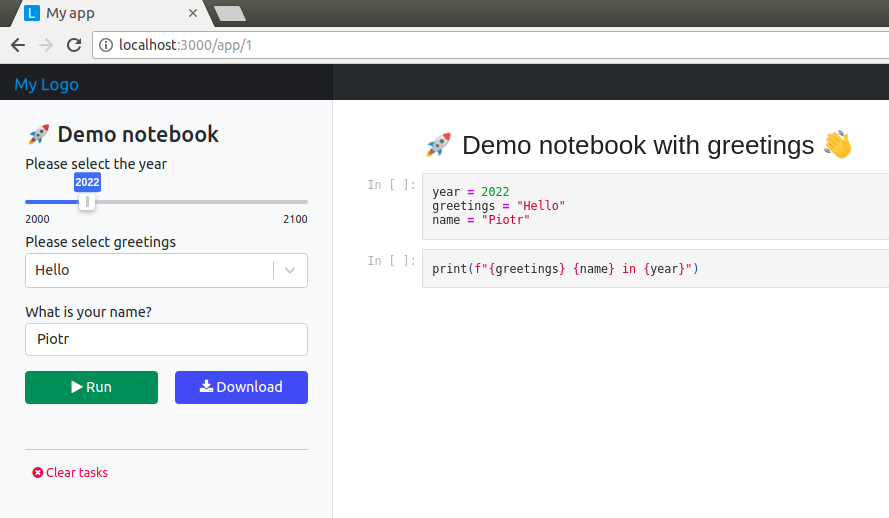
The demo notebook in the customized application:
Commit changes to private fork
It's time to commit all changes. To see what we have changed please run:
git status
Let's add a file with new logo:
# please run in the main project directory
git add frontend/public/my_custom_logo.png
Please commit all changes and push the code:
git commit -am "while labeling"
git push
You can check on the repository website on the GitHub that all changes are there.
Conclusions
The commercial license of Mercury allows private forks. The application can be easily customized. The private fork is a great solution to have upstream changes and keep customization as private.
What is more, the commercial license provides more features and dedicated support. To learn more about available licenses please refer to our pricing website. In the case of any questions, I'm happy to help!
AI Data Analyst on Your Computer
Use MLJAR Studio to explore data, find insights, and create reports with AI. Everything runs locally, so your data stays with you.
About the Author

Related Articles
- File upload widget in Jupyter Notebook web app
- Build Computer Vision Web App with Python, OpenCV and Mercury
- Develop NLP Web App from Python Notebook
- The 2 alternative approaches for Jupyter Notebook widgets
- The ipynb Jupyter Notebook File Extension
- PDF cheatsheets for 32 Jupyter Notebook Shortcuts
- The 8 surprising ways how to use Jupyter Notebook
- The 7 ways to run Jupyter Notebook online
- The 5 ways how to style text in Jupyter Notebook
- How to share Jupyter Notebook with non-programmers?