Create Retrieval-Augmented Generation using OpenAI API
I bet that you have heard of RAG before, but what it is? Retrieval-augmented generation (RAG) is a technique that enhances generative models by retrieving relevant information from external data sources to improve the accuracy and relevance of responses, which makes your work more productive. I want to show you how to create such a system using our new product - MLJAR Studio!
In this article, you will learn how to:
- create OpenAI API connection
- devide files into chunks
- generate embeddings for each chunk
- create a user query embedding
- find the best match chunk to a user query
- use the OpenAI model to create the response
Are you curious? Let's start!
Get MLJAR Studio
First of all, you will need to install MLJAR Studio - a powerful tool that allows you to code without much experience, it also saves a lot of time during programming. Without further ado, download MLJAR Studio from our website.
In case of problems with installation check out our tutorial.
Required libraries
You don't have to worry about any libraries. MLJAR Studio will help you with package installation and then will import them automatically.
Here's a cell with all imports (created by MLJAR Studio):
# import packages
import os
from dotenv import load_dotenv
from openai import OpenAI, AuthenticationError
from docx import Document
import numpy as np
from sklearn.metrics.pairwise import cosine_similarity
Create API connection
Firstly, you will need to get your API key from the OpenAI service. Here's a link: Get your API.
After that, open MLJAR Studio and find the Client connection recipe:
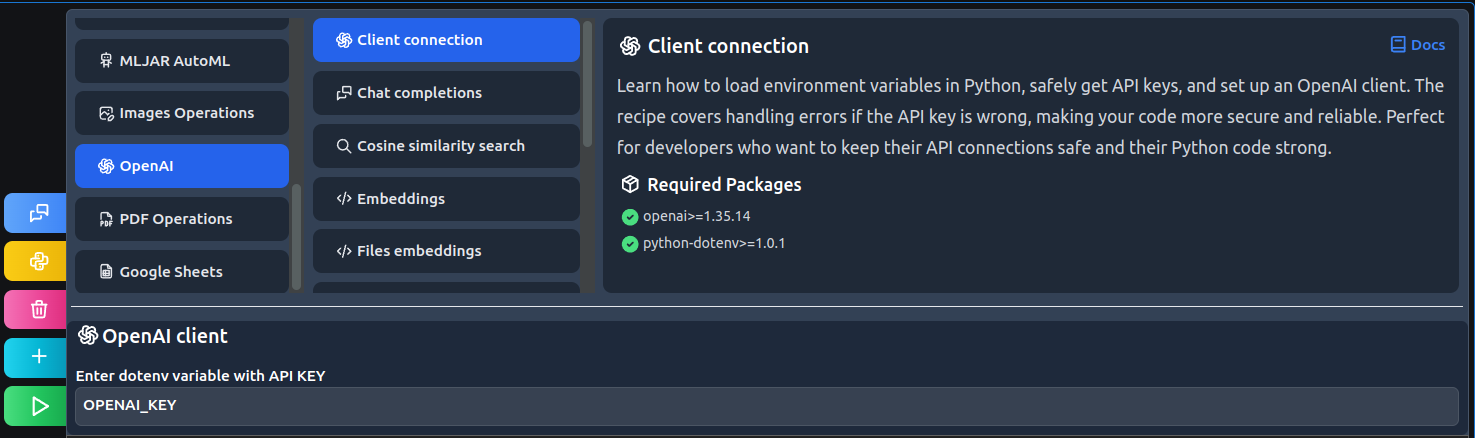
# load .env file
load_dotenv()

# get api key from environment
api_key = os.environ["OPENAI_KEY"]

# create OpenAI client
def create_client(api_key):
    try:
        client = OpenAI(api_key=api_key)
        client.models.list()
        return client
    except AuthenticationError:
        print("Incorrect API")
    return None

client = create_client(api_key)
Code explanation:
- Load dotenv credentials.
- Find the API key and set it as a variable.
- Create client connection function with error handling.
Generate file embeddings
Now, when you have created a client connection you can use all models that are available with OpenAI API. We used them to create a recipe that can divide PDF or DOCX files into chunks and generate embeddings for each chunk.
Find the Files embeddings recipe:
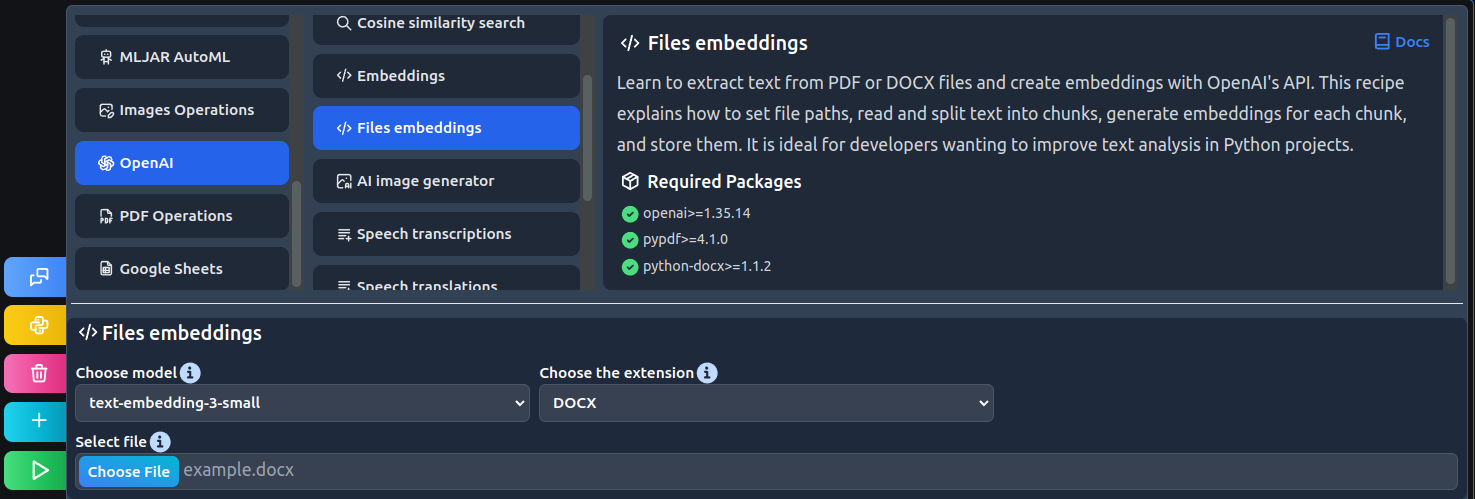
# set file path
filePath=r"example.docx"

# read file
doc = Document(filePath)

# declare lists
chunks = []
embeddings = []

# text division
for i in range(0, len(doc.paragraphs)):
    chunk = doc.paragraphs[i].text
    chunks.append(chunk)

# create embeddings
for i in range(0, len(chunks)):
    embedding = client.embeddings.create(
        input = chunks[i],
        model = "text-embedding-3-small"
    )
    embeddings.append(embedding.data[0].embedding)
Code explanation:
- Set file path as a variable.
- Read the DOCX file.
- Create a loop that goes through the file and creates chunks from each paragraph.
- Create another loop that generates embeddings for each chunk.
Find the best match chunk
You will need to create a query to search for cosine similarity between chunk embeddings. In simpler terms, find the best match chunk to a query.
Find the Cosine similarity search recipe:
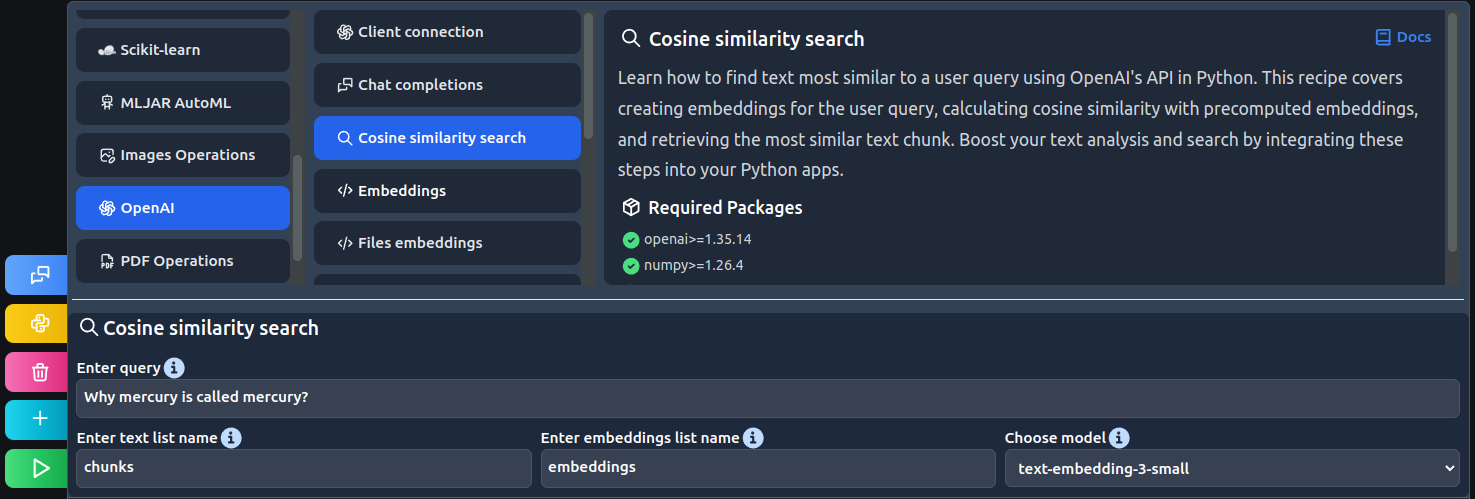
# define user query
user_query = "Why mercury is called mercury?"

# generate embedding
response = client.embeddings.create(
    input = user_query,
    model = "text-embedding-3-small"
)
query_embedding = response.data[0].embedding

# find most similar id
best_match_id = cosine_similarity(
    np.array(embeddings), np.array(query_embedding).reshape(1,-1)
    ).argmax()

# print most similar text
chunks[best_match_id]
Code explanation:
- Define the user query.
- Generate an embedding for the query.
- Find the best match chunk for the query.
- Print found chunk.
Ask AI model
After finding the relevant chunk, all you have to do is ask the AI model for a response based on this text fragment.
Find the Chat completions recipe:
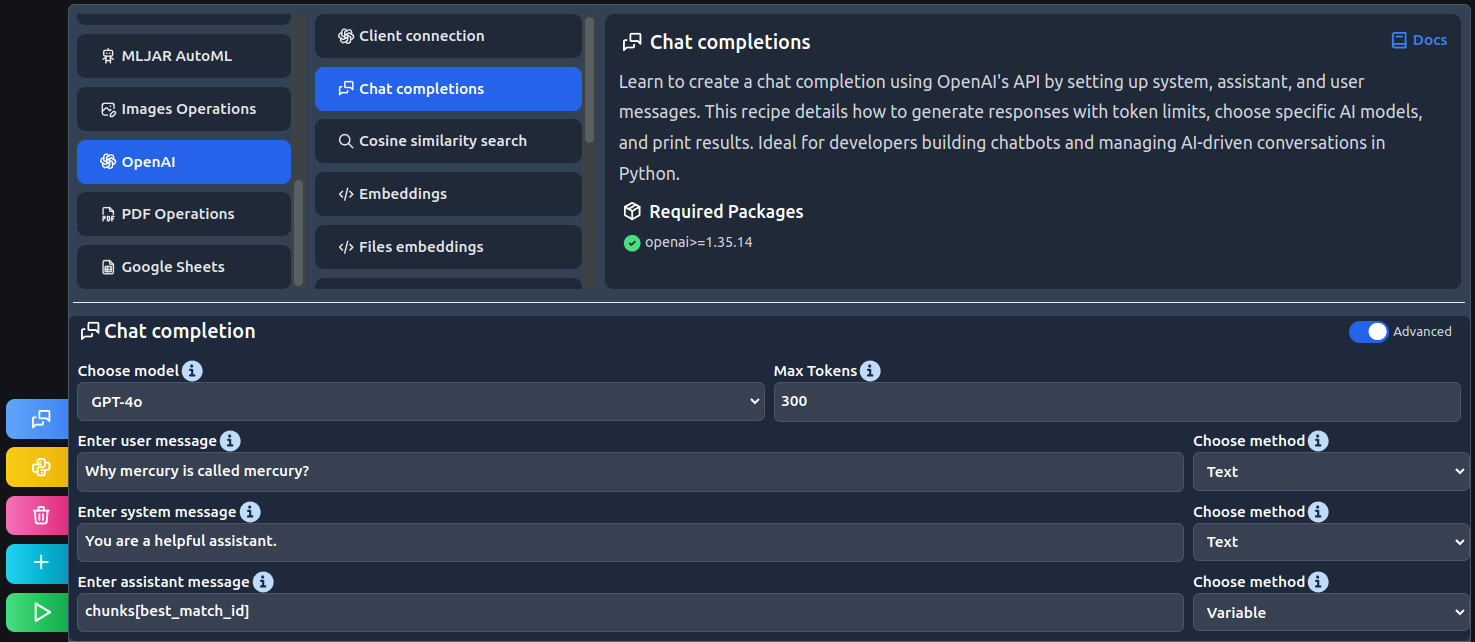
# create a chat completion
response = client.chat.completions.create(
    model="gpt-4o",
    messages=[
        {"role": "system", "content": "You are a helpful assistant."},
        {"role": "assistant", "content": chunks[best_match_id]},
        {"role": "user", "content": "Why mercury is called mercury?"},
    ],
    max_tokens=300
)

# get and print response
print(response.choices[0].message.content)
Code explanation:
- Create the chat completion with user, system, and assistant messages.
- Print the response.
Finally AI response:
Mercury is named after the ancient Roman god Mercurius (Mercury), who was the god of commerce, communication, and the messenger of the gods. The Romans associated this swift-moving planet with their fast-moving deity because it moves more quickly across the sky than any other planet, completing its orbit around the Sun in just 88 Earth days. This association with speed and swiftness is why the planet was given the name Mercury. In many other ancient cultures, the planet was also named after deities of speed, communication, or travel.
Conclusions
As you can see, creating quite a complex system like RAG with MLJAR Studio by your side is a piece of cake. But it's only one of many practical things you can do using MLJAR Studio.
Want to see the rest? Follow us to don't miss out on anything!
AI Data Analyst on Your Computer
Use MLJAR Studio to explore data, find insights, and create reports with AI. Everything runs locally, so your data stays with you.
About the Author

Related Articles
- Fairness in Automated Machine Learning
- 3 ways to access credentials in Jupyter Notebook
- How to create Dashboard in Python from PostgreSQL
- How to create Invoice Generator in Python
- ChatGPT can talk with all my Python notebooks
- Transfer data from Postgresql to Google Sheets
- Machine Learning Algorithm Comparison
- TabNet vs XGBoost
- 4 Effective Ways to Visualize LightGBM Trees
- 4 Effective Ways to Visualize Random Forest