ChatGPT can talk with all my Python notebooks
 As you might know, we are working on an open-source framework that can turn Python notebook into an interactive web application; it is called Mercury. Recently, we have added an option to execute notebooks with REST API. Moreover, we added a widget called APIResponse that allows you to return the dictionary as a JSON response. Because of this, we are able to connect any Python notebook to custom ChatGPT using Actions quickly. We would like to describe the flow of using Python notebook in ChatGPT to build your own custom GPT.
Of course, you can build a full REST API server with Django, Flask, or FastAPI to make your custom Python code available as REST API to ChatGPT. However, we believe that sharing Python notebooks with Mercury is much simpler and faster. You can host the Mercury server on your own infrastructure, or you can use our SaaS offering to deploy Python notebooks, so you can put your notebook online with one click. You can check Mercury Cloud pricing for details. This might be a good solution if you don't want to mess with docker-compose and nginx configuration.
How does it work?
Making Python notebook available in custom ChatGPT requires a few steps:
- You need to create a Python notebook.
- The notebook should be available online so ChatGPT can access it.
- Create custom GPT in GPT builder.
Let's dig into the details of each step. Additionally, we have created example Python notebooks with explanations so you can check them for a quick start:
- Custom action to send email from ChatGPT
- ChatGPT action to query Postgres database
- Use Google Sheets in custom ChatGPT
Create Python notebook
Please just create a normal Python notebook. You can use Jupyter Notebook, Jupyter Lab, VS Code, MLJAR Studio, or any other editor. If you would like to accept input parameters in the notebook, you can use Mercury input widgets, for example:
- Text widget to accept a string as an input parameter,
- Select widget to accept parameters from a list of choices,
- Slider widget to accept numeric parameter.
Using Mercury widgets is easy. Install the package with the command:
pip install mercury
Import module:
import mercury as mr
Add Text widget in the notebook:
name = mr.Text(value="Piotr", label="What is your name?", url_key="name")
That's it. The name parameter will appear in OpenAPI schema, which will be automatically generated. The parameter name is from url_key argument.
It is possible to return the dictionary as a JSON response from the notebook. Please use APIResponse to define JSON that will be returned as a request-response:
# return JSON response
response = mr.APIResponse({"message": "Hello from Mercury!",
                           "description": "Execute notebook with REST API"})
This is how it will look in the notebook:

Notebook deployment
You have two options for deploying Python notebook with Mercury:
- self-hosted server and deployment with docker-compose,
- Mercury Cloud SaaS service managed by us.
The easiest and fastest way it to use Mercury Cloud. In this article, we will use Mercury Cloud. If you will need help with self-hosted solution, please just create GitHub issue, and we will do our best to help you.
Please create an account in the Mercury Cloud and create a new site. Creating a new website with a unique domain address is as easy as filling the form below:
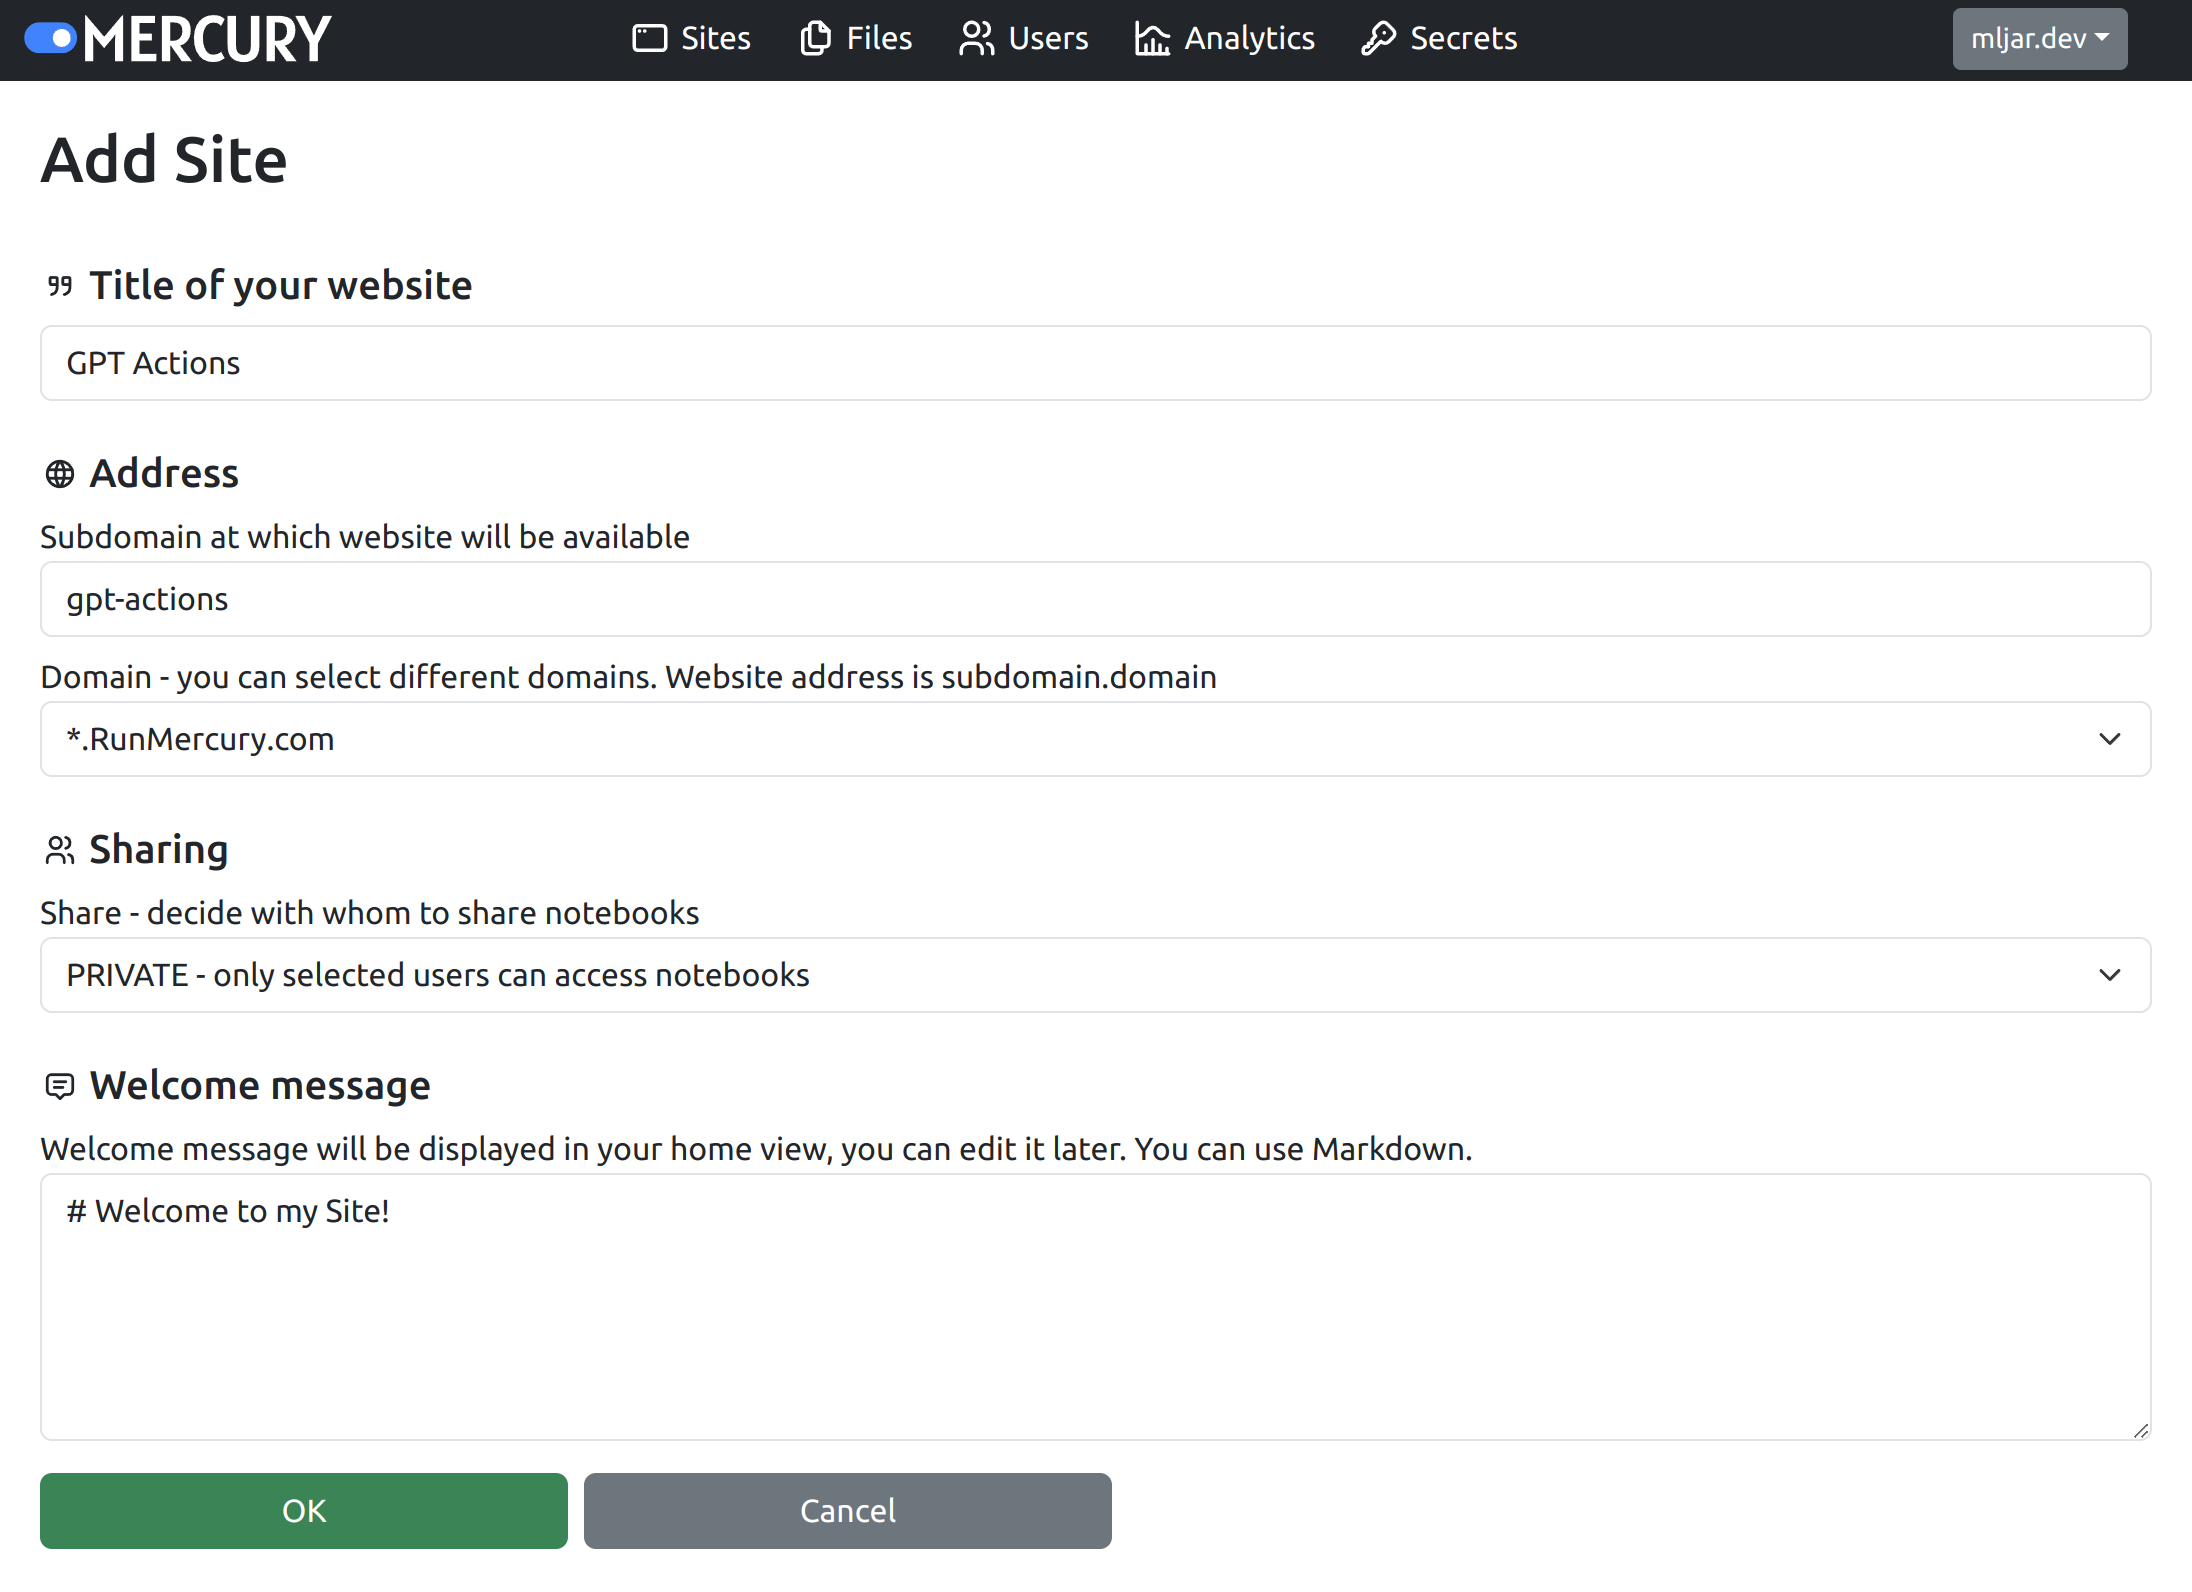
Please note that if you don't want to share notebooks in public, you should select PRIVATE in Sharing. Below is the view of the dashboard in the Mercury Cloud:
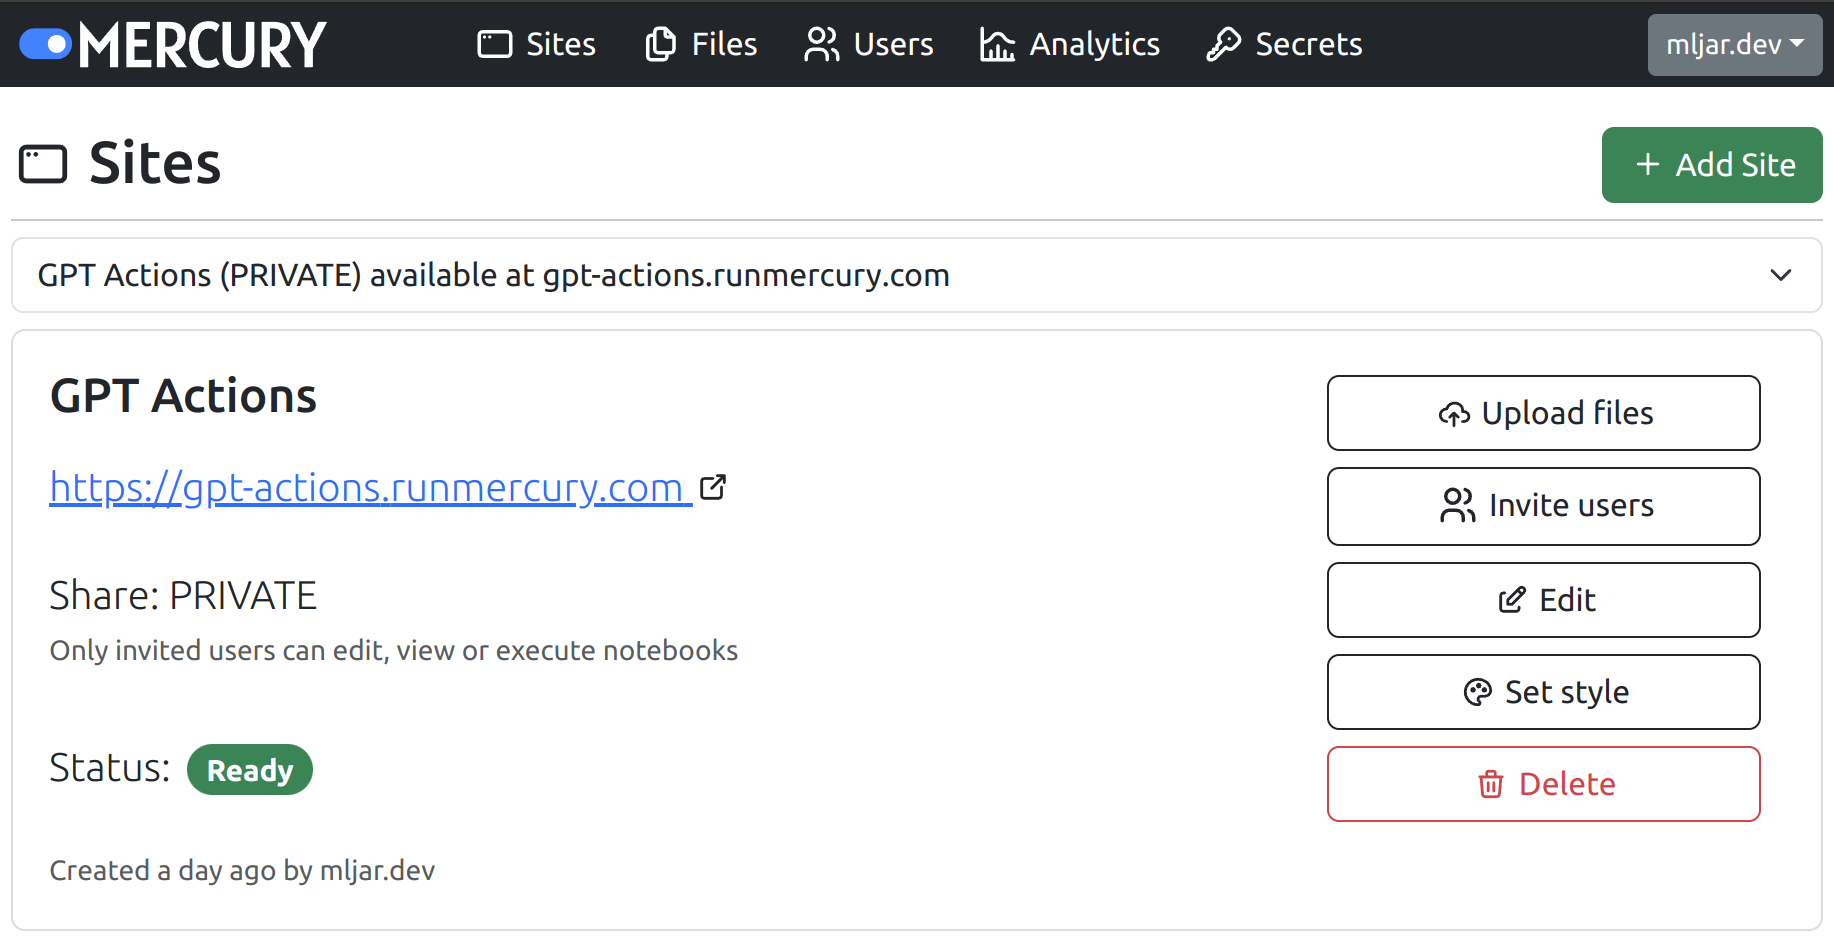
OK, the next step is to upload notebook file, just click Upload files button and select files.

You can upload notebook files in *.ipynb format and other files needed by notebook as well, for example data files. If your notebook needs additional packages, please just install requirements.txt file.
In the Mercury Cloud, you can also specify secrets that can be accessed as environment variables in the Python notebook.
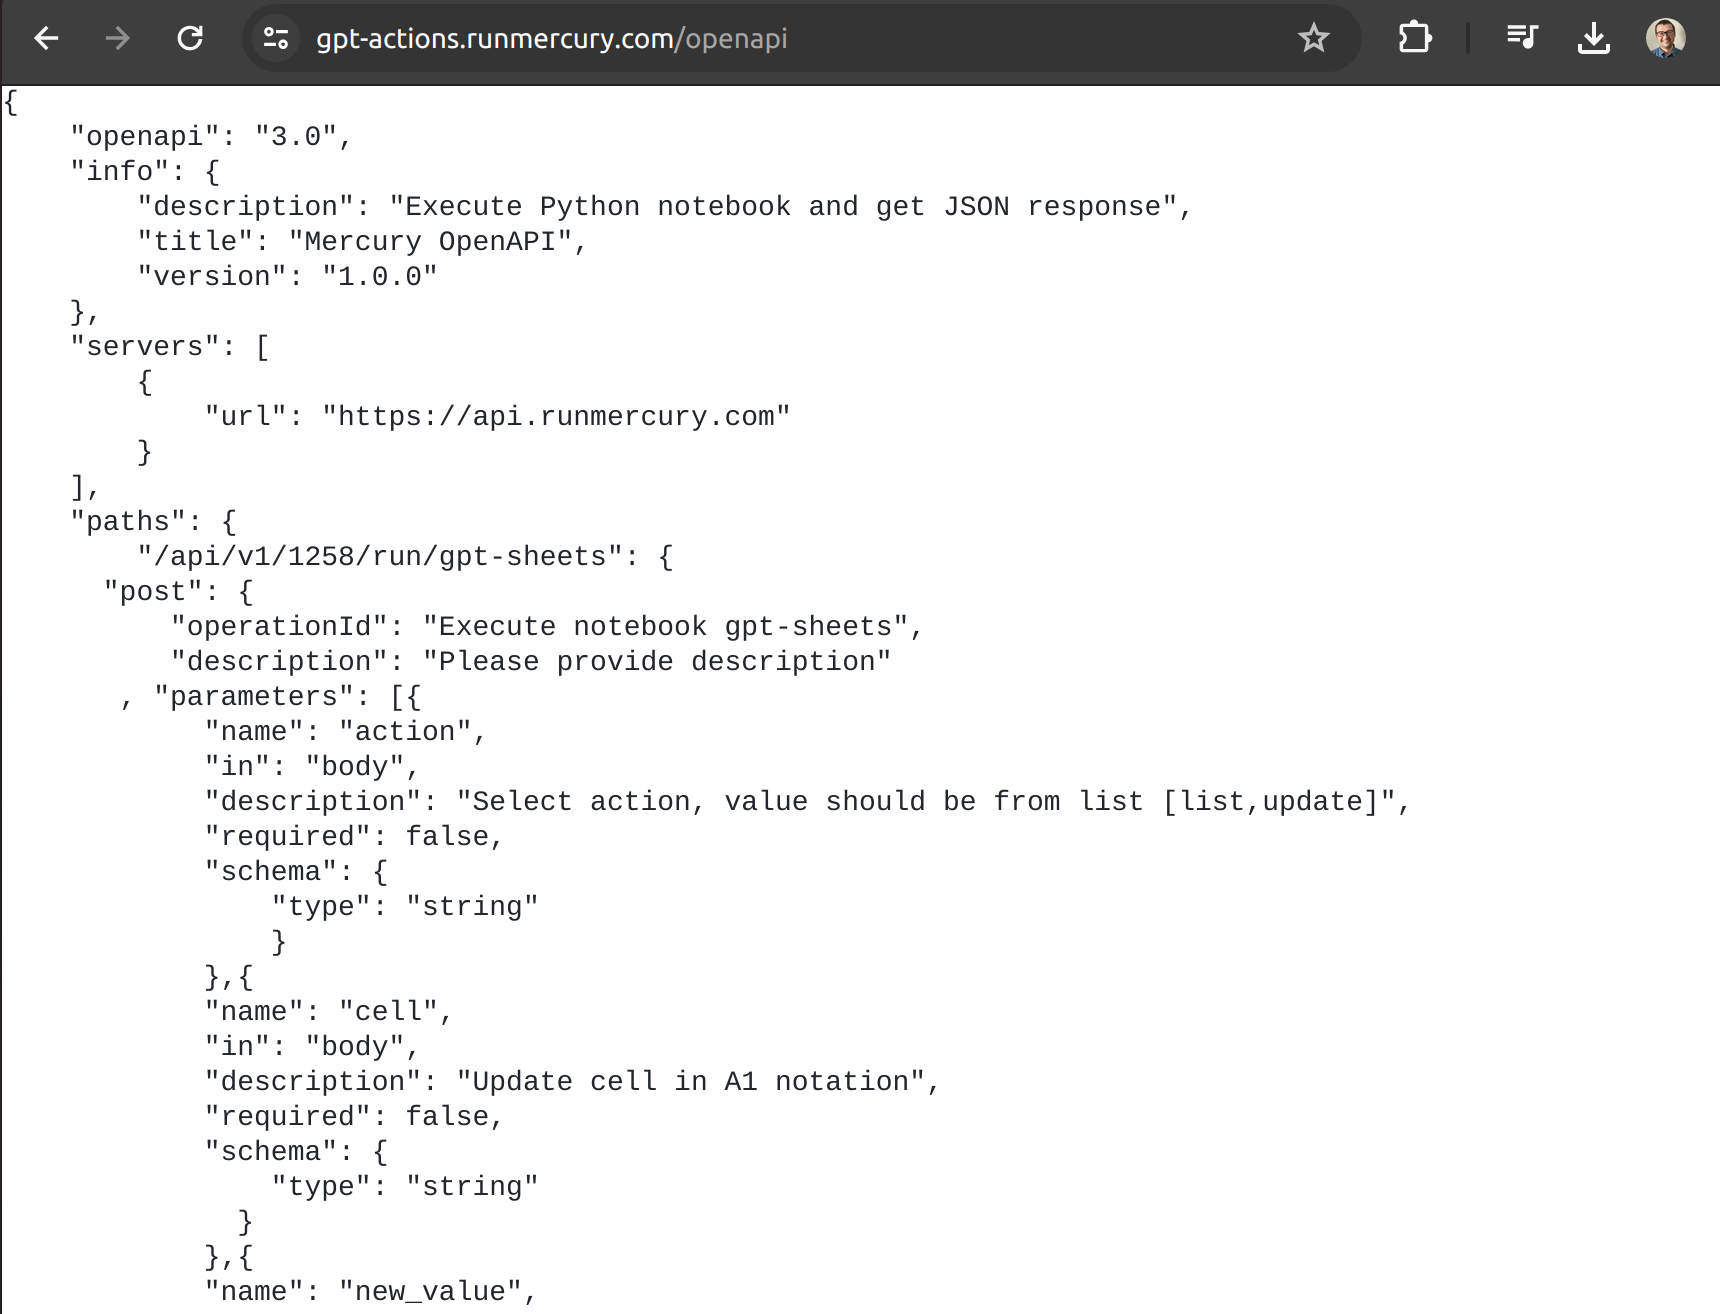
OK, the notebook should be available online. You can visit a created website. Mercury generates an OpenAPI schema for each website. Please find the OpenAPI link in the footer:
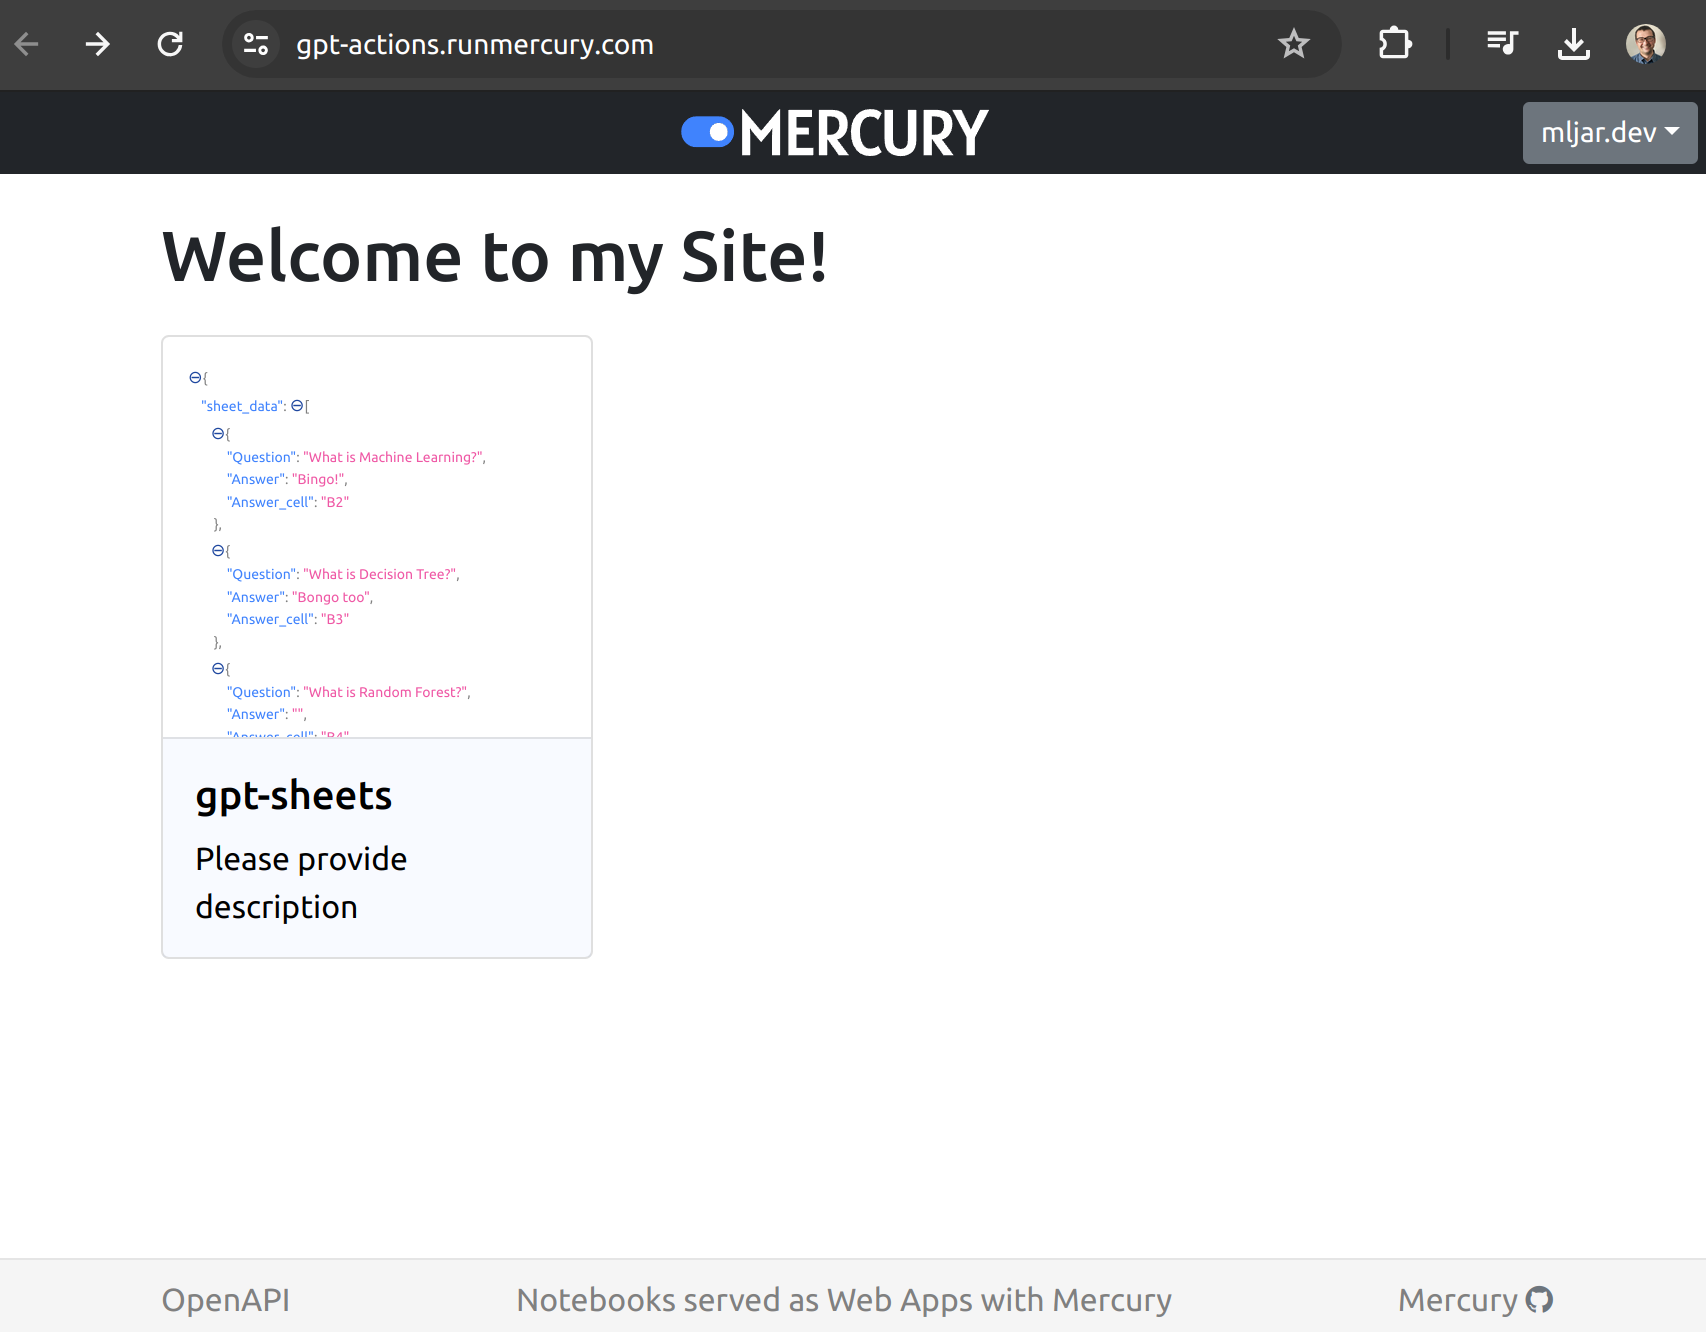
The OpenAPI schema for Python notebooks in Mercury:
Configure custom ChatGPT
Please open the custom ChatGPT configuration view and paste OpenAPI schema:
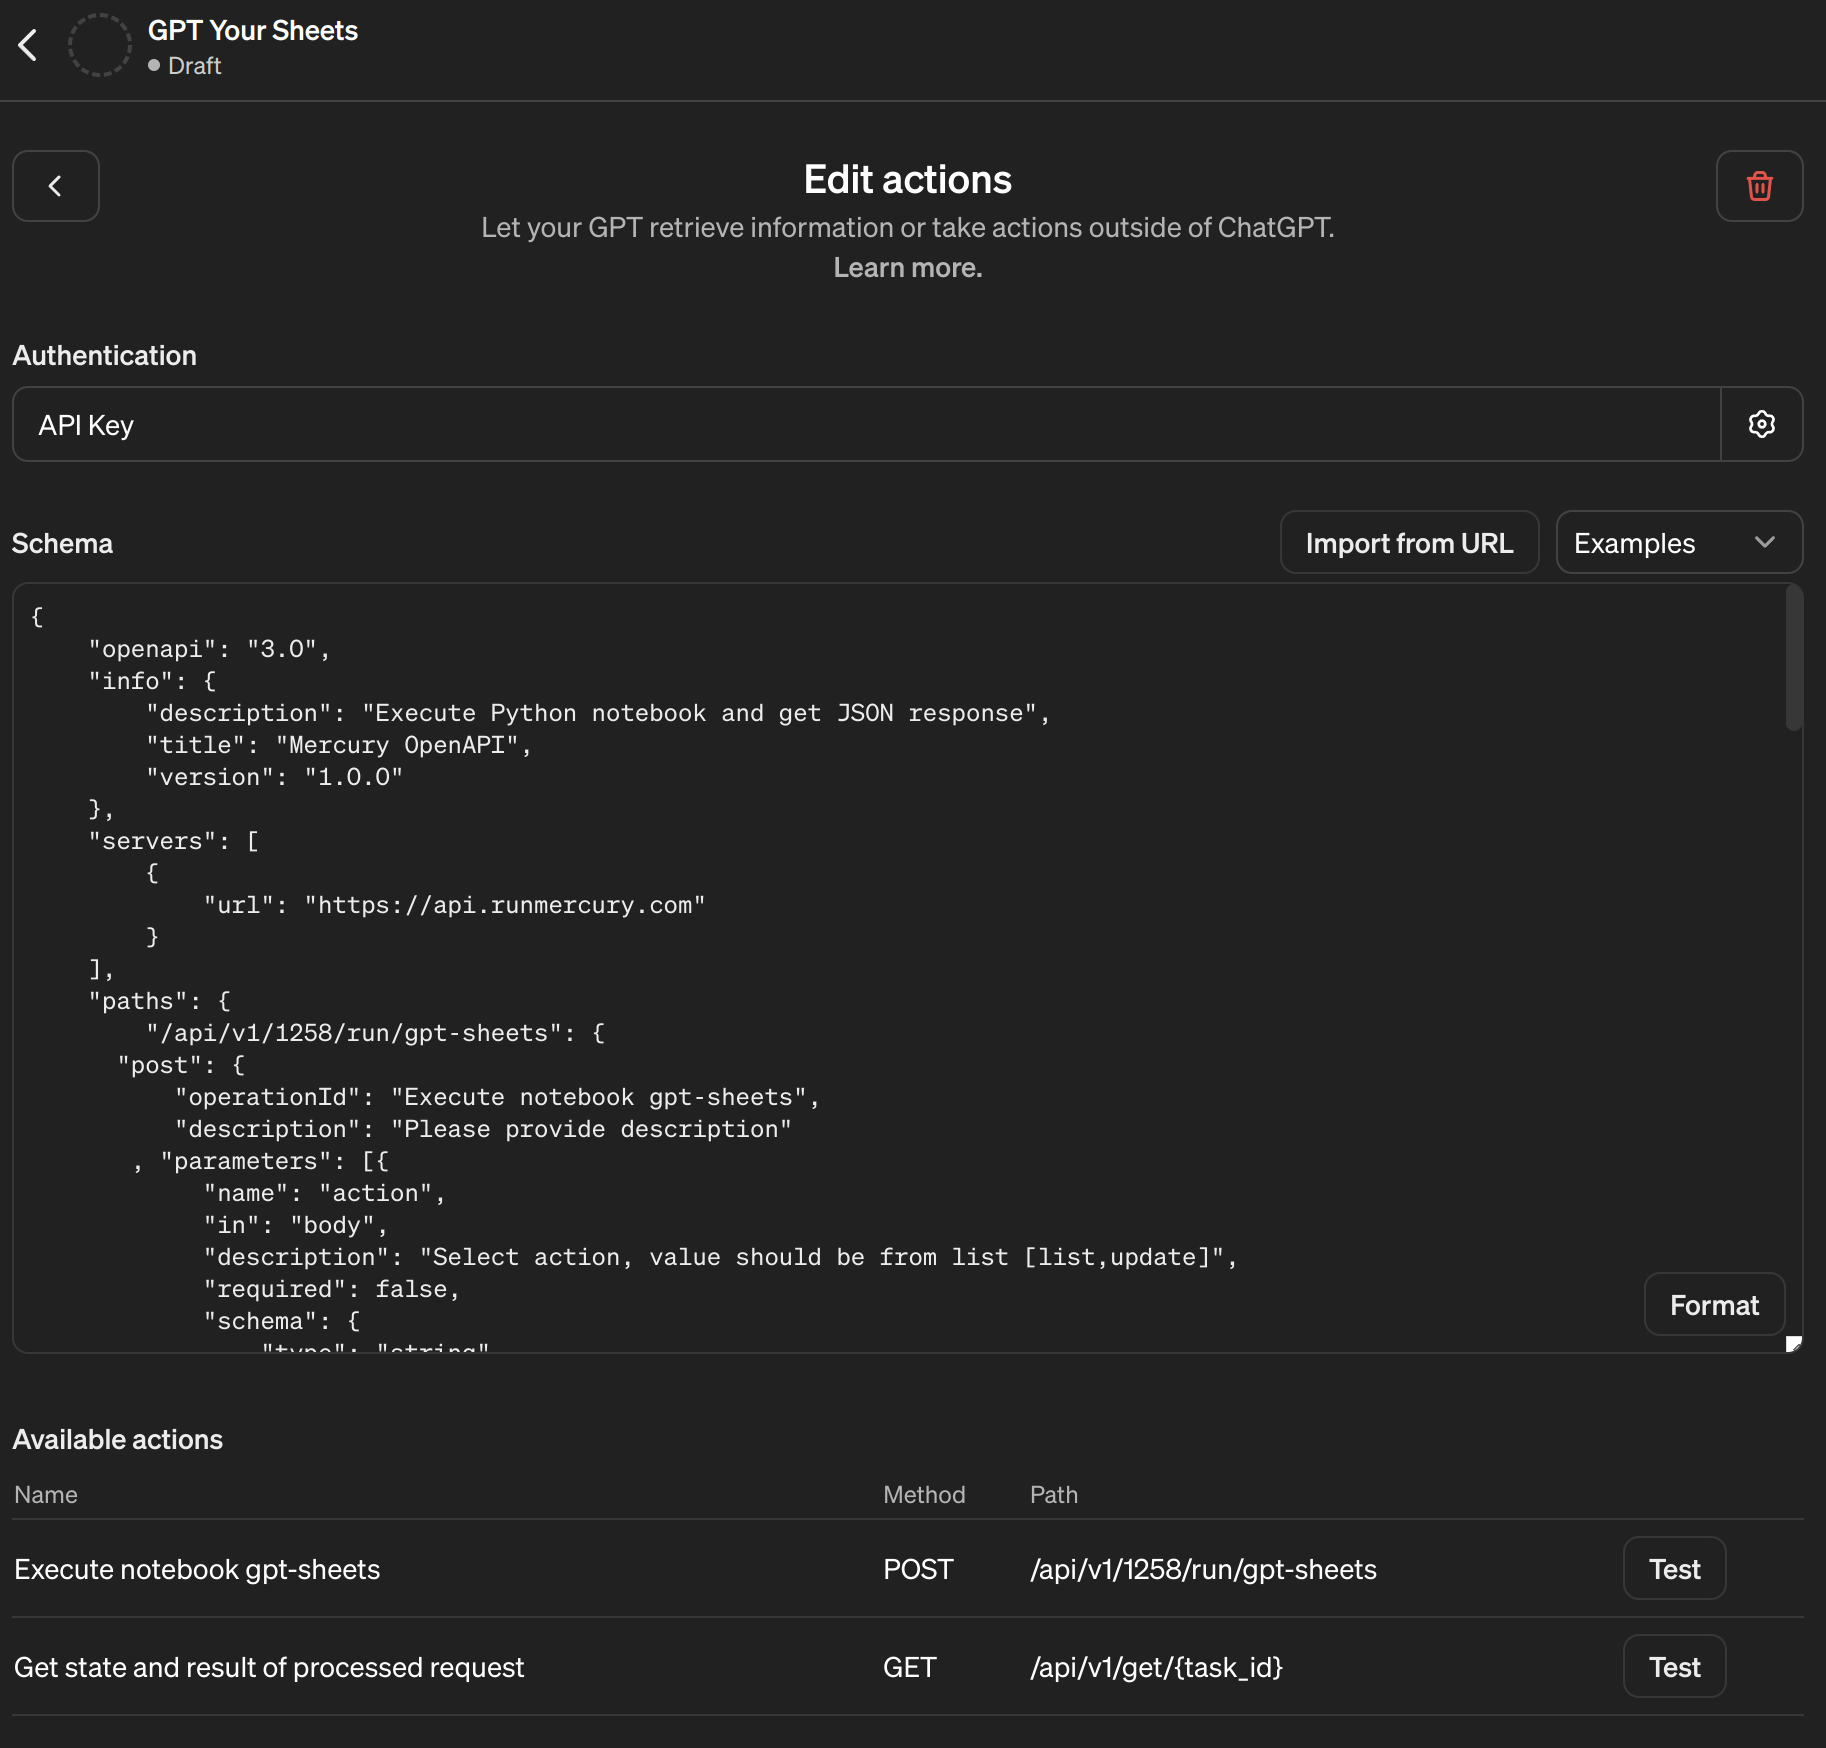
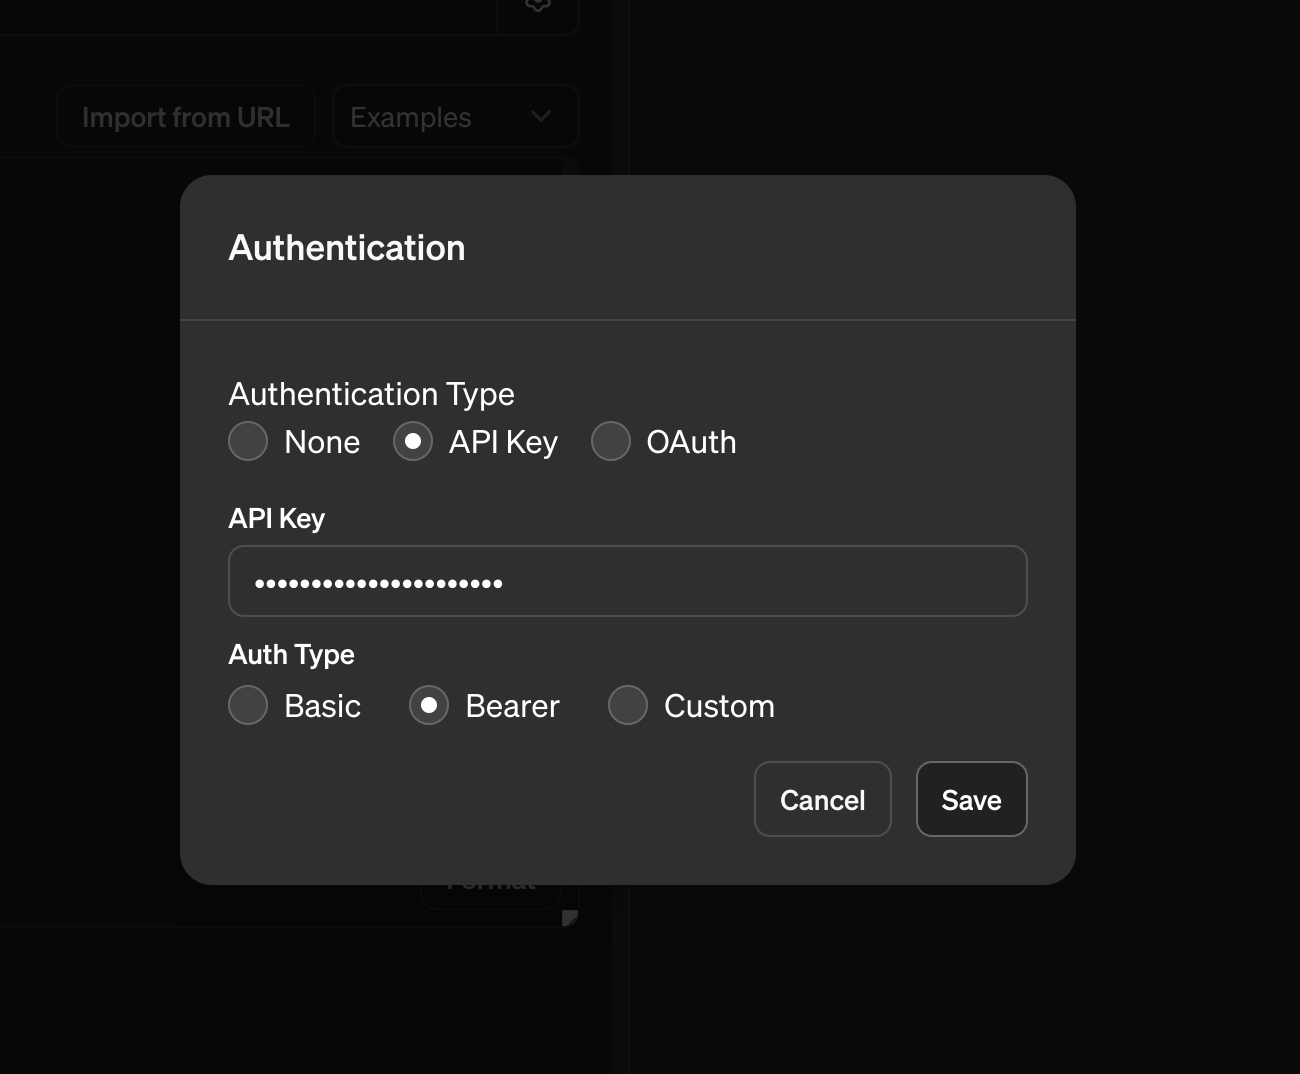
You should see new endpoints available. If your website is PRIVATE, please authorize ChatGPT to access your notebooks by adding API Keys for authentication. You can find your unique API Key in the Mercury Cloud dashboard in Account:
Please provide the API Key in the Authentication field in the GPT builder:
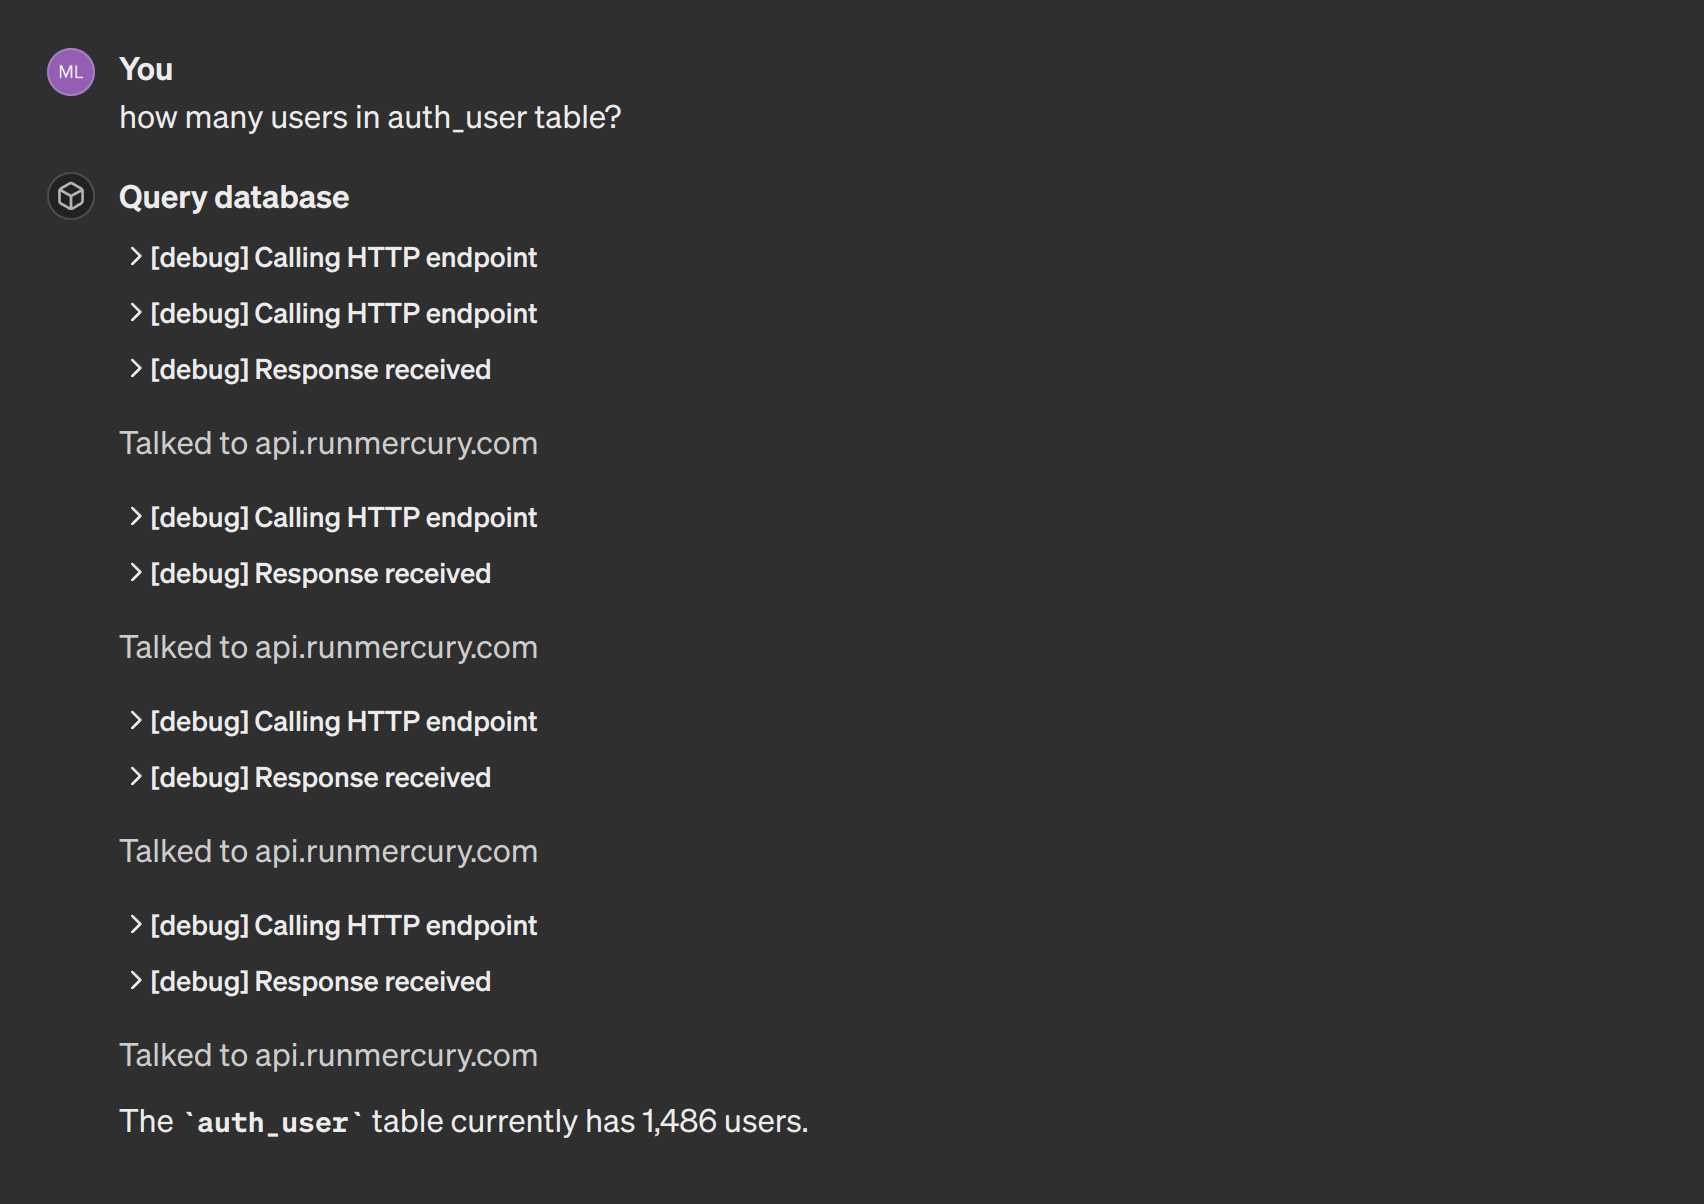
Ok, we are all set to start talking with our notebooks:

Mercury is using long polling to receive a response from Python notebook. ChatGPT will send several queries to get the final response:
Summary
Mixing Python notebooks with ChatGPT is exciting. You can quickly build custom API for ChatGPT with Python notebooks and Mercury. Please check our examples for notebooks:
- notebook for sending emails from ChatGPT,
- notebook for query Postgres database with SQL from ChatGPT,
- notebook for interacting with Google Sheets with ChatGPT.
Please let us know what have you built or if you need any help with creating Python notebook. All the best!
AI Data Analyst on Your Computer
Use MLJAR Studio to explore data, find insights, and create reports with AI. Everything runs locally, so your data stays with you.
About the Authors


Related Articles
- Python Dashboard for 15,963 Data Analyst job listings
- Fairness in Automated Machine Learning
- 3 ways to access credentials in Jupyter Notebook
- How to create Dashboard in Python from PostgreSQL
- How to create Invoice Generator in Python
- Create Retrieval-Augmented Generation using OpenAI API
- Transfer data from Postgresql to Google Sheets
- Machine Learning Algorithm Comparison
- TabNet vs XGBoost
- 4 Effective Ways to Visualize LightGBM Trees