Build chatbot to talk with your PostgreSQL database using Python and local LLM
Have you ever dreamed of just asking your database questions and getting answers back? Today, this dream becomes real - thanks to modern AI technology.
In this article, we will show you how to build a chatbot application that can query a PostgreSQL database and present the results as tables and charts. We will use a local, open-source LLM model, GPT-OSS 20B, served with Ollama. The chatbot application is built in Python with open-source libraries and can be extended and customized in many ways (the sky is the limit).
The whole solution works completely offline. Everything runs locally: a local database, a local LLM, and your application. No internet connection is required.
Full code for this article is available at github.com/mljar/chat-with-your-database.
1. Database setup
First, we prepare a local PostgreSQL database. Our example database simulates a small sales system. It contains three tables:
- customers – information about customers
- products – list of products
- orders – sales transactions
Customers table
The customers table stores basic information about each customer, such as name, email, country, and account creation date.
| Column        | Type         | Description                                |
| ------------- | ------------ | ------------------------------------------ |
| `customer_id` | BIGSERIAL PK | Unique customer identifier                 |
| `full_name`   | TEXT         | Realistic human name generated per country |
| `email`       | TEXT UNIQUE  | Synthetic but natural-looking email        |
| `country`     | TEXT         | One of 14 supported countries              |
| `city`        | TEXT         | Capital or major city                      |
| `created_at`  | TIMESTAMPTZ  | Account creation timestamp                 |
Products table
The products table contains information about items that can be purchased. It includes product name, category, price, and whether the product is currently available.
| Column         | Type          | Description                         |
| -------------- | ------------- | ----------------------------------- |
| `product_id`   | BIGSERIAL PK  | Product ID                          |
| `sku`          | TEXT UNIQUE   | Product SKU                         |
| `product_name` | TEXT          | Display name                        |
| `category`     | TEXT          | Electronics, Grocery, Apparel, etc. |
| `unit_price`   | NUMERIC(12,2) | Price per item                      |
| `active`       | BOOLEAN       | Availability flag                   |
| `created_at`   | TIMESTAMPTZ   | Product creation timestamp          |
Orders table
The orders table stores transaction data. Each row represents one purchase and connects a customer with a product. It also includes quantity, price at the time of purchase, order date, and order status.
| Column        | Type          | Description                        |
| ------------- | ------------- | ---------------------------------- |
| `order_id`    | BIGSERIAL PK  | Order ID                           |
| `order_ts`    | TIMESTAMPTZ   | Order timestamp                    |
| `customer_id` | BIGINT FK     | → customers.customer_id            |
| `product_id`  | BIGINT FK     | → products.product_id              |
| `quantity`    | INT           | Units purchased                    |
| `unit_price`  | NUMERIC(12,2) | Price at time of order             |
| `currency`    | TEXT          | Always USD                         |
| `status`      | TEXT          | paid, pending, refunded, cancelled |
Together, these three tables allow us to ask interesting business questions, for example:
- Which products sell the most?
- How many orders came from each country?
- What is the total revenue per month?
The preview of tables:

2. Setup local LLM
Next, we set up the local language model (LLM) that will power our chatbot. We use Ollama, a tool that lets us run large language models directly on our computer. Thanks to this, we don't need any external API or internet connection. In this tutorial, we use the open-source model GPT-OSS 20B. It is strong enough to understand natural language questions and translate them into SQL queries.
To download and start the model, run:
ollama run gpt-oss:20b
The first time you run this command, Ollama will download the model. This may take a few minutes. After that, the model runs locally and you can even chat with it in the terminal.

Our chatbot application will connect to this local model and send user questions to it. The model will generate SQL queries and Python code that we will execute in a controlled and safe way.
3. Database connection
Now we connect our Python app to the PostgreSQL database. To keep the code clean, we created a small helper class called DatabaseClient (in dbclient.py). It handles:
- creating a connection pool
- reading the database schema
- running SQL queries and returning results
- converting results to pandas
DataFrame
Schema summary for the LLM
Before the LLM can generate good SQL, it must understand what tables and columns exist.
That's why DatabaseClient has a method called get_schema_summary().
It returns a short text description of the database schema, for example:
Database structure:
- customers: customer_id (bigint), full_name (text), email (text), country (text), city (text), created_at (timestamp with time zone)
- orders: order_id (bigint), order_ts (timestamp with time zone), customer_id (bigint), product_id (bigint), quantity (integer), unit_price (numeric), currency (text), status (text)
- products: product_id (bigint), sku (text), product_name (text), category (text), unit_price (numeric), active (boolean), created_at (timestamp with time zone)
We send this schema summary to the LLM as context. Thanks to that, the model knows which table to use and how to join them.
Running queries
The class also includes a query(sql) method. It executes SQL and returns the results.
Example:
from dbclient import DatabaseClient

db = DatabaseClient()
result = db.query("select version()")
Safety: running LLM-generated SQL
Running SQL generated by an LLM can be risky, so we add a few safety rules:
- we use a read-only database user
- we block dangerous keywords like
drop,insert,update,grant, etc. - we set a default query timeout (for example 5 seconds) to avoid long running queries
- we automatically add a
LIMIT(for example 1000 rows) to avoid huge outputs
These checks help keep the system safer and more stable.
4. Python executor
Just like with SQL, we must be careful when running Python code generated by an LLM.
To make this safer, we created a helper class called SafeishPythonExecutor (in safeish.py file).
Its goal is simple: don't let AI-generated code do dangerous things.
This executor runs Python code in a controlled and limited environment. It is not a perfect security sandbox, but it adds several important safety layers.
Main safety rules
Before any code is executed, we apply multiple checks:
- All
importstatements are removed - Dangerous functions like
"eval","exec","compile","open", and"__import__"are blocked - The code is validated using Python’s AST (Abstract Syntax Tree)
Removing imports
The code is first parsed using AST. Every import or from ... import ... statement is removed.
This prevents the code from loading modules like os, sys, or subprocess.
AST validation
We analyze the code structure before execution.
For example, we block access to special attributes like __class__ or __dict__, which are often used to escape restricted environments.
Blocking dangerous functions
Calls to risky functions are not allowed. This prevents:
- dynamic code execution (
eval,exec) - file access (
open) - loading new modules (
__import__)
Restricted built-in functions
Instead of giving access to all Python built-ins, we provide a filtered version.
Functions related to file access or environment inspection (like open, globals, locals, getattr, setattr) are removed.
Size and complexity limits
We also limit how big or complex the code can be. If it is too long or creates too many AST nodes, execution is stopped. This helps protect against resource-heavy or denial-of-service style code.
Controlled variables
The executed code only sees variables that we explicitly provide. For example, it may receive:
- a DataFrame
dfwith query results - plotting library Altair
- and pandas
It does not have access to the internal objects of the main application.
Safe error handling
If something goes wrong, errors are captured and returned as messages. The main application does not crash.
Together, these safeguards create a safe-ish environment. It works well for running small AI-generated data analysis snippets, but it should not be treated as a fully secure sandbox.
Example usage
Below we run Python code with access to pandas, Altair, and a dataframe df returned from the database:
executor = SafeishPythonExecutor(safe_globals={"alt": alt, "pd": pd})

res = executor.run(
        python_code,
        context={"df": df},   # last query result
        return_locals=True,
    )

chart = res.locals.get("chart")
This allows the LLM to generate charts or data transformations while keeping the environment controlled.
5. Building chatbot application
Now we connect everything into a working chatbot.
This part of the code combines:
- Mercury (UI)
- Ollama (LLM)
- PostgreSQL (data)
- Safe Python executor (charts)
You need to install required libraries with command:
pip install mercury ollama pandas altair psycopg[binary]
Step 1 — Imports and initialization
We start by importing libraries and preparing the database connection.
import altair as alt   # data visualization
import pandas as pd    # data operations
import mercury as mr   # UI
import ollama          # local LLM
from typing import Optional
from dbclient import DatabaseClient       # safe db execute
from safeish import SafeishPythonExecutor # safe python execute
We create the database client and get the schema description:
db = DatabaseClient()
db_schema = db.get_schema_summary()
The schema summary will be passed to the LLM so it understands the database structure.
Step 2 — System prompt
We prepare the system message that defines how the AI should behave.
messages = []
messages.append({
    "role": "system",
    "content": (
        "You are an SQL assistant connected directly to a PostgreSQL database. "
        "You can execute SELECT queries on this database, "
        "and your system will automatically run any SQL query you provide. "
        "Always try to answer user questions by generating and executing an SQL query first, "
        "even if you think you already know the answer logically. "
        "Never assume the result — always verify it in the database. "
        "Only if the question cannot possibly be answered with SQL, then ask for clarification. "
        "Use SELECT statements only (no INSERT, UPDATE, DELETE). "
        "When creating visualizations (such as charts, graphs, or plots), "
        "Use the Altair library for all visual outputs. It is already available\n"
        "Create chart object with Altair. I will do display(chart). Please set width to 600px. "
        "Data is in pandas dataframe called df - use df variable. DONT create sample df variable. "
        "If you think you need another library, do not attempt to import it — "
        "simply explain that it is not available. "
        "Database schema:\n"
        f"{db_schema}"
    )
})
This prompt tells the model:
- always use SQL SELECT
- verify answers in the database
- use Altair for charts
- work only with DataFrame
df - do not import libraries
This is extremely important - it guides the LLM to act like a database analyst.
The messages list keeps the whole conversation history. This helps the LLM understand the context of the discussion.
Step 3 - Tool: run SQL
We define a function that executes SQL generated by the LLM:
def query_database(sql: str) -> pd.DataFrame:
    """Query database

    Args:
      sql: SQL query to be executed

    Returns:
      Pandas DataFrame with query results
    """
    result = db.query(sql)
    df = DatabaseClient.to_dataframe(result)
    return df
This function is exposed to the LLM as a tool.
Step 4 - Tool: create charts
The second tool allows the LLM to generate charts using Python:
def create_atair_chart(python_code) -> Optional[alt.Chart]:
    """Execute python code to create Altair plot on last query result

    Args:
      python_code: string with python code that will create altair chart

    Returns:
      Altair chart object
    """

    executor = SafeishPythonExecutor(safe_globals={"alt": alt, "pd": pd})

    res = executor.run(
        python_code,
        context={"df": df},   # last query result
        return_locals=True,
    )

    chart = None
    if res.ok:
        chart = res.locals.get("chart")
    else:
        print(res.error)
    return chart
The LLM can send Python code that uses the dataframe df, pandas and altair.
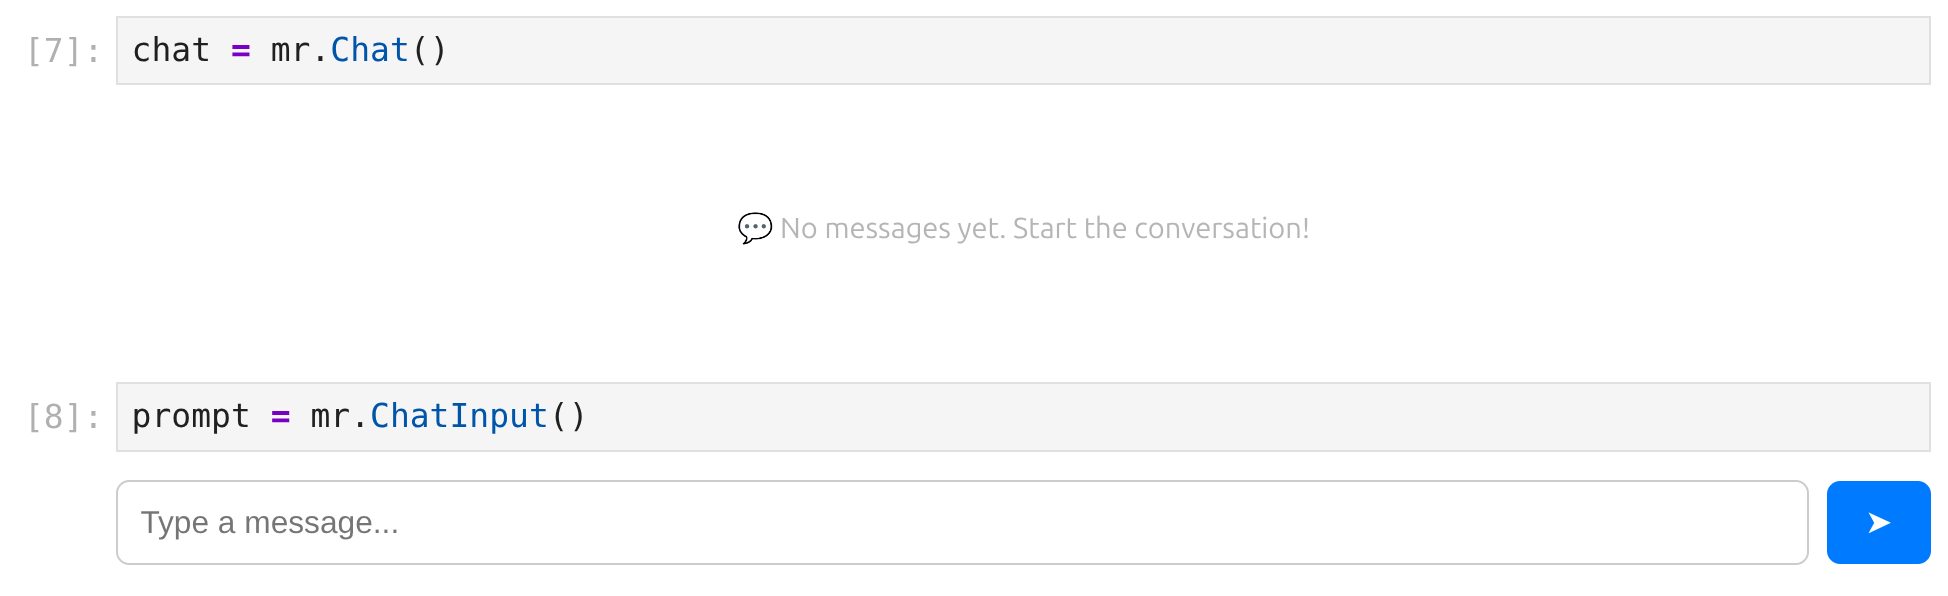
Step 5 - Chat UI
We create the chat interface using Mercury framework. We use Chat widget to display all messages:
chat = mr.Chat()
User input is provided with ChatInput:
prompt = mr.ChatInput()
You will see UI displayed in the notebook:
Step 6 - user interaction
When user provide value in prompt input, it will re-execute all cells below that widget. In the next code cell we have code that will send prompt to LLM, call tools and display messages:
if prompt.value:

    user_msg = mr.Message(prompt.value, role="user", emoji="👤")
    chat.add(user_msg)

    ai_msg = mr.Message(role="assistant", emoji="🤖")
    ai_msg.set_gradient_text("Thinking ...")
    chat.add(ai_msg)

    messages += [{"role": "user", "content": prompt.value}]
    response = ollama.chat(
      model='gpt-oss:20b',
      messages=messages,
      think='low',
      tools=[query_database, create_atair_chart]
    )
    messages.append(response.message.model_dump(exclude_none=True))
    if response.message.thinking:
        ai_msg.append_markdown(response.message.thinking)
    if response.message.content:
        ai_msg.append_markdown(response.message.content)

    if response.message.tool_calls:
        for tc in response.message.tool_calls:

            if tc.function.name == "query_database":

                with ai_msg:
                    sql_expander = mr.Expander("⚒️ SQL query", key=f"expander-{len(messages)}")
                    with sql_expander:
                        print(tc.function.arguments["sql"])

                df = query_database(**tc.function.arguments)
                messages.append({'role': 'tool', 'tool_name': tc.function.name, 'content': DatabaseClient.describe_dataframe_for_llm(df)})
                with ai_msg:
                    display(df)

            elif tc.function.name == "create_atair_chart":
                chart = create_atair_chart(tc.function.arguments["python_code"])
                messages.append({'role': 'tool', 'tool_name': tc.function.name, 'content': "Plot created" if chart else "Cant create a plot"})
                if chart:
                    with ai_msg:
                        display(chart)
Let's analyze above code step by step.
When the user types a question, the flow begins:
if prompt.value:
User message is created and added to the chat:
    user_msg = mr.Message(prompt.value, role="user", emoji="👤")
    chat.add(user_msg)
AI message is created and added to chat. There is Thinking ... text displayed.
    ai_msg = mr.Message(role="assistant", emoji="🤖")
    ai_msg.set_gradient_text("Thinking ...")
    chat.add(ai_msg)
Next, we call the LLM with tools enabled. We provide list [query_database, create_atair_chart] as argument for tools. LLM will use tools to provide response:
    messages += [{"role": "user", "content": prompt.value}]
    response = ollama.chat(
      model='gpt-oss:20b',
      messages=messages,
      think='low',
      tools=[query_database, create_atair_chart]
    )
Response is saved to messages. The thinking or content values are displayed if available:
    messages.append(response.message.model_dump(exclude_none=True))
    if response.message.thinking:
        ai_msg.append_markdown(response.message.thinking)
    if response.message.content:
        ai_msg.append_markdown(response.message.content)
The final step is executing the tools. We check if the LLM decided to use any of the available tools.
    if response.message.tool_calls:
        for tc in response.message.tool_calls:
If LLM selects a tool query_database we call this function with provided sql query. Please note, that Expander is created that display SQL that was used.
            if tc.function.name == "query_database":

                with ai_msg:
                    sql_expander = mr.Expander("⚒️ SQL query", key=f"expander-{len(messages)}")
                    with sql_expander:
                        print(tc.function.arguments["sql"])

                df = query_database(**tc.function.arguments)
                messages.append({'role': 'tool', 'tool_name': tc.function.name, 'content': DatabaseClient.describe_dataframe_for_llm(df)})
                with ai_msg:
                    display(df)
If LLM selects a tool create_altair_chart we call Python executor with provided code, and display chart variable in the message.
            elif tc.function.name == "create_atair_chart":
                chart = create_atair_chart(tc.function.arguments["python_code"])
                messages.append({'role': 'tool', 'tool_name': tc.function.name, 'content': "Plot created" if chart else "Cant create a plot"})
                if chart:
                    with ai_msg:
                        display(chart)
Mercury provides live application preview during Python notebook development:

Example view of app with plot:

6. Serve application
The notebook can be served as standalone web application. Please run in your terminal the following command:
mercury
It will start Mercury server and detects all *.ipynb files in the current directory and serve them as web apps.

Simply click on selected notebook the interact with application:

7. Answer business questions
Now we can use our app to ask real business questions in natural language. Instead of writing SQL queries, we simply type what we want to know.
For example, we can ask about sales, customers, or product performance. The chatbot understands the question, generates the SQL query, runs it on the database, and shows the results as tables or charts.

This makes data analysis much easier, especially for people who are not familiar with SQL. It feels more like talking to an assistant than working with a database.
Conclusions
In this tutorial, we built a chatbot that can talk directly to a PostgreSQL database. Instead of writing SQL queries manually, we can now ask questions in plain language and get results as tables and charts.
We combined several powerful tools:
- a local LLM (GPT-OSS 20B) running with Ollama
- a PostgreSQL database
- Python for logic and safety layers
- Mercury to build a simple chat interface
All of this works fully offline. Your data stays on your machine, and you have full control over the system. This makes the solution great for internal tools, analytics dashboards, and working with sensitive data.
We also added safety mechanisms for both SQL and Python code. This is very important when working with AI-generated code. With these protections, the system becomes much more stable and safer to use.
This project shows how quickly modern AI can turn a database into something you can simply talk to. Just a few years ago, building such a system required a full team. Today, you can do it with Python, open-source tools, and a bit of creativity.
And yes - AI helped us write this article, too. GPT was used during the writing process to improve clarity and language 😊
This is just the beginning. You can extend this system with authentication, multiple databases, business logic, or company-specific knowledge. The possibilities are huge.
Happy building 🚀
Explore next
Continue with practical guides, tutorials, and product workflows for Python, AutoML, and local AI data analysis.
- AI Data Analyst
Analyze local data with conversational AI support and notebook-based, reproducible Python workflows.
- AutoLab Experiments
Run autonomous ML experiments, track iterations, and inspect results in transparent notebook outputs.
- MLJAR AutoML
Learn how to train, compare, and explain tabular machine learning models with open-source automation.
- Machine learning tutorials
Step-by-step guides for beginners and practitioners working with Python, AutoML, and data workflows.
Run AI for Machine Learning — Fully Local
MLJAR Studio is a private AI Python notebook for data analysis and machine learning. Generate code with AI, run experiments locally, and keep full control over your workflow.
About the Authors


Related Articles
- AutoML Example Projects: A Guide with 10 Popular Datasets
- What is AI Data Analyst?
- Navy SEALs, Performance vs Trust, and AI
- New version of Mercury (3.0.0) - a framework for sharing discoveries
- Zbuduj lokalnego czata AI w Pythonie - Mercury + Bielik LLM krok po kroku
- Build a ChatGPT-Style GIS App in a Jupyter Notebook with Python
- Private PyPI Server: How to Install Python Packages from a Custom Repository
- Essential Python Libraries for Data Science (2026 Guide)
- Statistics for Data Science: Essential Concepts
- Machine Learning Basics: Beginner’s Guide 2026