AutoML Open Source Framework with Python API and GUI
Quick answer: Open-source AutoML in Python lets you train, compare, and explain many models automatically. MLJAR AutoML is a practical option for tabular data and reproducible reports.
Let me introduce you an open-source Automated Machine Learning framework called mljar-supervised. It is available as a Python package. It can be used with Python API or with graphical interface in the MLJAR Studio - our distribution of JupyterLab with user-friendly extensions. It automates full process of Machine Learning pipeline construction. Let's look closer at it.
The mljar-supervised is licensed under MIT and code is available at github.com/mljar/mljar-supervised. The MLJAR Studio code is available at github.com/mljar/studio and binary installer can be downloaded from the downloads page.
MLJAR AutoML features
MLJAR AutoML handles the entire machine learning process:
- Data Preprocessing: It converts categorical columns to numeric and can process text, date, and time values.
- Feature Engineering: It creates new features (called golden features) from raw data.
- Feature Selection: It removes irrelevant features to improve model performance.
- Algorithm Selection & Hyperparameter Tuning: Once the dataset is ready, it searches through different algorithms and optimizes hyperparameters.
- Supported Algorithms: It includes Linear Models, Decision Trees, Random Forest, Extra Trees, XGBoost, LightGBM, CatBoost, Multi-Layer Perceptron, and k-Nearest Neighbors.
- Ensembling & Stacking: It can ensemble and stack the best models to boost performance.
- Automatic Documentation: After training, it creates Markdown and HTML reports. These include details about model hyperparameters, performance metrics, and SHAP-based explanations.
At the end of each model training, there is created autmatic documentation that is available as Markdown and HTML. The documentation has information about model hyperparamters, performance metrics, and explanations computed with SHAP.
The MLJAR AutoML works with tabular datasets and can solve tasks:
- binary classification - predict two classes,
- mutli-class classification - predict more than two classes,
- regression - predict continuous value.

Using with Python API
The MLJAR AutoML can be installed with pip command:
pip install mljar-supervised
or with conda command:
conda install -c conda-forge mljar-supervised
AutoML training is easy. Below is a Python example that trains AutoML for a regression task. It predicts real estate property prices based on their features:
import pandas as pd
from supervised import AutoML

# load example dataset
df = pd.read_csv("https://raw.githubusercontent.com/pplonski/datasets-for-start/master/house_prices/data.csv")

# create X columns list and set y column
x_cols = ["MSSubClass", "MSZoning", "LotFrontage", "LotArea", "Street", "Alley", "LotShape", "LandContour", "Utilities", "LotConfig", "LandSlope", "Neighborhood", "Condition1", "Condition2", "BldgType", "HouseStyle", "OverallQual", "OverallCond", "YearBuilt", "YearRemodAdd", "RoofStyle", "RoofMatl", "Exterior1st", "Exterior2nd", "MasVnrType", "MasVnrArea", "ExterQual", "ExterCond", "Foundation", "BsmtQual", "BsmtCond", "BsmtExposure", "BsmtFinType1", "BsmtFinSF1", "BsmtFinType2", "BsmtFinSF2", "BsmtUnfSF", "TotalBsmtSF", "Heating", "HeatingQC", "CentralAir", "Electrical", "1stFlrSF", "2ndFlrSF", "LowQualFinSF", "GrLivArea", "BsmtFullBath", "BsmtHalfBath", "FullBath", "HalfBath", "BedroomAbvGr", "KitchenAbvGr", "KitchenQual", "TotRmsAbvGrd", "Functional", "Fireplaces", "FireplaceQu", "GarageType", "GarageYrBlt", "GarageFinish", "GarageCars", "GarageArea", "GarageQual", "GarageCond", "PavedDrive", "WoodDeckSF", "OpenPorchSF", "EnclosedPorch", "3SsnPorch", "ScreenPorch", "PoolArea", "PoolQC", "Fence", "MiscFeature", "MiscVal", "MoSold", "YrSold", "SaleType", "SaleCondition"]
y_col = "SalePrice"
# set input matrix
X = df[x_cols]
# set target vector
y = df[y_col]

# create automl object
automl = AutoML(total_time_limit=300, mode="Explain")
# train automl
automl.fit(X, y)
You can see that we used the Explain mode in the AutoML constructor. The MLJAR AutoML can work in different modes because there might be different needs from users:
- Explain - should be used when you need quick results, it is perfect for inital analysis and data understanding,
- Perform - mode for building models with prediction time constraint, thus great for production ready models,
- Compete - highly tunned machine learninig pipelines constructed from many models and ensembled,
- Optuna - tunning hyperparameters with Optuna framework.
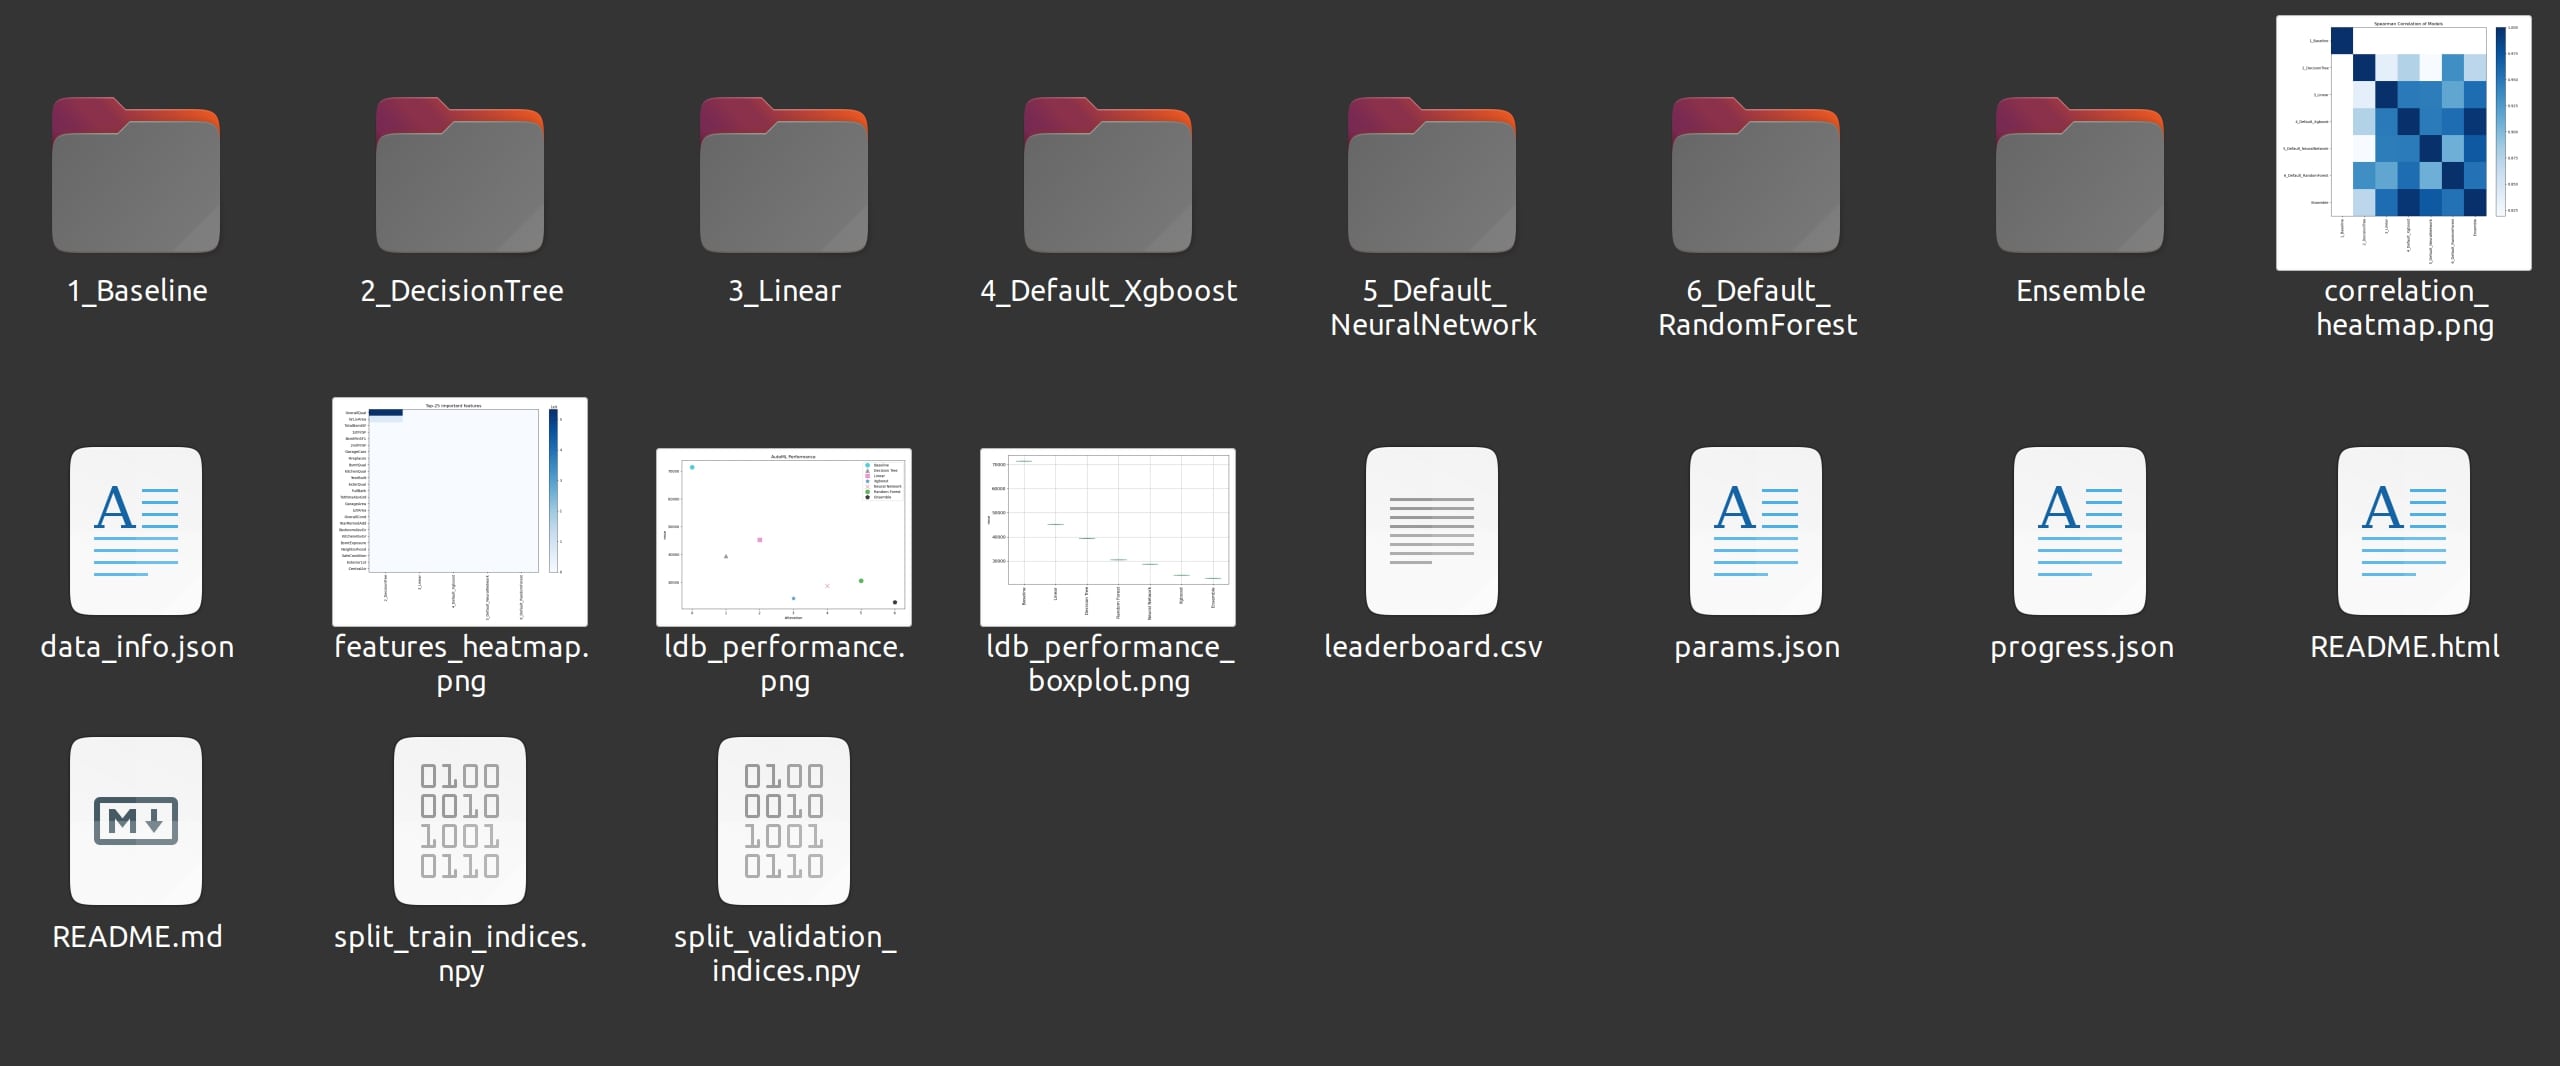
The documentation for AutoML training, with all models from leaderboard will be automatically saved on the hard drive. You can inspect the output files, model files, plots there:
AutoML GUI in MLJAR Studio
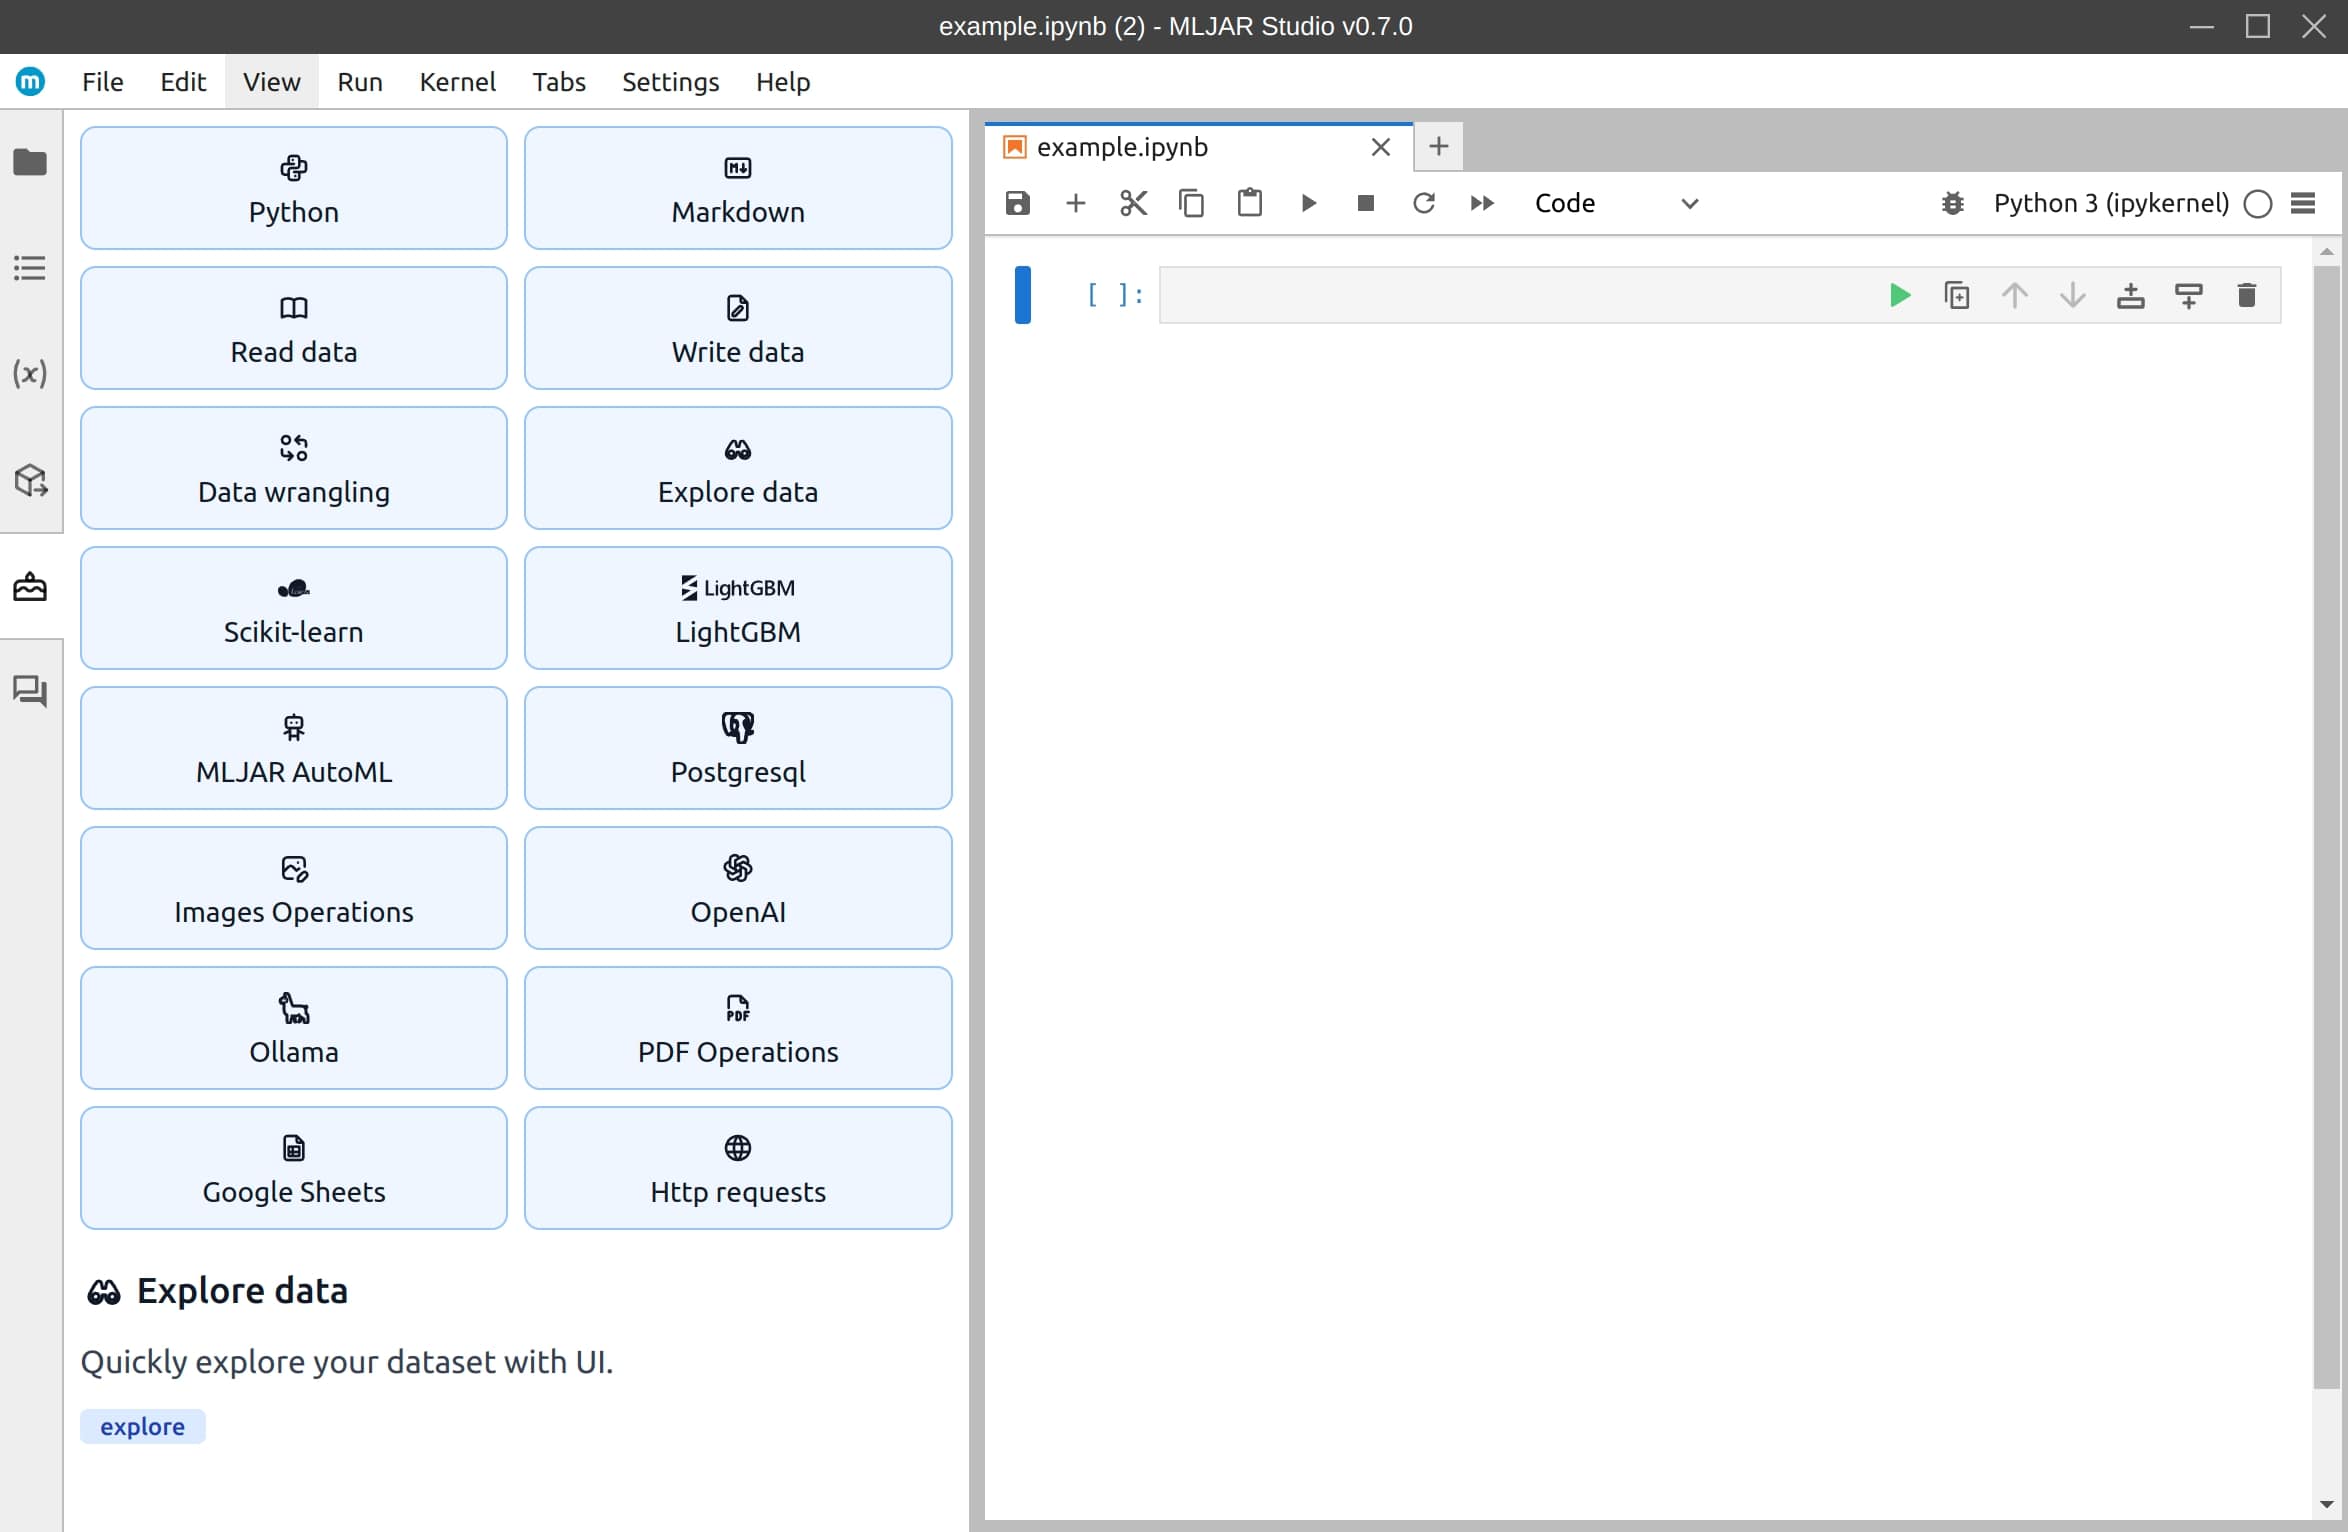
Do you want to use AutoML with a graphical user interface? We have just the thing for you! We built a desktop app with a Python notebook interface. It includes a no-code tool called Piece of Code 🍰 that helps you create Python code using interactive snippets. Each code recipe has its own user interface that connects directly to a Python session. The MLJAR Studio app is open-source too: github.com/mljar/studio
The view with collection of code cookbooks available in the Piece of Code. Each cookbook has set of code recipes.
Below is a simple, step-by-step guide on how to train an AutoML model using Piece of Code.
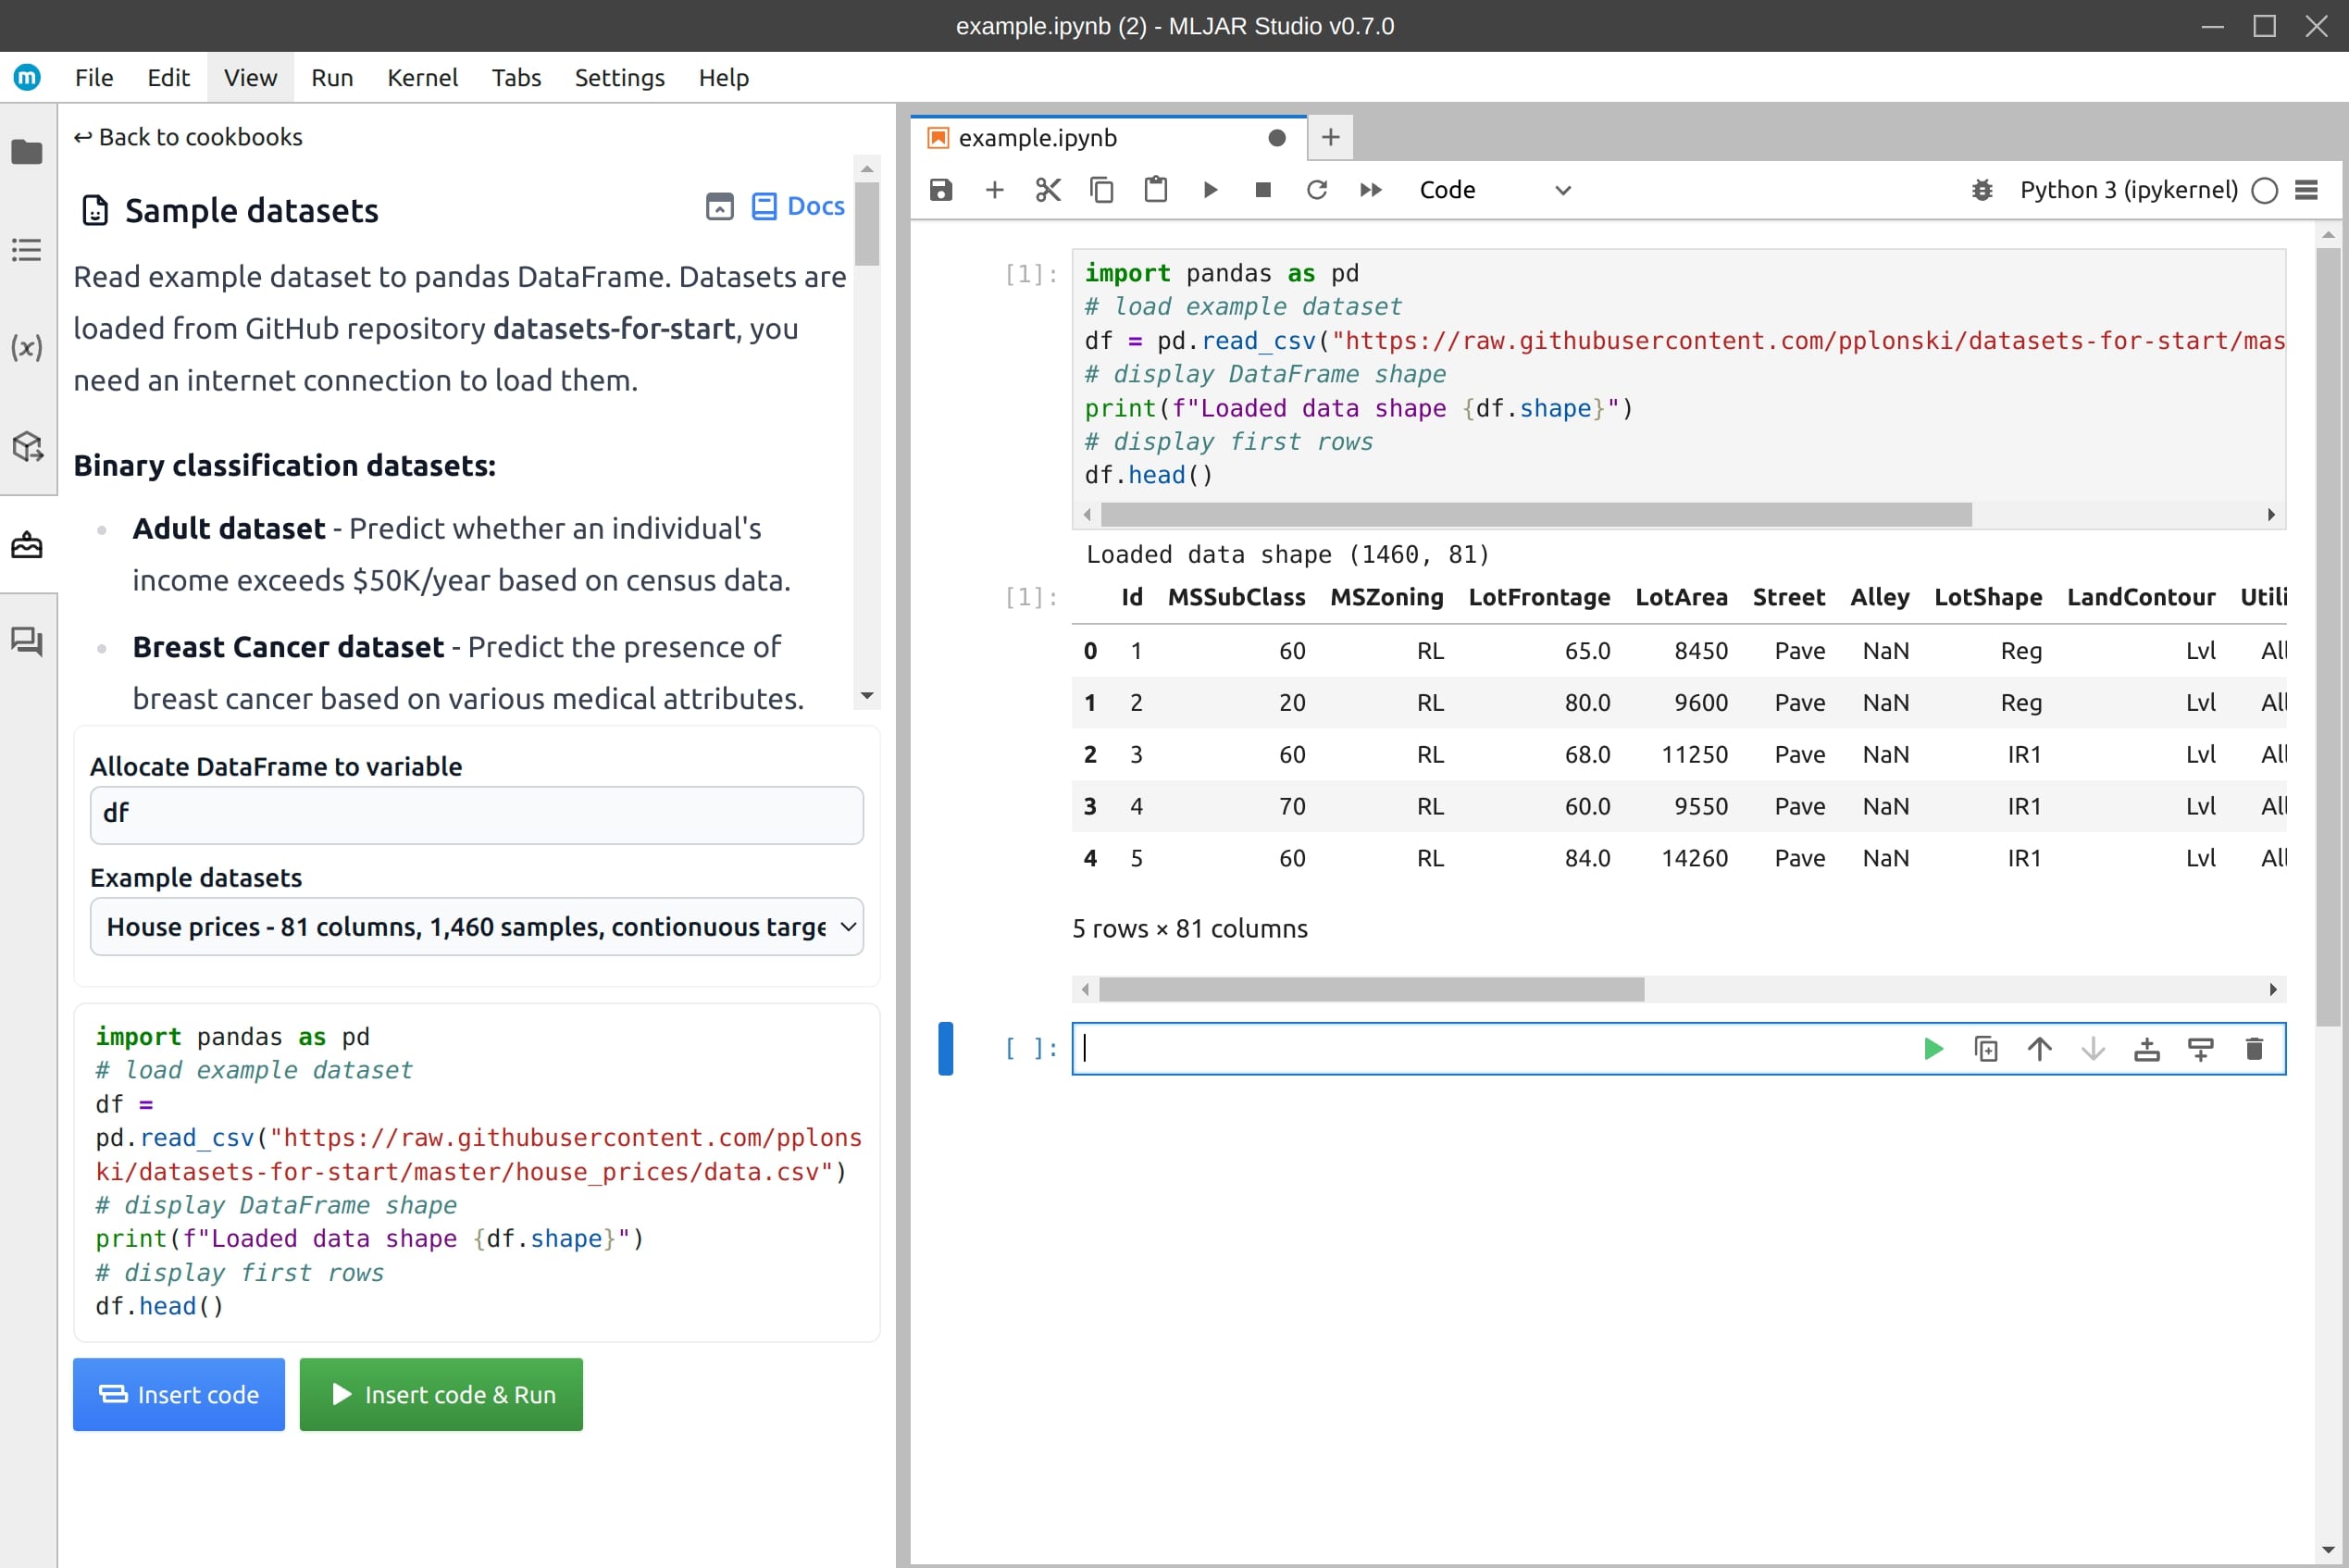
1. Load sample dataset
Use a code recipe with sample datasets. You can find it in Read data -> Sample datasets. Choose the House prices dataset. This will load the data into a variable called df.
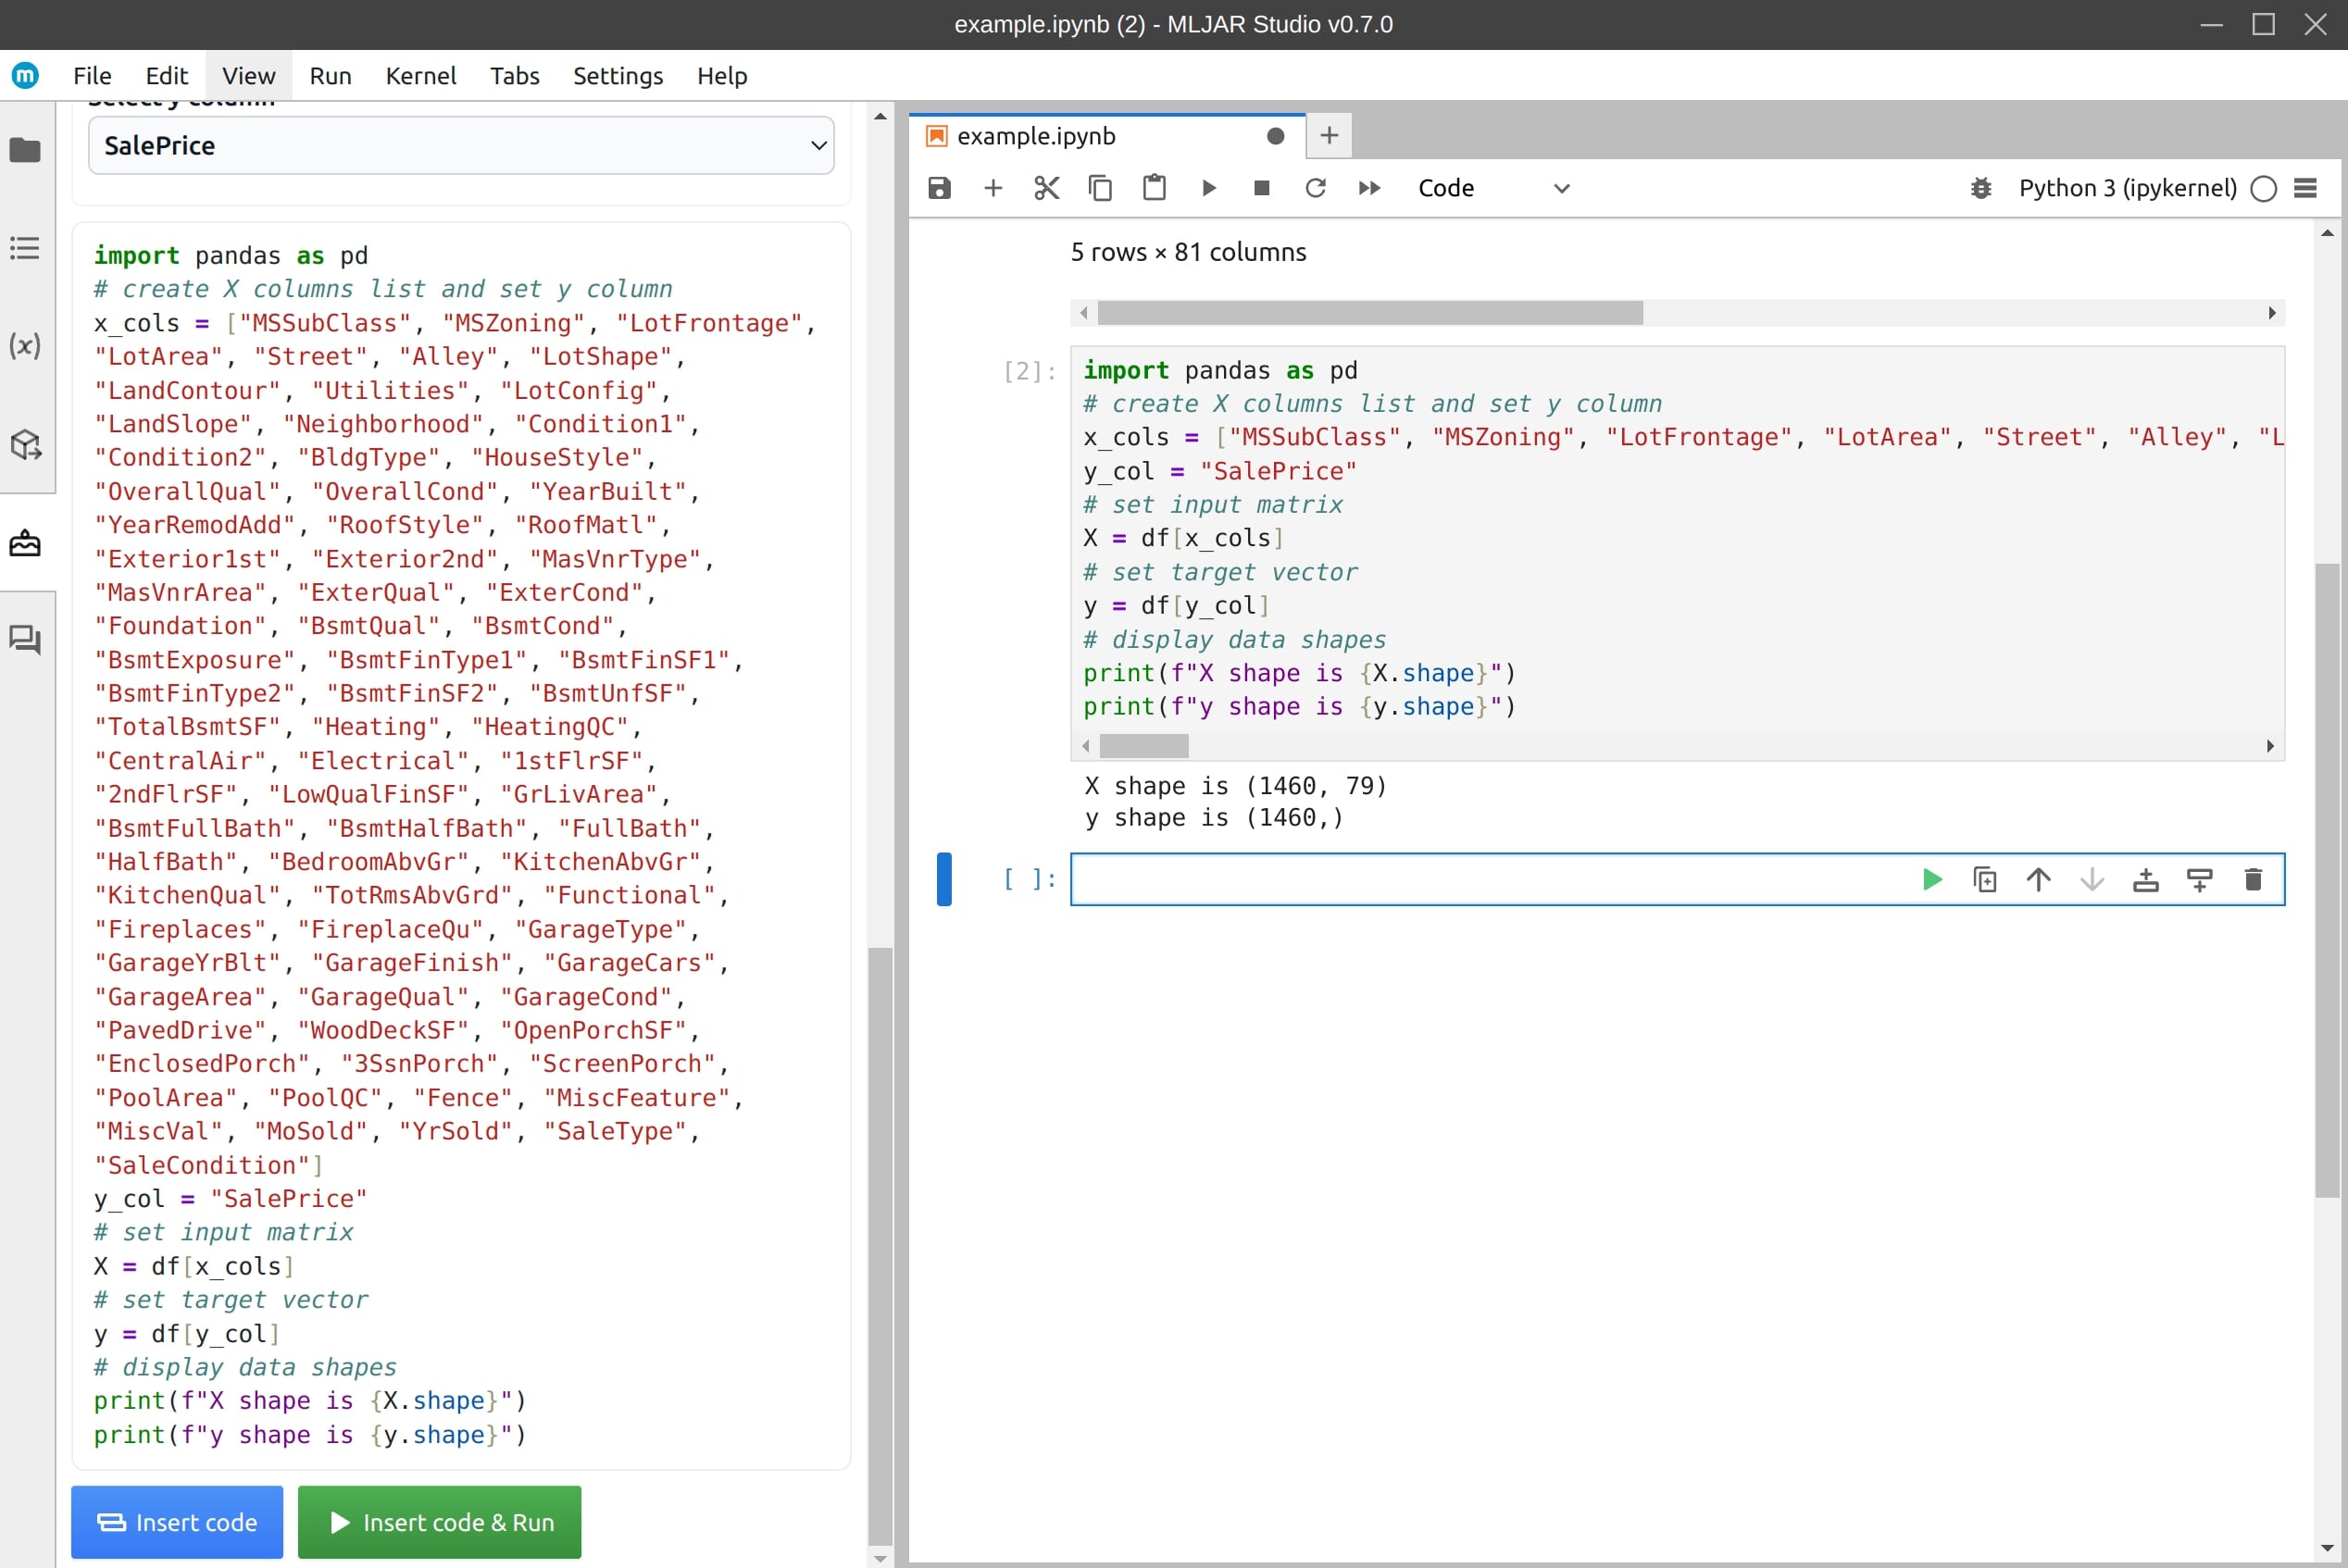
2. Split data
Separate your data into features (X) and the target (y).
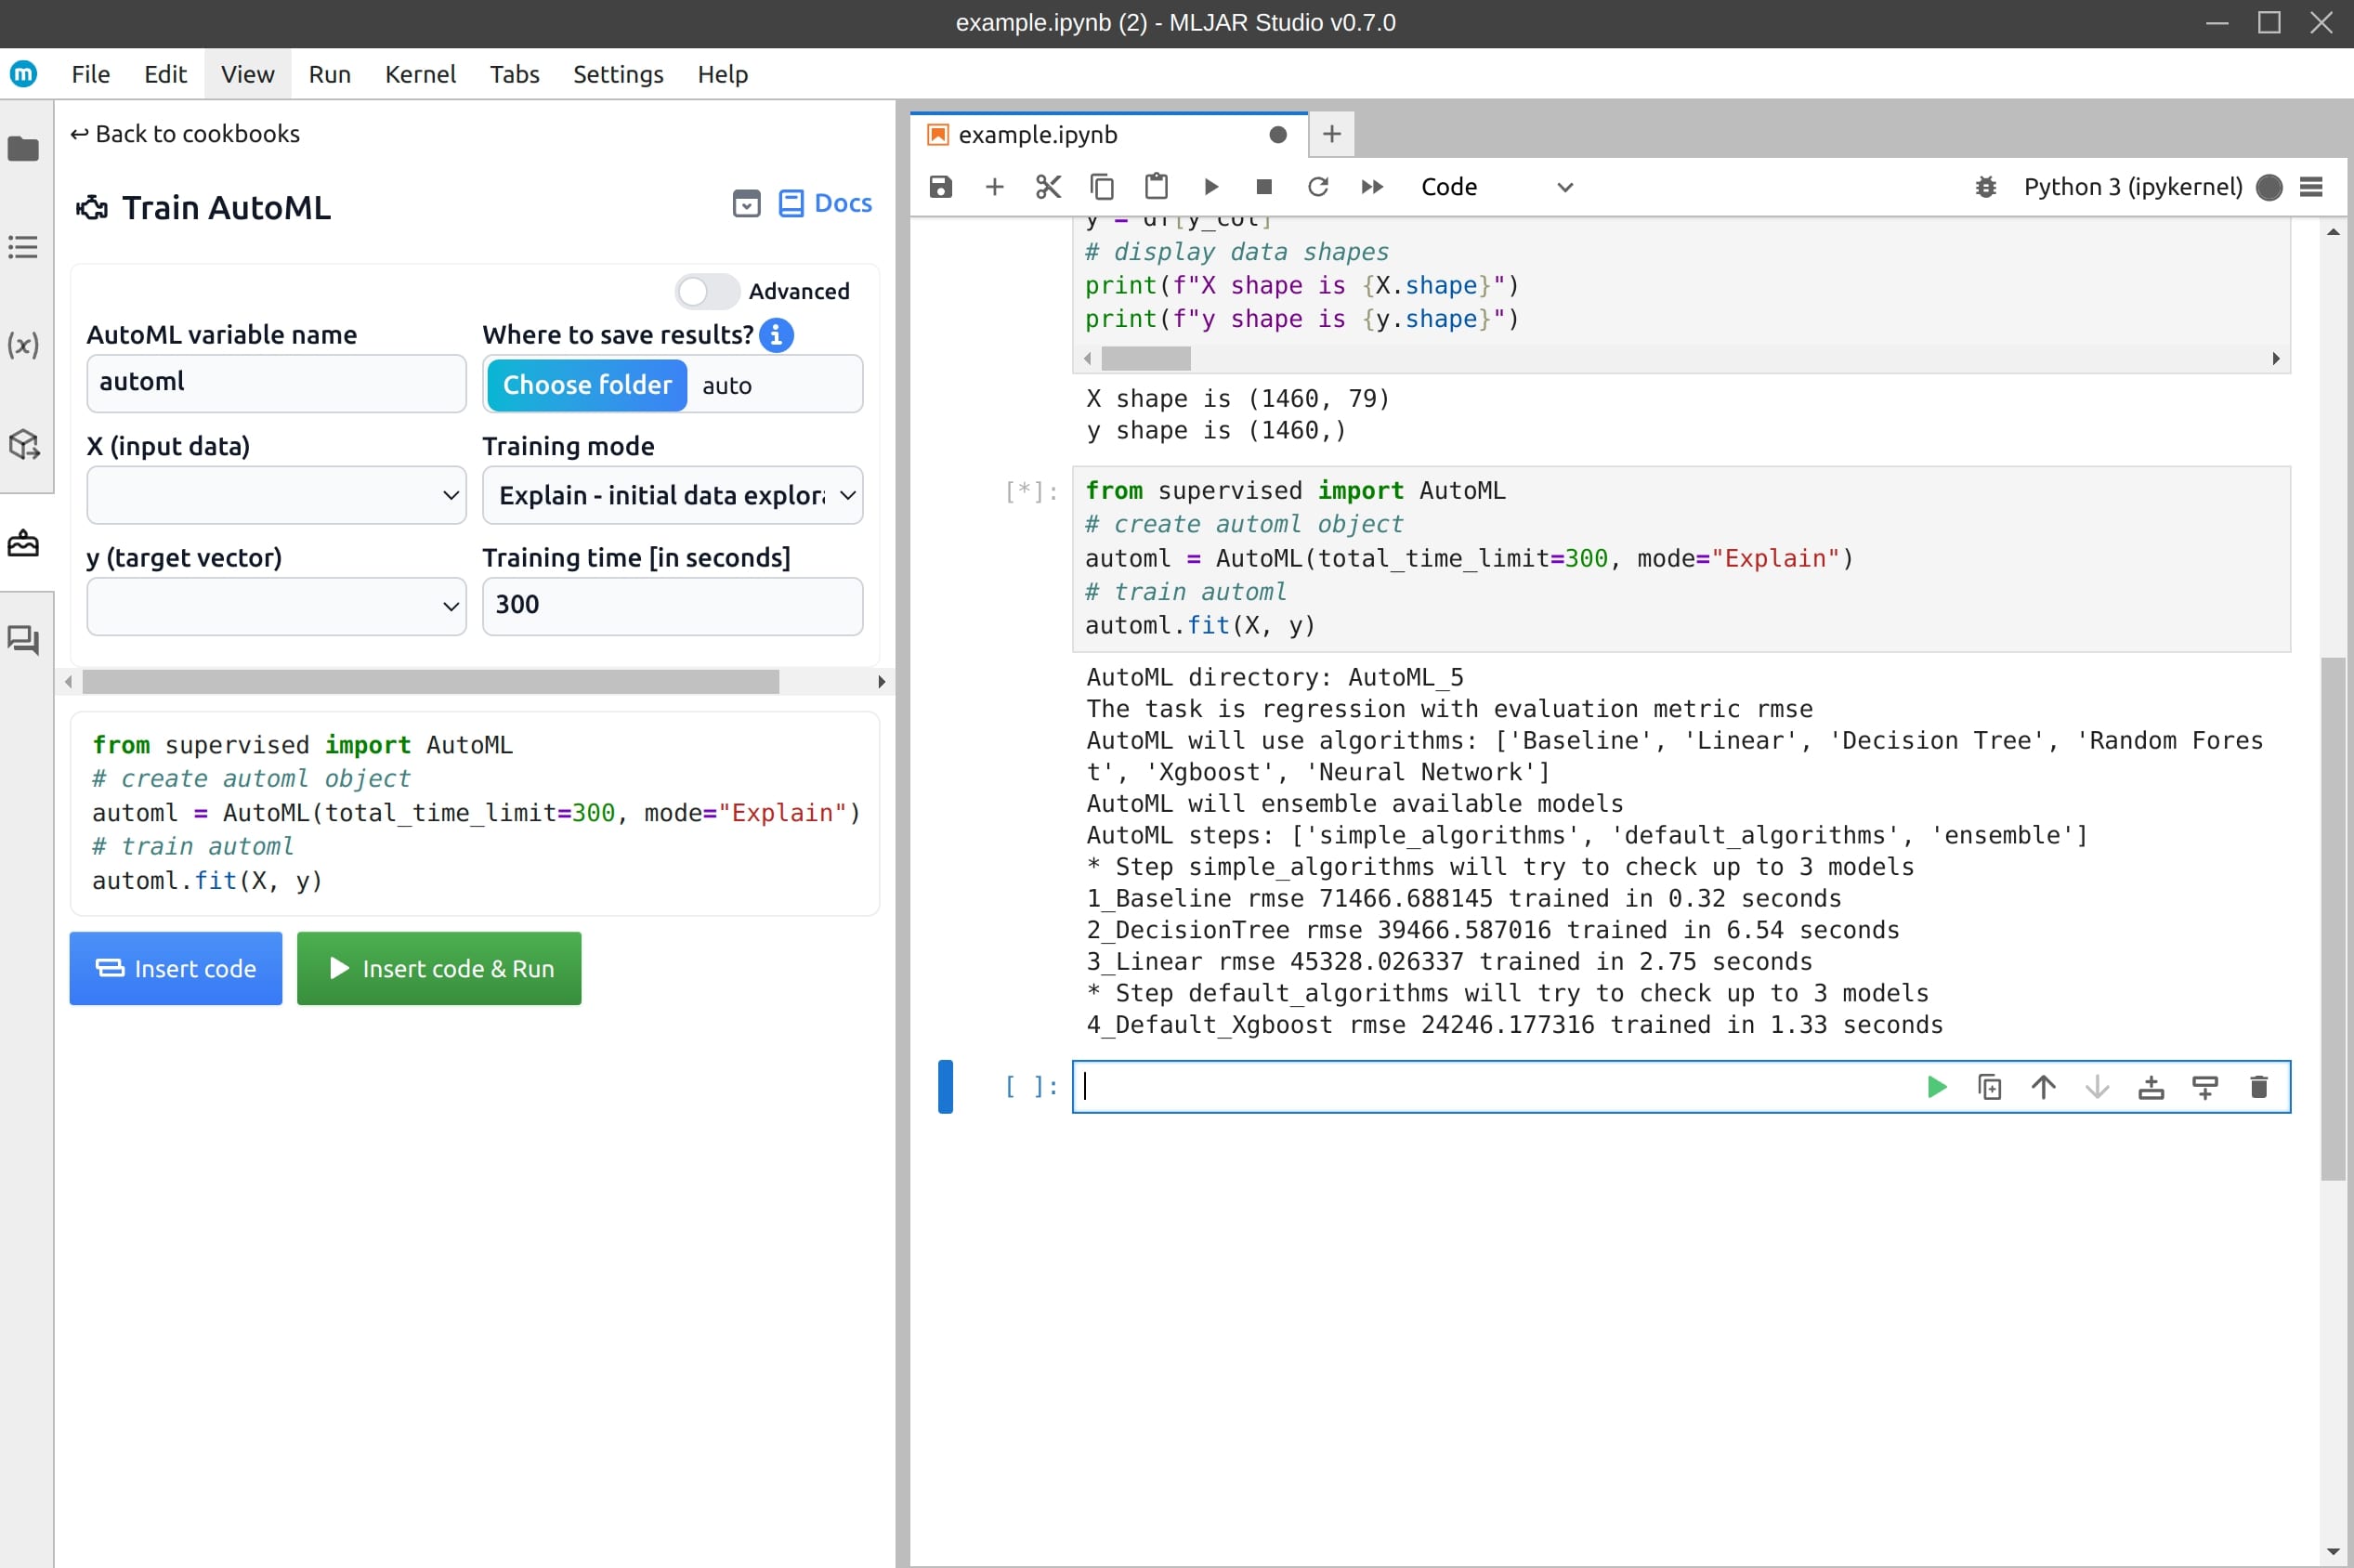
3. Train AutoML
Start the AutoML training process. We will use the default Explain mode.
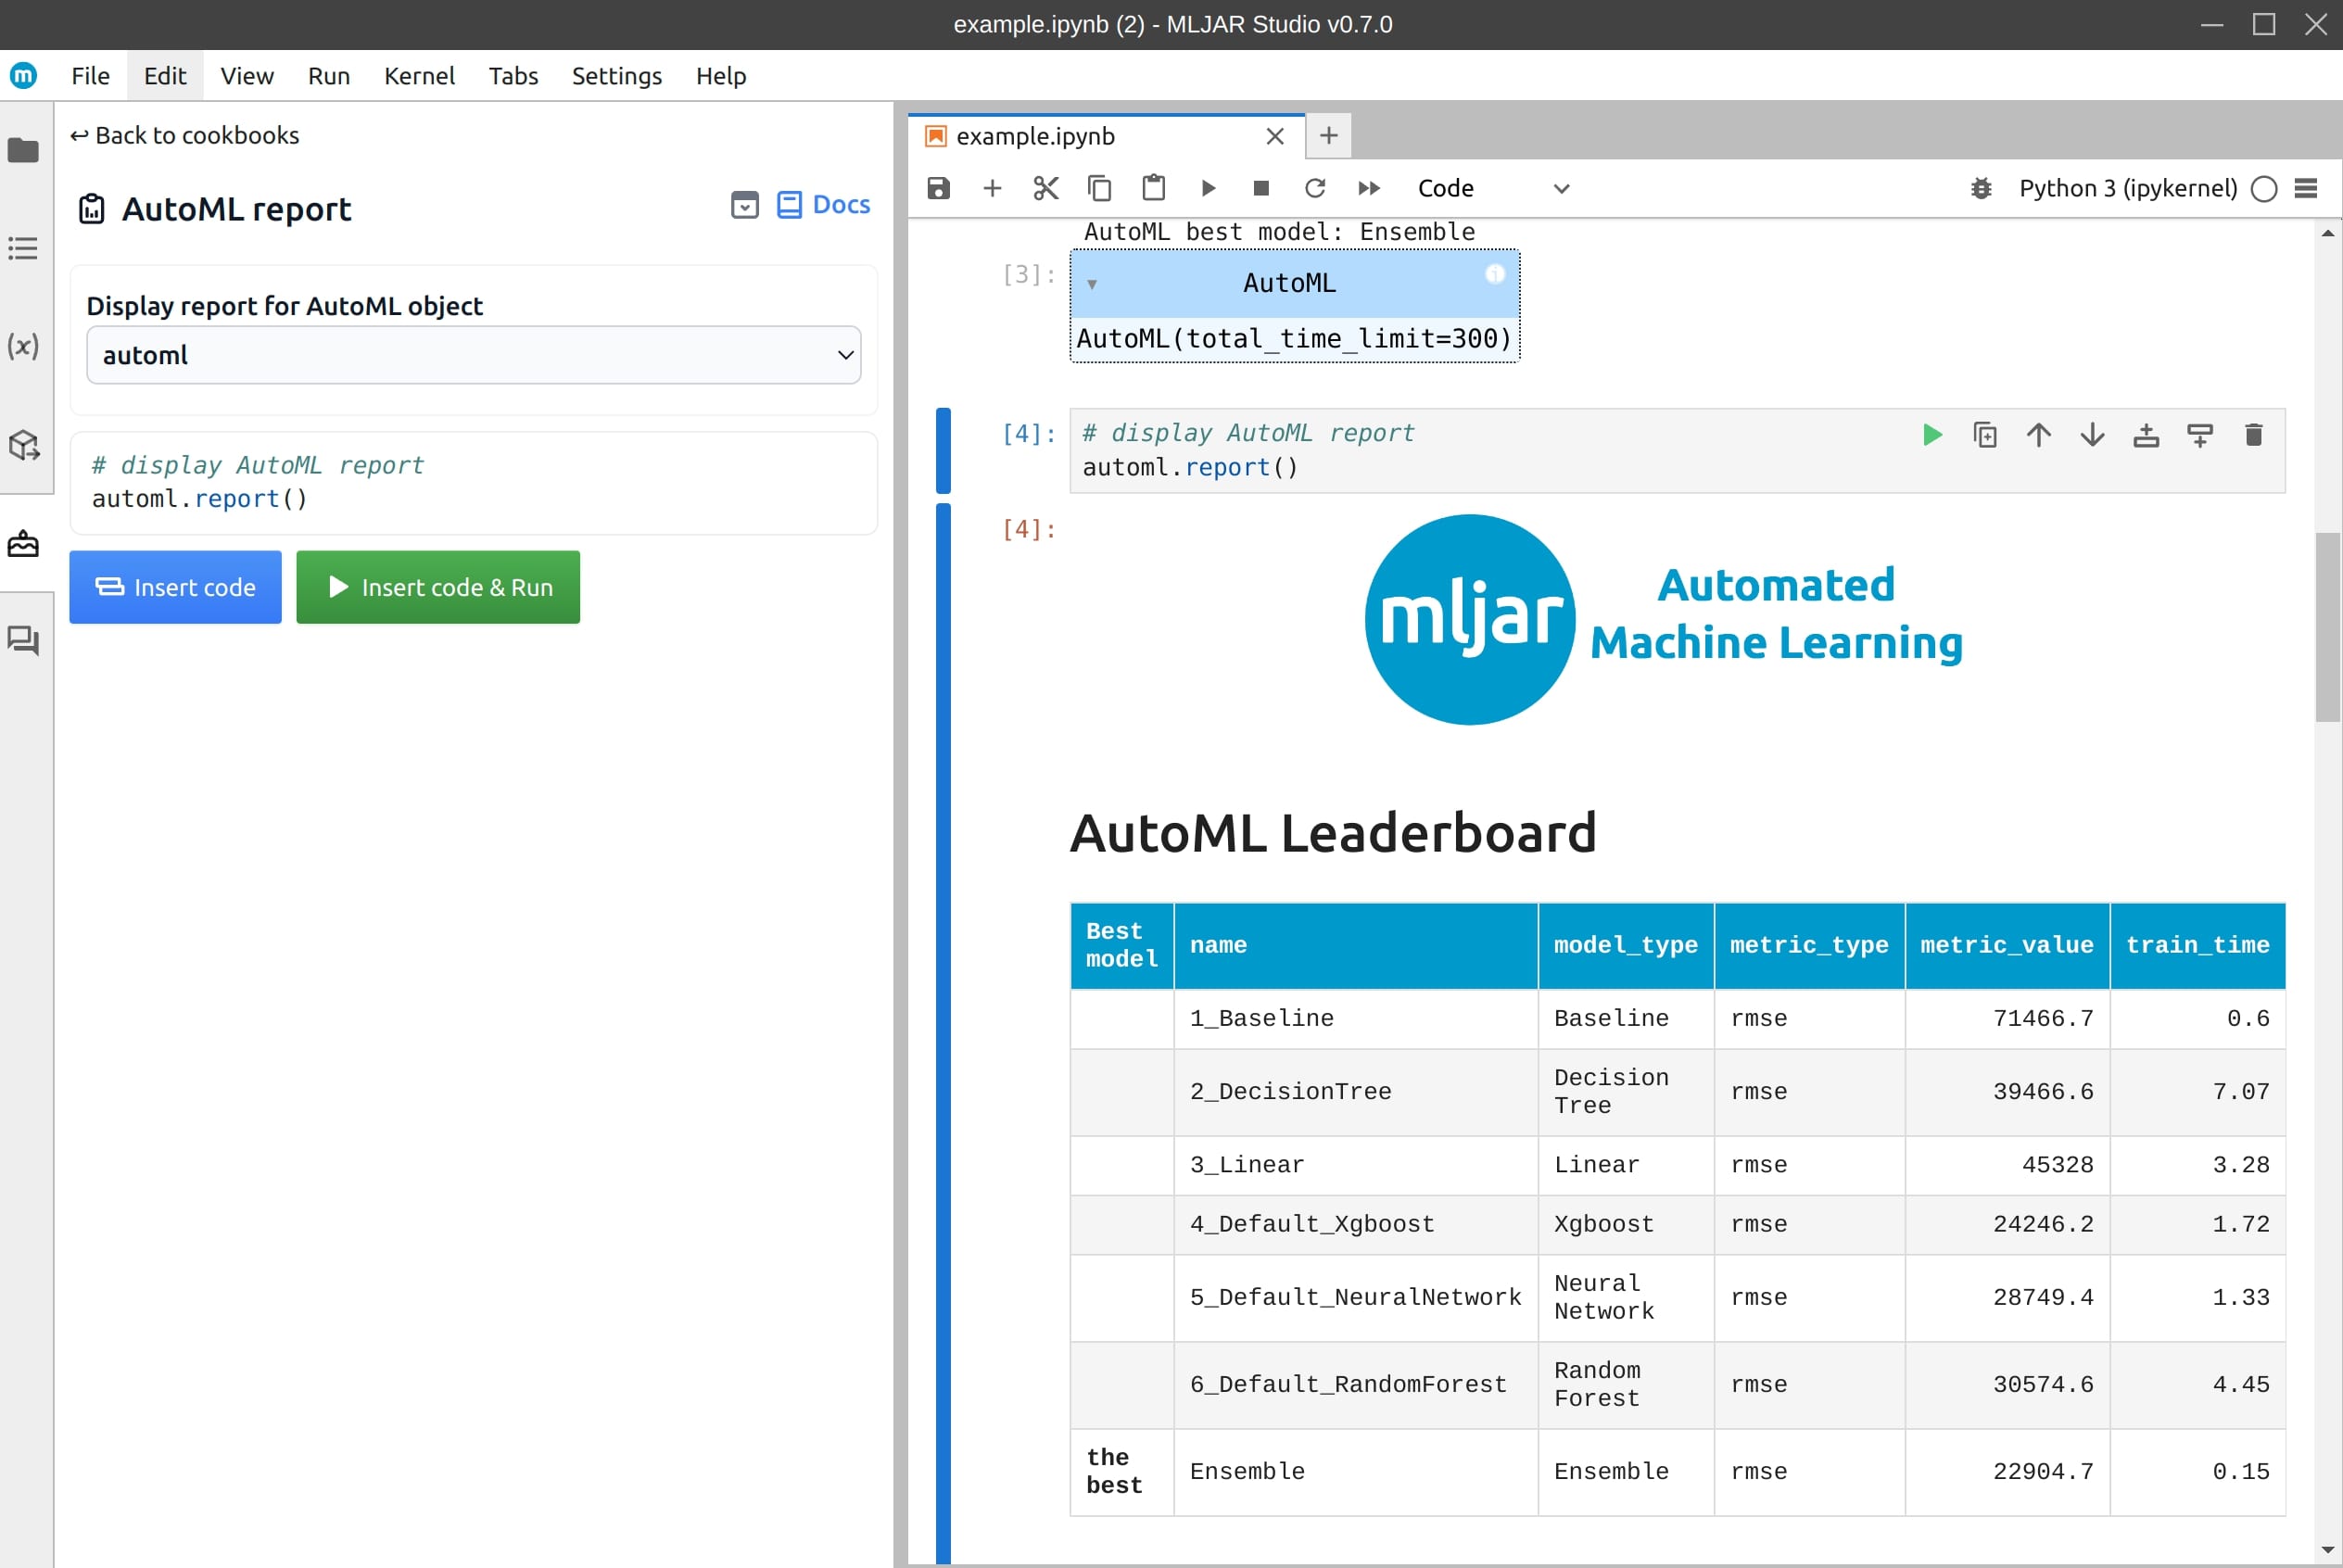
4. Display AutoML report
Once training is done, you can view the AutoML report to see the results. You can click into model in the leaderboard table to see details of each.
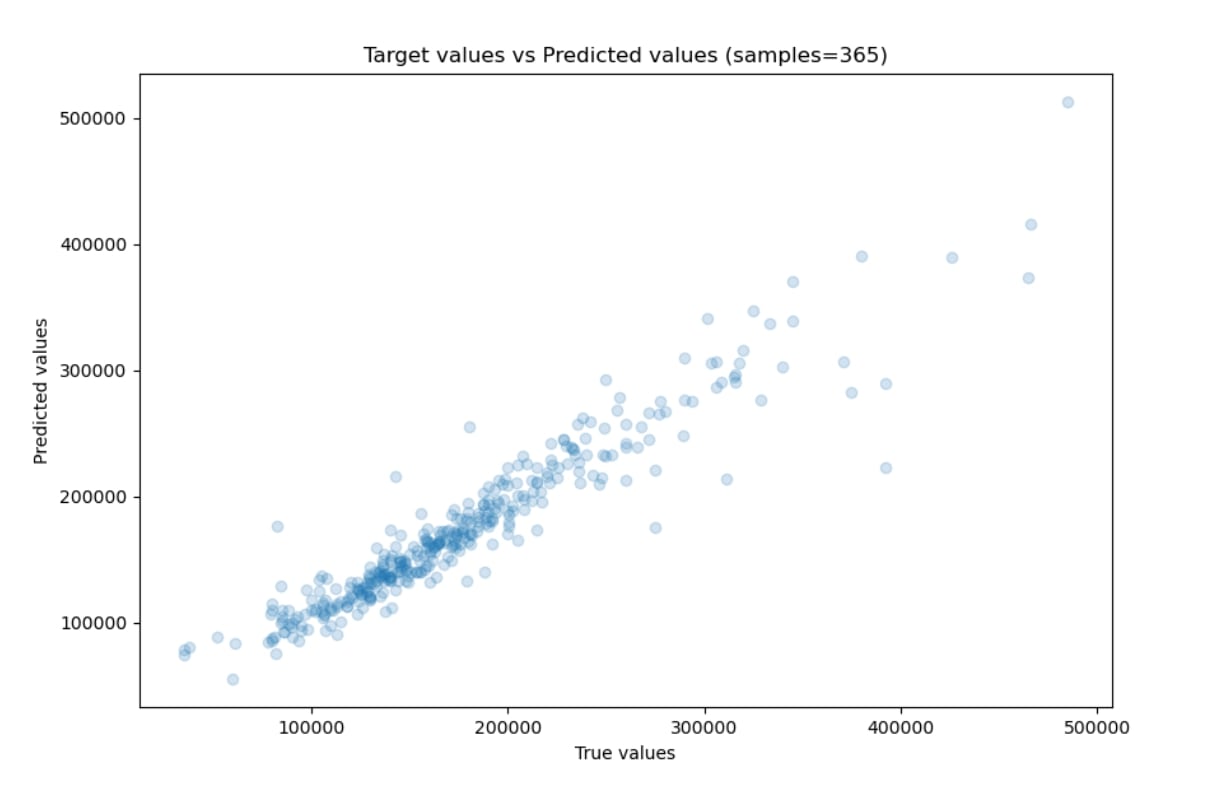
My favorite plot in the report compares the true vs. predicted house prices. This plot was created using the validation dataset, and the results look great! 😊
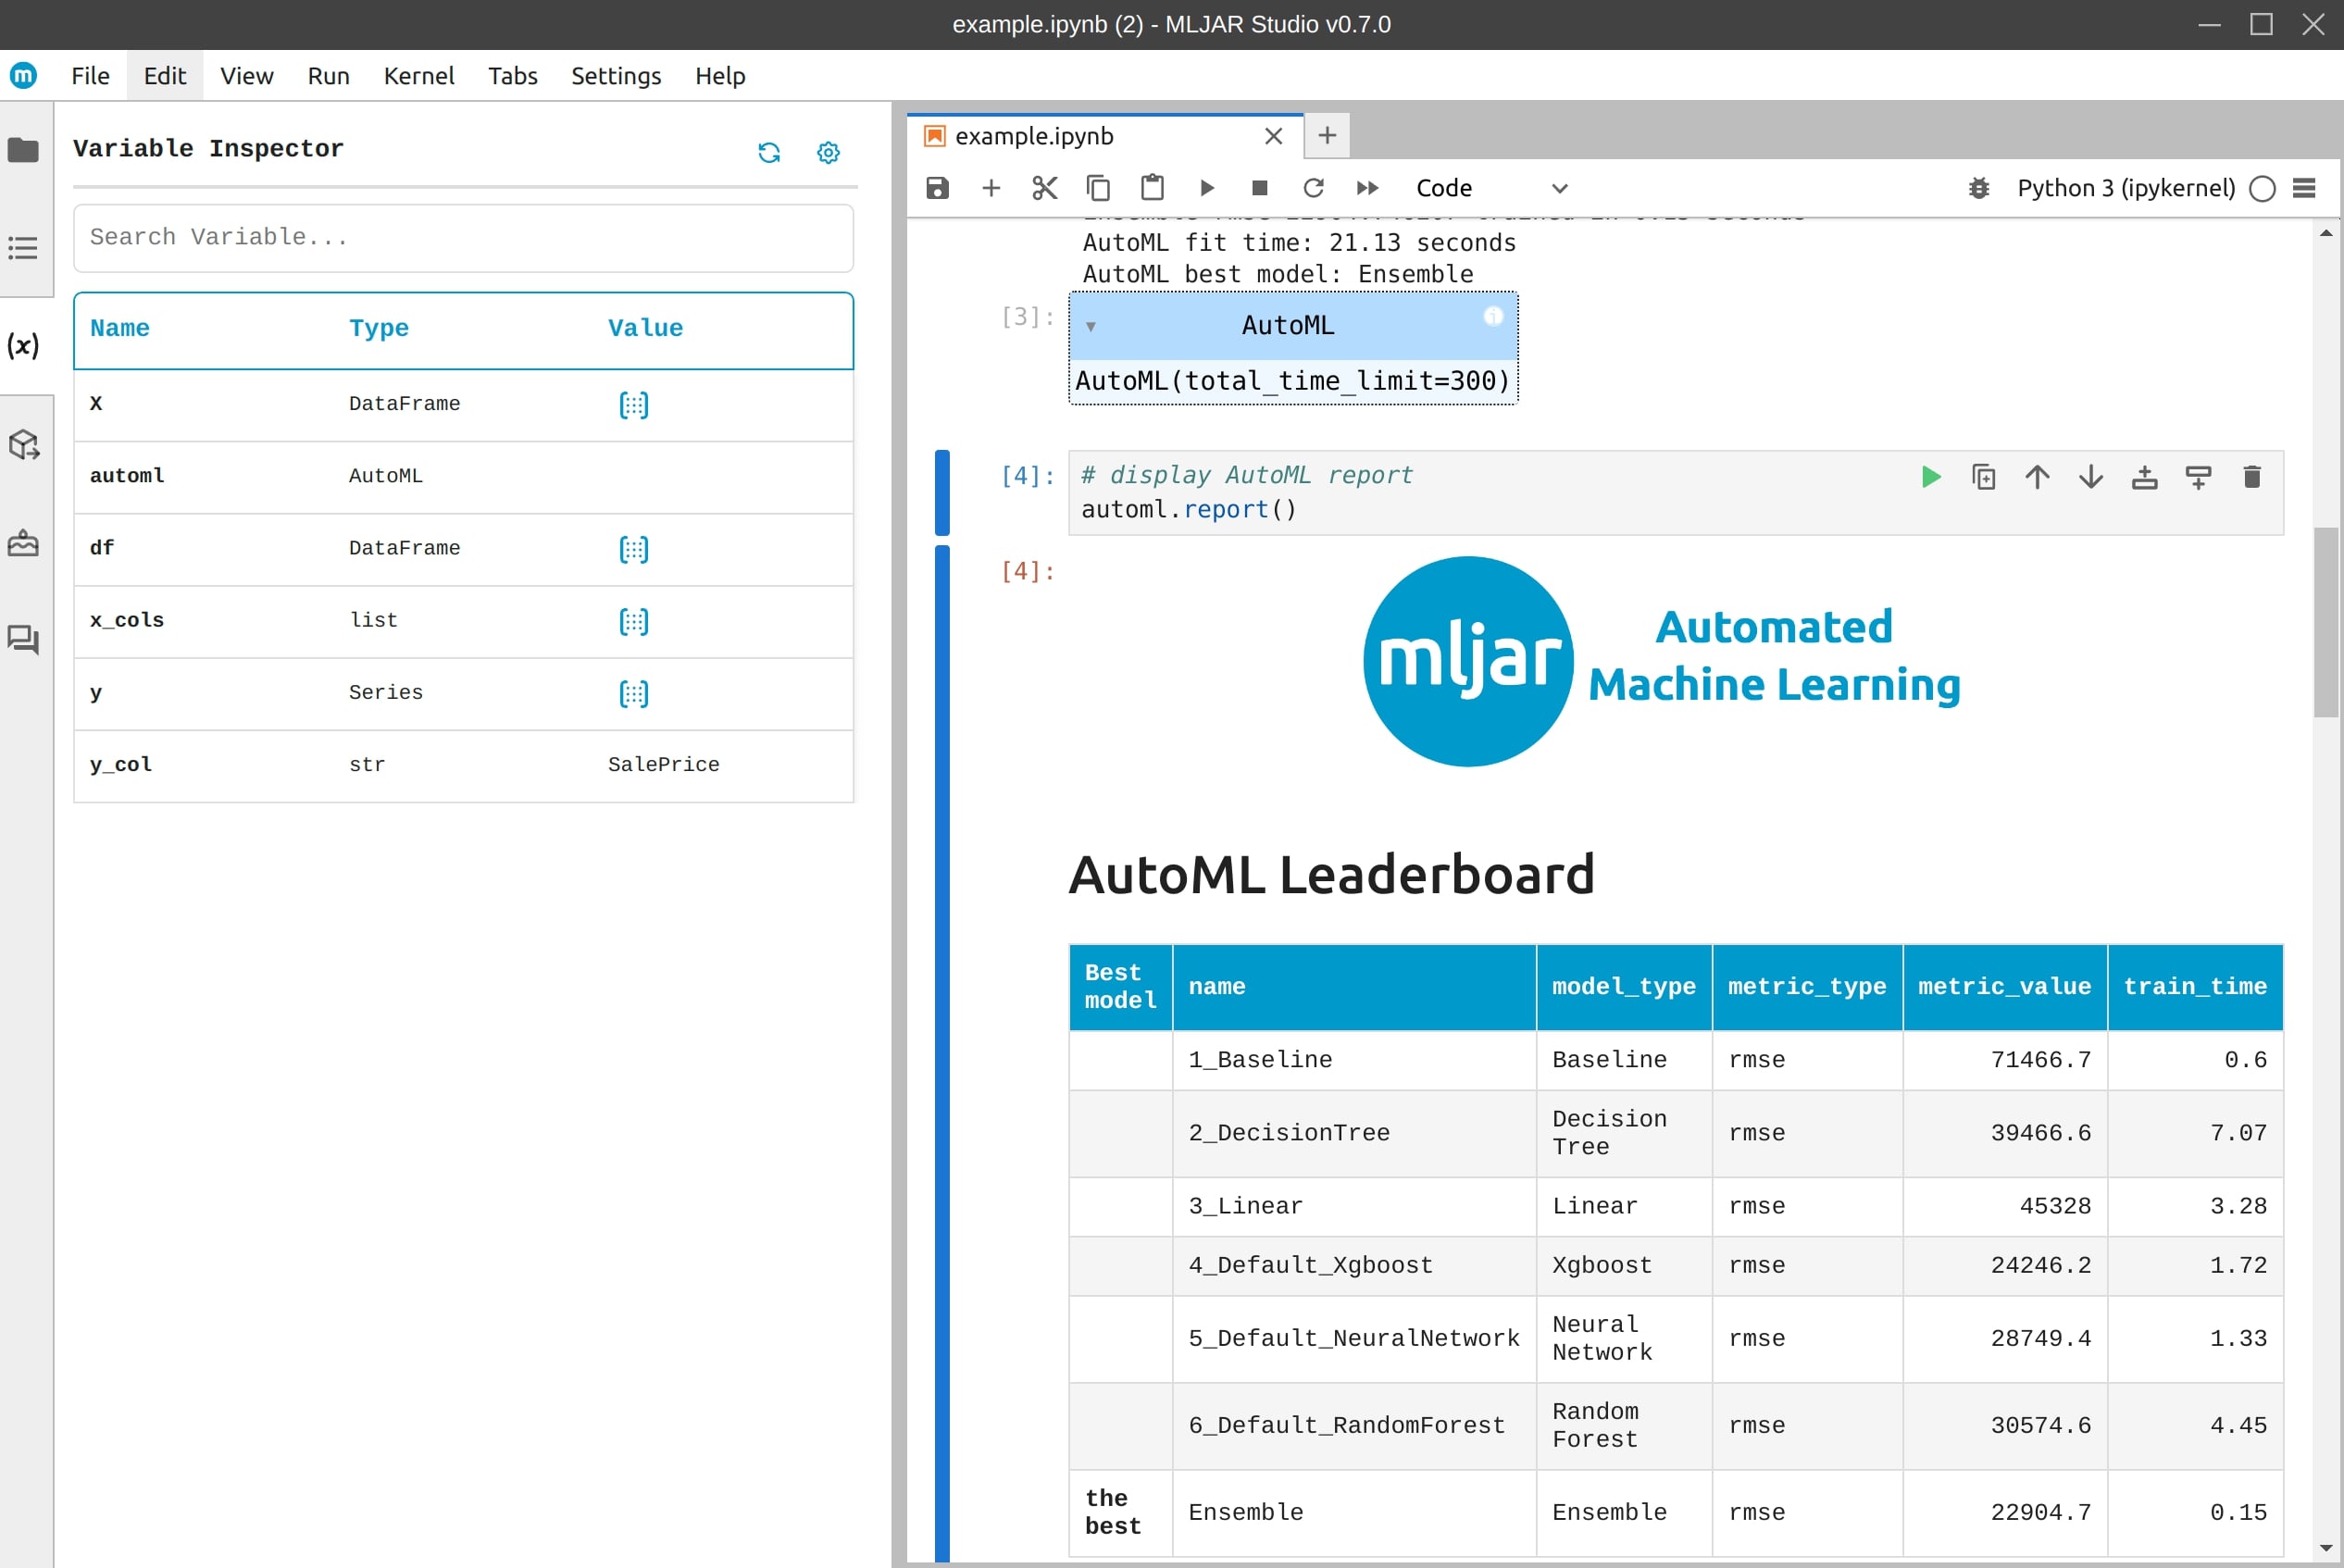
5. Explore variables in Jupyter
In MLJAR Studio, you can inspect the available variables. This makes it easier to understand the code.
Summary
MLJAR offers an open-source AutoML framework that you can use with Python code or a user-friendly graphical interface in MLJAR Studio. It automates the entire machine learning process—from data preprocessing and feature engineering to model selection and hyperparameter tuning. With MLJAR, you can choose different modes for quick analysis, production-ready models, or highly tuned pipelines. The MLJAR Studio app even lets you work with interactive code snippets, making it easier to understand and use.
AI Data Analyst on Your Computer
Use MLJAR Studio to explore data, find insights, and create reports with AI. Everything runs locally, so your data stays with you.
About the Author

Related Articles
- 2 ways to install packages in Jupyter Lab
- 2 ways to delete packages in Jupyter Lab
- 2 ways to list packages in Jupyter Lab
- My top 10 favorite machine learning algorithms
- Jupyter Package Manager
- Variable Inspector for JupyterLab
- Use ChatGPT in Jupyter Notebook for Data Analysis in Python
- ChatGPT for Advanced Data Analysis in Python notebook
- 4 ways for Exploratory Data Analysis in Python
- AutoML Example Projects: A Guide with 10 Popular Datasets